I know 100% whole wheat bread is probably not going to be my most popular post ever. It’s not a new idea, there’s nothing too exciting about it. But considering the health benefits of using 100% whole wheat(freshly ground is best of course!), not to mention the savings of making your own bread – it’s definitely worth the effort. I don’t consider my bread especially amazing, there is always room for improvement, but I have come a long way from wondering whether my bread was going to turn out or not and I’ve learned so many things on the way that I can hopefully pass on in a post like this.
In my latest column I wrote about hard wheat that’s used for making bread. I found I didn’t have nearly the amount of room I needed just for the recipe alone, so in this post I’ve included a short version of this recipe with just a basic description of the steps – for someone who is more experienced at making bread. And I’ve also included a longer version where I describe each step in greater detail with a few pictures included(that you can click to see a bigger version, be sure to click the picture twice to see the large version). Both are the same recipe. I’ve tried to include step-by-step pictures in the more detailed version – without going too Pioneer Woman on you all – to hopefully give you an idea of what most steps should look like. This was fairly difficult as the whole process took nearly all the naturally lightened hours of the day, so please forgive the less than perfect pictures 🙂 Keep in mind that I doubled the recipe and made 4 loaves instead of 2, that’s why it looks like more dough. If you do want to double it, don’t double the yeast unless you want the bread to rise faster. You can increase the yeast to a point – but if your bread rises too fast, it wont have time to develop the flavors and wont taste as good so consider letting it rise as long as you can afford.
This recipe makes 2 loaves. Like with just about any yeast bread, this freezes well. If you end up baking it in the late afternoon or evening I recommend letting it sit out overnight before freezing it, or slicing and then freezing. As soon as the bread is completely cool after baking it you want to wrap it well as it will dry out.
This recipe was originally adapted from Guilty Kitchens Whole Wheat Machine Bread Recipe. If you’d rather use a bread machine check there!
[print_this]100% Whole Wheat Bread Recipe (simplified version)
Makes 2 loaves
- 2 C milk
- 1 1/3 C warm water
- 2 1/4 tsp active dry yeast or one package
- 1/4 C butter, melted and cooled
- 1/4 C honey
- 1 tbsp + 1 tsp salt
- 1 1/5 C add-ins – rolled oats, seeds like sunflower or ground flax, 7 grain cereal, etc
- 1/4 C gluten(optional)
- 7-8 C whole wheat flour from hard wheat(freshly ground if possible)
In a small bowl, add 1/3C water and sprinkle the yeast over top of the water and set aside for 10 minutes. In a large bowl mix the remaining water, milk with whatever add-ins you choose to use and 3-4 C of flour plus the softened yeast. Once mixed, add the gluten flour and mix well, then the cooled butter and honey and salt. Mix well and begin adding flour until the dough cannot be easily mixed with a spoon. Flour your surface and turn out the dough and begin to knead, adding handfuls of flour as needed. Knead for at least 15 minutes even if using a mixer slowly adding less and less flour to prevent sticking. When finished kneading the dough will be lighter in color, springy and smooth. It will still be tacky to the touch – don’t add any more flour.
Add a couple tablespoons of oil to a large bowl. Add the loaf and turn it over to coat the loaf in oil to prevent it from drying out. Cover with a towel and let rise in a warm draft free place until doubled. In a cool kitchen this can take up to 4 hours(you can reduce this time by placing in a warm place or by increasing the amount of yeast slightly). Once doubled, knead well to remove all air bubbles and incorporate the oil on the outside of the dough. Cut in two, form into loaves and place in buttered or greased loaf pans. Cover and let rise again until the loaves are just over the edge of the loaf pans which should take about half the amount of time as the first rise.
Preheat your oven to 400 degrees. Once hot place your loaves in the oven and immediately turn the heat down to 350 degrees. Bake for 55 minutes or until the internal temperature reaches 190-200 degrees. Remove from the pans and place on cooling racks and cool at least 1-2 hours before slicing.[/print_this]
[print_this]
100% Whole Wheat Bread Recipe
Makes 2 loaves
- 2 C milk(room temperature or barely warmed milk, up to 110 degrees)
- 1 1/3 C warm water(110 degrees, as measured with a thermometer, or just barely warm to the touch)
- 2 1/4 tsp active dry yeast or one package
- 1/4 C butter, melted and cooled completely
- 1/4 C honey
- 1 tbsp + 1 tsp salt
- 1 1/5 C add-ins – rolled oats, seeds like sunflower or ground flax, 7 grain cereal, etc(only use fairly quick cooking grains if you use grains – or you can choose to use other flours, like oat flour, spelt flour, etc)
- 1/4 C gluten flour(optional)
- 7-8 C whole wheat flour from hard wheat(freshly ground if possible)
In a small bowl, add 1/3C barely warm to the touch water(too hot will kill your yeast!) and sprinkle the yeast over top of the water and set aside for 10 minutes. Your yeast should visibly get softer and then start to puff up. How long this takes will depend on how warm it is. In a large bowl mix the remaining water, milk with whatever add-ins you choose to use and 3-4 C of flour plus the softened yeast.
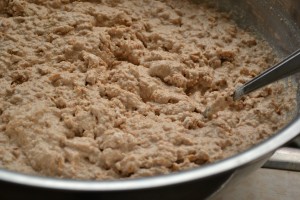
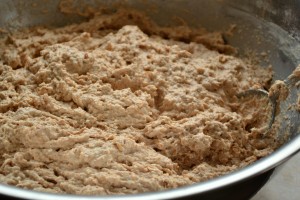
Once mixed, add the gluten flour if using(*this is optional – it will make the bread stronger and less crumbly. I find I can slice much thinner slices that stay together when I use gluten flour – it’s not necessary for a good loaf though). If not using be sure to knead especially well to activate the gluten that is already in the flour to prevent a crumbly loaf. The gluten flour will also absorb more water, so you will need more slightly flour if not using gluten flour) Mix very well, even after it’s fully incorporated, continue to stir in the same direction for a couple minutes. This will help the gluten begin to form. If you look carefully as you’re stirring you’ll be able to see small “strands” of gluten starting to appear at the edge of the bowl and it will begin to look less and less like a quick bread.
Add the cooled butter and honey along with the salt and another cup of flour. Again, mix well with a large spoon. Slowly add more flour until the dough cannot easily be mixed with a spoon. Flour your hands and sprinkle the dough very well with flour and begin to knead(I find this easiest in a lightweight bowl that can spin around as I knead. You can also flour your counter well and place the dough on your counter to knead it at this point if you want).
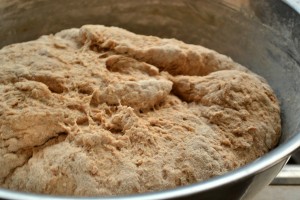
The dough will stick to your fingers at first, but continue to knead adding a handful of flour at a time. Slowly as the dough becomes less sticky and more firm start only adding a small amount of flour at a time, just to prevent it from sticking – be careful not to add too much flour. Kneading in total should take at least 15 minutes, even if using a mixer. The dough should be lighter in color than when you first started, springy, and the surface on the bottom of the dough should be smooth except for any add-ins(seeds, rolled grains, etc) sticking out.
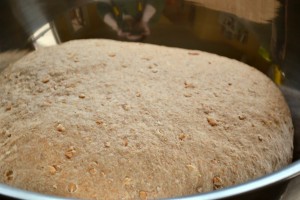
In a large bowl, pour a tablespoon or two of oil and place the dough into the bowl and flip the dough over to coat all surfaces of the dough. Cover with a towel and set in a warm, draft free place. Let rise until doubled, in a cool kitchen this can take up to 4 hours or sometimes longer. Be patient, if you know your yeast is active and your water and milk were not too warm then just wait until your bread rises. It may take less or more than 4 hours depending a lot of different factors. You can reduce this time by making sure the dough is in a warm place(but not too warm) or by increasing the yeast slightly. The first rise is especially important because this will strengthen the gluten, allowing your bread to rise well the next time and hold it’s shape when being baked. Be sure to let your bread rise to it’s maximum during the first rise, but no more.
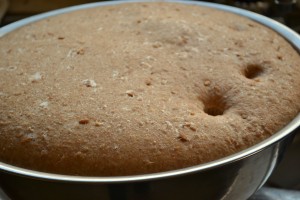
To test whether your bread has risen enough you can do the poke test by poking your finger into the dough about an inch and quickly removing it. With white bread, dough that has not risen enough will spring back and fill the hole. Whole wheat bread dough is not as easy to tell. You may poke the dough and the hole does not fill in, but the dough still feels firm and dense. When you poke it, it should feel light and airy and if you break the surface you’ll be able to see the little gluten strands inside all filled with air. This will take some practice to know what it feels like when it’s done rising. Notice in the previous picture how small the dough is, and in the picture below that it’s above the rim of my bowl. It will grow a lot!
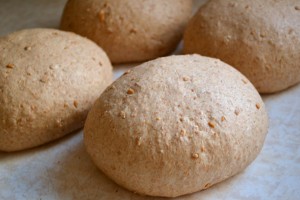
Once the dough has doubled in size, remove from the bowl and knead well to remove any air bubbles and incorporate any oil that’s on the outside of the dough. Cut the dough in half(or in my case 4 because I doubled the recipe) and knead into a round ball.
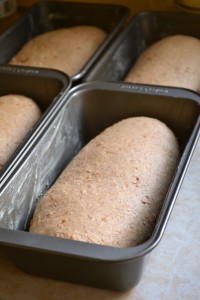
Let rest for 5 minutes and then shape each loaf and place in buttered or greased loaf pans. I simply shape my loaves by kneading one side over and over in the same place and then flipping to the other side and kneading until it forms a loaf shape, being careful that the middle is not significantly thicker than the edges. You can also press the dough out and then roll it up, pinching the seam to get it to stick together. Either way is fine.
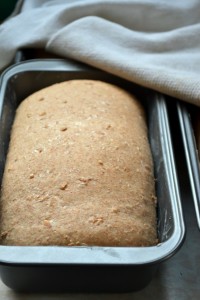
Cover with a towel and let rise until just over the top of the edge of the loaf pans. Don’t let your bread rise too long. I’ve found that bread that’s allowed to rise just long enough will still spring up in the oven. If your bread is left too long, it may rise more outside of the oven, but not grow at all once inside the oven.
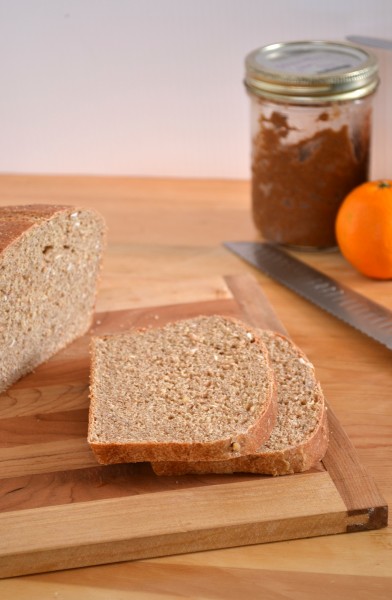
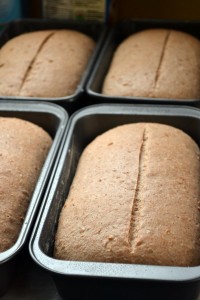
Preheat your oven to 400 degrees. If desired you can place a pan of water in the bottom of the oven to create some steam inside your oven, which will result in a nicer crust and may help the bread to rise. I put one oven rack in the very bottom of the oven with a pan of water and then the next rack just above the first one, still in the bottom half of the oven. Once the oven is hot, slash your loaves only about 1/4″ deep if desired using a very sharp knife(a serrated bread knife works best for me) and a quick slashing motion and place the loaves inside the oven. Immediately turn the oven down to 350 degrees and bake the loaves for 55 minutes or until 190-200 degrees internal temperature if you have a thermometer to measure. Turn your loaves around half way through to ensure even browning, and consider covering the loaves with tin foil about 3/4 of the way through baking to prevent them from getting too dark. Turn out the loaves and cool on a cooling rack and cool at least 1-2 hours before slicing.
Let the bread rest overnight or for at least a couple more hours before freezing whole, or slicing and freezing in a sealed bag.[/print_this]
If you have any questions about making whole grain bread or even whole grain flours please leave a comment or send an email to fooddoodles at gmail dot com. I’m by no means an expert, but would love to help if I can!


Comments & Reviews
Susan says
I have baked my own bread for many years. These days (or the last time I baked bread – I now much prefer tortillas), I use the King Arthur Flour 100% Whole Wheat Bread recipe. I would also try yours, as I like the idea of add=ins. The most interesting part for me, though, is putting the oil in the bowl in a quantity larger than I would have expected, for the purpose of greasing the dough. If I ever bake bread again (read: if I ever manage to move beyond tortillas), I will try that. I’m definitely saving this recipe.
Charlotte Moore says
I clicked on the Whole Wheat Machine Bread site. How amazing to realize this is the same recipe I have been using for a good while. Love this bread!!!! I have a double recipe going now.
Zara says
I tried this today, and it was delicious! Thanks for the recipe!
Becky @ TOHG says
Ah ha! I found your detailed bread recipe! I’m doing a little reading about bread making before attempting again. Thanks for directing me here! Love the details and pictures!
Alicia @ Bakeaholic says
I’m definitely going to have to try making whole wheat bread! I’ve never made bread before, and my boyfriend keeps asking for it!
Curlsz says
I keep fresh wheat bread in the house every week, I have bought bread in the store in forever – some variations I do is – add oat bran, wheat bran, cracked wheat and sometimes I put in carrot pulp from when I juice – it’s awesome!
Kat says
I switched my family to almost everything whole wheat in the last year. It really makes a difference! I think we’ve been sick less, look better and feel healthier. With a new baby I’m excited to teach her to eat healthy from the get-go.
brighteyedbaker says
This bread looks really good and hearty! I also took a look at your no-bake granola bars and mocha oatmeal. Both are on my to-make list now. I’ll be back to see more soon!
Allison says
Wow, I haven’t made homemade bread in a long time. You have inspired me. The loaves look great and I love that the recipe makes 4. Thanks for sharing.
Mellissa @ ibreatheimhungry says
Heidi I love all the photos – its the perfect tutorial for baking bread! This does look excellent for sandwiches and I’m going to try it! I have made some great breads from the healthy artisan bread in five minutes a day cookbook which is great but none of them have really been soft enough for my picky four year old to have his favorite almond butter and homemade strawberry preserves sandwich on. Maybe this bread will be the one that meets his stringent (read: picky!) requirements! Thanks for sharing!
Scott at Real Epicurean says
I love making my own bread on a Sunday and this looks like a perfect recipe.
Lyn @LovelyPantry says
Well, I’ve wanting to try this for so long… you’ve made it so simple. Now is the time to try. This was an awesome post – thank you! Bread is so awesome 🙂
kyleen says
Your loaf is so round on top! I’ve made whole wheat bread once before, but the loaf came out wonky so I made rolls with the other half of the recipe. I love the step by step photos; I’m always too lazy to pull my camera out for those shots.
Brandon says
Your bread looks delicious! I love that you share so many images in your post, thank you for sharing!
Brandon
Jill | Dulce Dough says
Your bread looks perfect! One of my goals this year is to make more of my own bread. I am going to give this recipe a try!
Sonia The Healthy Foodie says
What are you talking about? This is a GRAND post! Brilliant! And that recipe looks super good. I love making bread at home and haven’t been doing that in way too long. I think I’m gonna have to give your recipe a try, perhaps I’ll even do that this week-end.
And seriously, talk about taking us by the hand, here. Your step by step instructions are plain incredible.
I repeat, this is a GRAND post! Worthy of framing! 😉 Good job, Heidi!
StoriesAndSweetPotatoes says
Hey making bread is awesome and no simple task so it may be more popular than you think. This is a REALLY good explanation of it so thanks!
Erin @ Texanerin Baking says
Hey now! Why wouldn’t 100% whole wheat bread be popular? Okay, it’s not super duper exciting, but it’s bread. And people should be eating 100% whole grain bread every day. You’ve just provided us with a recipe, with awesomely clear directions, that should be a staple for us all. 🙂
Anyway, your bread looks super. I used to make German vollkornbrot every few days but then I got lazy and just went back to picking it up from the store. Sourdough is kind of a pain. This looks way less maintenance, which is a definite plus!
The Elegant Eggplant says
Ive never even thought to make my own sandwich bread before!!! Yours looks uber perfect 🙂
Nora @ Natural noshing says
Gorgeous bread! Oh how I wish I could eat wheat 🙁 I can still look in amazement though, I love how hearty the loafs look. There’s nothing like homemade bread – especially when you can make large batches and freeze it for quick serving!
Kelly says
Mmm there is NOTHING better than making homemade bread , this looks so delicious! So glad I came across your blog, new follower! xoxo
Alexis @ There She Goes says
wow – you made bread! i think this has inspired me to consider doing this in the future- im too scared still!
Heidi @ Food Doodles says
I don’t blame you! It’s very intimidating!
Annie @ Naturally Sweet Recipes says
I love homemade wheat bread! Looks like a delicious recipe! I’m glad I found your blog. 🙂
Paula says
I love wholemeal bread, especially toasted with butter and jam or honey. Yummy!
Kathryn says
Wow, your bread looks perfect! Thank you for the step by step guide as well, I really want to get into making my own bread and this will be so helpful!
Nami | Just One Cookbook says
What a beautiful whole wheat bread. I have to admit that I don’t usually buy whole wheat bread as a choice of sandwich bread….I didn’t grow up with it so it’s just something new to me. But now that I have two kids, I always think about making them used to eat healthy food. This looks like a great recipe. I’d love to try this.
Lachelle says
I have been making whole wheat bread for many, many years now and I don’t think it ever makes it 1-2 hours after coming out of the oven before we slice into it. I love fresh, warm home made bread! My recipe uses applesauce (and some oil) and it comes out so moist. It is my Grandma’s recipe and I love it!
Heidi @ Food Doodles says
That sounds great! I know what you mean, the smell of bread baking is amazing, it’s so hard to resist!
Emily @LivingLongfellow says
I might attempt this on Sunday. The last few times I’ve tried to bake bread (minus beer bread), it’s turned out really dry. This looks excellent. Thanks!
Heidi @ Food Doodles says
I know what you mean! Just be sure not too add too much flour, that will make it dry. The dough will still be sticky when you’re done kneading. I hope it goes well! 😀
Nicole, RD says
I love sandwich bread and therefore love this post 🙂 Your loaves look incredible! I will definitely, definitely be making some myself 🙂
Eat Good 4 Life says
Wow, the bread looks really good. The pictures are awesome. I have actually never made 100% whole wheat bread believe it or not so maybe now I will 🙂
jeralyn says
I make 5 loaves of whole wheat bread every Monday…I’ve been looking to change things up…can’t wait to try this recipe!
Maryea @ Happy Healthy Mama says
That should say “so I am” not “some”. Autocorrect. 🙂
Maryea @ Happy Healthy Mama says
I have been on the lookout for a whole grain bread recipe. I’m so intimidated, but determined to stop buying store bought sandwhich bread. I do have a question-Luke seems to have a dairy sensitivity some am avoiding it right now. Would non-dairy milk and butter work in this recipe? If the answer is yes I may give this a try tomorrow!
Heidi @ Food Doodles says
Absolutely! You could even use oil if you want in place of the butter. And any kind of milk or even more water would work – the bread might not be as soft because dairy milk is richer which makes it softer, but I don’t really think it’ll make that big of a difference really, it should work just fine 🙂