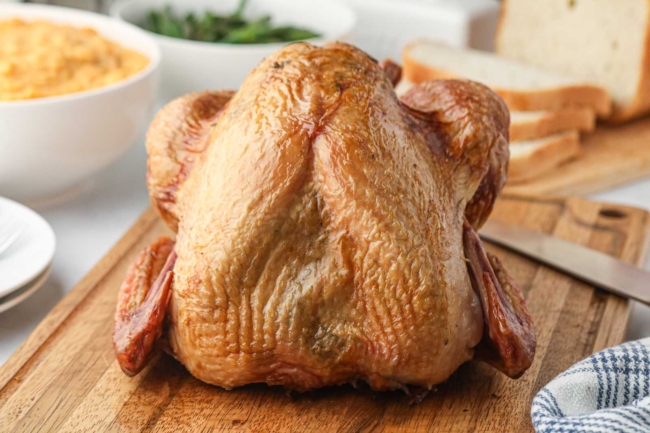
This Traeger smoked turkey is everything you want for your next holiday meal or weekend gathering. Smoking a whole turkey on your pellet grill adds amazing flavor and juiciness. Whether you’re cooking a smoked turkey for Thanksgiving or just want a new spin on turkey dinner, this method is a game-changer. Best of all, the process is simple – no fancy chef skills are required. It’s naturally gluten-free and keto and easy to make paleo and dairy-free.
If you’ve ever been intimidated by cooking turkey, you’re in the right place. That was me a few years ago.
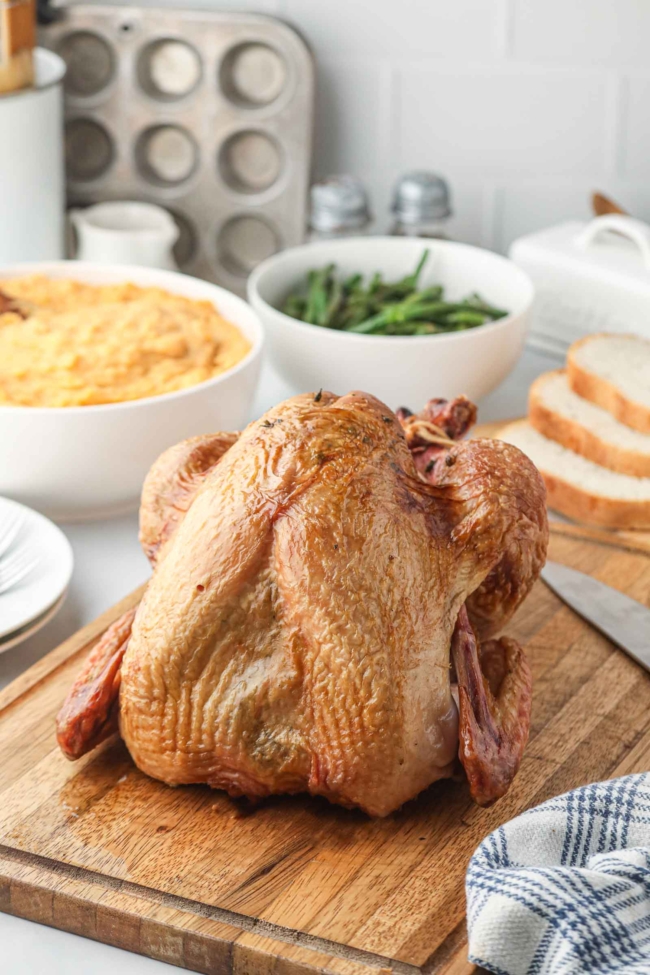
When I first started experimenting with smoking turkey, I had a few missteps. My first attempt? Dry – like desert dry. Then I tried brining, figuring, “How hard could it be?”
It’s straightforward, and the results are consistently juicy and flavorful.
Ingredients
Here’s an overview of what you’ll need to make a Traeger smoked turkey.
For the brine
- Vegetable broth – adds flavor and moisture to the brine. Feel free to use turkey broth if you have it!
- Kosher salt – essential for tenderizing the meat and locking in moisture. Some table salts contain additives like anti-caking agents or iodine, which can affect the flavor. If using table salt, you’ll want to use a pure, non-iodized table salt for the best results.
- Fresh rosemary, thyme and sage – to infuse the turkey with flavor.
- Ice water – cools the brine down quickly and ensures the turkey doesn’t cook in the brine.
For the turkey
- Whole turkey – choose a 12 to 16-lb turkey; one that hasn’t been salted, pre-brined, injected, basted or enhanced. If you buy a frozen turkey, you must thaw it before smoking. I wrote about that below.
- Unsalted butter – adds richness and helps the skin crisp up. You can use olive or avocado oil for paleo/dairy-free.
- Fresh rosemary, thyme and sage – complements the brine and infuses the turkey.
- Garlic – brings a savory, aromatic depth.
- Lemon zest – brightens up the flavor of the herb butter.
- Kosher salt and black pepper
Please note that full instructions and measurements are listed in the recipe box at the bottom of the page. And that the ingredients aren’t to scale.
Can I use spices instead of herbs?
For Thanksgiving, it seems most people prefer using fresh herbs like rosemary, thyme, and sage. So that’s what I went with for this turkey on the Traeger.
The flavors pair well with classic dishes like this Baked Butternut Squash with Garlic and this Rainbow Carrots Recipe.
If you prefer using spices (like me!), this Smoked Turkey Breast recipe uses paprika, garlic powder and a touch of cayenne pepper for a spicy twist. If you’re serving a smaller crowd and don’t need a whole turkey, it’s the perfect recipe.
But you can use the same spice rub on this turkey and then omit the herbs.
Salt conversion
Some types of salt are coarse, others are fine. To keep things simple and accurate, it’s best to weigh them.
For the brine, you need 250 grams of salt. This means using one of these:
- 1 cup Morton Kosher Salt
- 1 3/4 cups Diamond Crystal Kosher Salt
- 3/4 cup table salt
Why bother with brining?
Brining a turkey can make a significant difference in the final result, but whether it’s “worth it” depends on your priorities and preferences. Here’s a breakdown of the pros and cons to help you decide:
Pros
- Juicier meat – brining infuses the turkey with moisture and salt, helping the meat stay juicy and flavorful even if it’s slightly overcooked. This is particularly important for lean cuts like the breast. Smoking at low temperatures can dry out the bird, making brining more worthwhile. And if you’re cooking a heritage or organic turkey, which tends to be leaner, brining is especially helpful to retain moisture.
- Enhanced flavor – a brine allows herbs, spices, and other flavorings to penetrate beyond the surface of the meat, delivering a more evenly seasoned turkey.
- Improved Texture:
The salt in a brine breaks down muscle proteins, tenderizing the meat and giving it a more tender bite.
Cons
It’s time-consuming, requires a lot of space in the fridge, messy and just plain annoying!
But – you’re going to spend all that money on the turkey and then spend all those hours waiting for it to smoke. It’s definitely worth the hassle, in my opinion.
If you want, you can buy a turkey that’s been labeled “enhanced” or “self-basting,” as they’re often pre-brined or injected with a salt solution, reducing the need for additional brining.
How big of a turkey do I need?
This recipe is for a 12 to 16-lb turkey.
You generally want to plan for 1.25 pounds (566 grams) of turkey per person.
If you want plenty of leftovers for sandwiches and other dishes like this Instant Pot Turkey Soup with Noodles, consider increasing the weight per person to 1.5 to 2 pounds.
Here’s a quick guide:
- 4 – 6 guests → 6 to 8 lbs.
- 7 – 9 guests → 9 to 12 lbs.
- 10 – 12 guests → 12 to 15 lbs.
- 13 – 16 guests → 16 to 18 lbs.
- 17 – 20 guests → 20 to 24 lbs.
If you use more than 16 lbs. turkey, adjust the measurements and cook time to accommodate the larger size.
How to thaw a turkey
Properly thawing your turkey is a crucial first step to ensure it cooks evenly and safely. Here’s a guide to help you thaw your turkey.
Thawing in the fridge
Thawing your turkey in the refrigerator is the safest and easiest method. Plan ahead, as this method requires quite a bit of time. Place your turkey in a pan or tray to catch drips. Here’s a general guideline for thawing times.
- 4 lbs. – 1 day
- 8 lbs. – 2 days
- 12 lbs. – 3 days
- 16 lbs. – 4 days
- 20 lbs. – 5 days
- 24 lbs. – 6 days
Once thawed, the turkey can remain in the refrigerator for 1-2 days before cooking.
Thawing in cold water
If you’re short on time, the cold-water method is a faster option. Place your turkey in its original packaging or a sealed bag to prevent water from entering. Submerge it completely in cold water, changing the water every 30 minutes to maintain a safe temperature. Allow about 30 minutes per pound of turkey.
For example:
- 12 lbs. – 6 hours
- 16 lbs. – 8 hours
Cook the turkey immediately after thawing using this method. That means you’ll have to skip the brine.
Things to Avoid
- Never thaw a turkey at room temperature or in warm water, as this can promote bacterial growth.
- Avoid starting the smoking process with a partially frozen turkey, as this can result in uneven cooking.
Timeline for smoking a turkey
This timeline will get a 12-pound turkey on the table at 2 p.m. It’s just an estimate, though, and your times will vary depending on your turkey and smoker!
Smoking a 12-16 lb turkey at 225 °F (107 °C) typically takes 30-40 minutes per pound, which equates to about 6-10 hours. The exact time depends on the size of the turkey, your smoker’s consistency, and how often the lid is opened.
Thanksgiving Eve
Any time between 5:30 a.m. and 5:30 p.m. – prepare the brine.
30 minutes later – remove innards from the turkey, place in the brining bag, and add cooled brine. Refrigerate or store in an ice-filled cooler.
Thanksgiving Day
6:30 a.m. – remove the turkey from the brine. Rinse thoroughly under cold water and pat dry with paper towels.
6:45 to 7:00 a.m. – prepare the herb butter mixture and apply it under and over the turkey skin. Tuck the wings and tie the legs.
7:00 to 7:15 a.m. – preheat the Traeger smoker to 225 °F (107 °C) with the lid closed for 15 minutes.
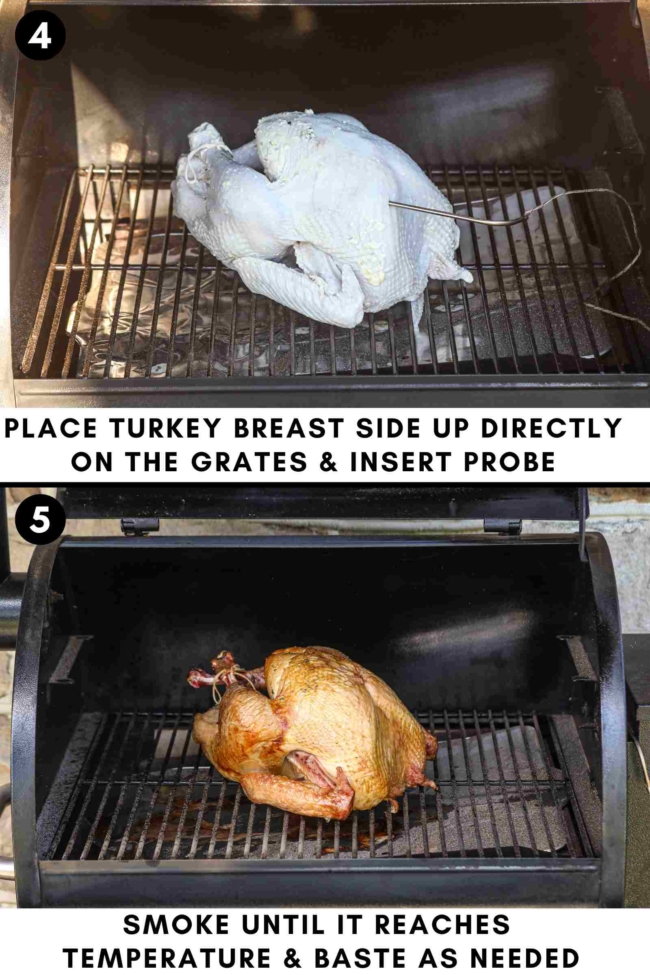
7:15 to 7:30 a.m. – place the turkey on the smoker, breast side up. Insert the meat probe into the thickest part of the breast, avoiding the bone.
7:30 a.m. – smoke the turkey at 225 °F (107 °C). During this time, check the smoker occasionally to ensure the temperature remains consistent.
12:30 p.m. or 1:00 p.m – this time is just an estimate! When the turkey’s internal temperature reaches approximately 145 °F (63 °C), raise the heat to 375-400 °F (190-205 °C) and smoke until the internal temperature reaches 160°F (71°C) in the thickest part of the breast and 175°F (80°C) in the thighs. Continue smoking until the internal temperature reaches 160 °F (71 °C)in the breast and 175 °F (80 °C) in the thighs.
1:30 p.m. – remove the turkey from the smoker and let it rest for at least 30 minutes, allowing it to reach the final internal temp of 165 °F (74 °C).
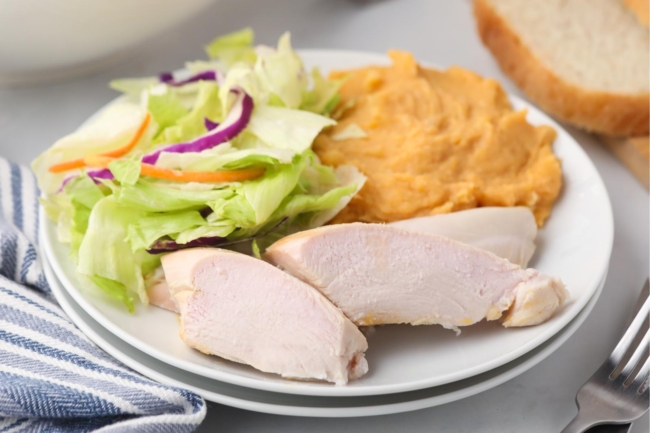
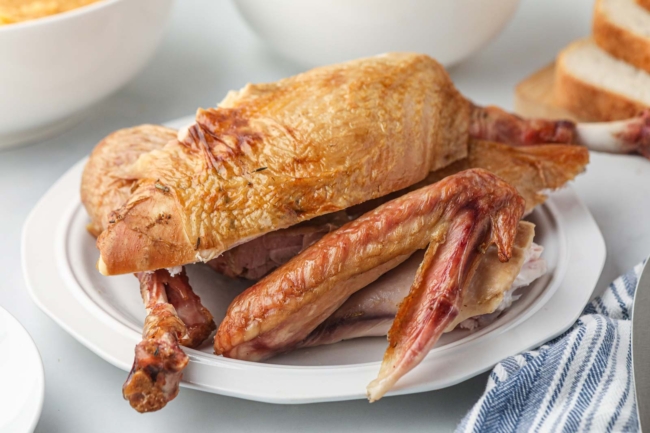
2:00 p.m. – carve and serve your perfectly smoked turkey!
Can I smoke it ahead?
You can, but it’s SO much better when it’s fresh.
But if it’s not possible to smoke it on the day of serving, you can smoke the turkey a day or two in advance. Wrap it in plastic, then foil, and place it in a large bag, then store it in the fridge.
To reheat, place it in the oven at 325 °F (163 °C) until it’s warmed.
Keep some broth on hand to add moisture when reheating. If you opt to make it ahead, know the turkey might dry out, so basting is important.
How to store
Store leftover turkey in an airtight container in the fridge for up to 4 days.
For freezing, wrap the turkey tightly in foil, then place it in a freezer-safe bag. It’ll keep for up to 3 months. Thaw overnight in the fridge before reheating.
Wood chips vs pellets
Wood chips and pellets are popular fuel sources for Traeger smokers.
I prefer wood chips, but either one will work for this recipe.
Wood chips for smokers are typically made from hardwood trees. It’s important to avoid using softwoods like pine, as they can impart a bitter, resinous flavor to your food.
While some advocate soaking wood chips before using them, it’s generally not recommended. Soaking can lead to inconsistent smoking and can make it more difficult to control the temperature in your smoker.
Pellets for smokers are made from compressed hardwood sawdust and burn hot and long by design. They are typically made from 100% hardwood with no additives or fillers.
If using pellets, you may need to refill the hopper.
What are the best smoke flavors for smoking a turkey?
Apple, cherry, hickory and maple are good wood choices. They add a mild, sweet flavor to the turkey.
This Mr. Bar-B-Q wood chip bundle has three separate bags: apple, mesquite, and hickory, so you could use the apple or hickory for today’s recipe and use the mesquite for this Smoked Ribeye Recipe.
For pellets, this Traeger Grills Signature Blend is 100% all-natural wood pellets for smokers. The signature blend is maple, cherry and hickory, which is a great choice for this recipe.
Gluten-free
This recipe is naturally gluten-free and paleo! That said, if you’re sensitive to gluten, you’ll want to check the labels if you buy a store-bought broth.
While the core ingredients of broth (meat, vegetables, water) are naturally gluten-free, some store-bought broths may contain additives or flavorings that may contain gluten or non-paleo ingredients.
Be sure to look for a gluten-free label or consider making your own if you need it to be gluten-free/paleo.
Thanksgiving side dishes
- Honey Orange Cranberry Sauce
- Naturally Gluten-free Quinoa Stuffing
- Mashed Sweet Potatoes with Bacon
- Sweet Potato Mac and Cheese
I hope you’ll enjoy this Traeger smoked turkey! If you try it out, I’d love to hear your thoughts below in the comments. Thanks! 🙂

Traeger Smoked Turkey
Ingredients
For the brine:
- 3 quarts vegetable broth or chicken or turkey broth
- 250 grams kosher salt this is equivalent to 1 cup Morton Kosher Salt, 1 3/4 cups Diamond Crystal Kosher Salt, or 3/4 cup table salt*
- 2 tablespoons fresh rosemary finely chopped
- 2 tablespoons fresh thyme finely chopped
- 2 tablespoons fresh sage finely chopped
- 5 quarts ice water combined volume of ice and water should be 5 quarts
For the turkey:
- 1 whole 12 to 16-lb (5.4 to 7.3-kg) turkey NOT one that's already been salted/brined/injected/basted/enhanced, should be thawed (if frozen)
- 1 cup (225 grams) unsalted butter softened (or olive oil for paleo)
- 2 tablespoons fresh rosemary finely chopped
- 2 tablespoons fresh thyme finely chopped
- 2 tablespoons fresh sage finely chopped
- 5 cloves garlic minced
- 1 tablespoon kosher salt
- 1 teaspoon ground black pepper
- 1 lemon zested
Instructions
Make the brine (a day before serving):
- Line a large container, such as a pot, bucket, or roasting pan, with a brining bag — make sure it's big enough to hold both the turkey and the brine comfortably and make sure it’ll fit in your fridge. If you have a large enough pot to hold everything, you don’t need to use a brining bag.
- Remove the innards from the turkey. Place the turkey, breast side down, into the bag. This allows the breast meat, which is more prone to drying out, to absorb more moisture and flavor. Since the breast is the thickest and most delicate part, submerging it helps ensure it stays juicy during the cooking process.
- In a large stockpot, combine the broth, salt, rosemary, thyme and sage. Bring the mixture to a boil, stirring often to ensure the salt dissolves completely.
- Once the mixture reaches a boil, remove it from heat, add the ice water, and allow it to cool to room temperature.
- Once the brine has cooled, transfer it to the brining bag, ensuring the turkey is fully submerged and filled with the liquid. If you're using a brine bag, make sure to hold the sides upright to prevent them from collapsing while you pour in the brine. If you have a second set of hands, that’s helpful! It’s fine if the bony tips of the legs stick out at the top. For larger turkeys, you might need to prepare additional brine by dissolving 1/4 cup of salt in 4 cups of warm water to cover the turkey completely. If using additional brine, make sure it’s well-mixed and chilled before adding to the main brine.
- If the turkey floats, weigh it down with a heavy pot, a bag or ice, a stack of plates, or another heavy object.
- Remove as much air as you can from the liner and seal it tightly. Then, place the turkey in the refrigerator or an ice-filled cooler.
- Refrigerate the turkey for 12-24 hours.
- Take the turkey out of the brine and discard the brine.
- Rinse the turkey under cold running water, making sure to get into the cavity and around the neck and wings.
- After rinsing, pat the turkey very dry thoroughly with paper towels. This is crucial for achieving crisp skin when cooking.
Smoke (the day of serving):
- Take the turkey out of the refrigerator for 30-60 minutes before placing it on the smoker.
- Place a drip pan under where you'll smoke the turkey. Add the wood chips to the smoker. Apple, cherry, hickory and maple are good wood choices.
- Preheat the Traeger smoker to 225 °F (107 °C) with the lid closed for about 15 minutes.
- In a small bowl, combine the softened butter, chopped rosemary, thyme, sage, garlic, kosher salt, black pepper, and lemon zest. Mix well until the herbs and seasoning are evenly distributed in the butter.
- Carefully separate the skin from the turkey breast by sliding your fingers under the skin, being careful not to tear it. Spread about half of the herb-butter mixture evenly under the skin, covering the breast meat. Rub the remaining herb butter over the outside of the turkey, ensuring it’s fully coated.
- Tuck the wings under the turkey and tie the legs together with kitchen twine.
- Place the turkey directly on the grill grates, breast side up. Place the probe/meat thermometer into the thickest section of the turkey breast, avoiding the bone.
- Close the lid and smoke at 225 °F (107 °C). Smoking a 12-16 lb turkey at 225 °F typically takes 30-40 minutes per pound, which equates to about 6-10 hours. The exact time depends on the size of the turkey, your smoker's consistency, and how often the lid is opened. For crispy skin - when the turkey's internal temperature reaches approximately 145 °F (63 °C), raise the heat to 375-400 °F (190-205 °C) and smoke until the internal temperature reaches 160°F (71°C) in the thickest part of the breast and 175°F (80°C) in the thighs. This will take about 30-60 minutes.
- Carefully remove it from the smoker. Let it rest for at least 15-30 minutes before carving. This is important for retaining juices and ensuring tender meat and for the turkey to reach the final internal temp of 165 °F (74 °C) in the thickest part of the breast.
- Let leftovers cool completely. Refrigerate leftovers in an airtight container for up to 4 days.





Leave A Reply!