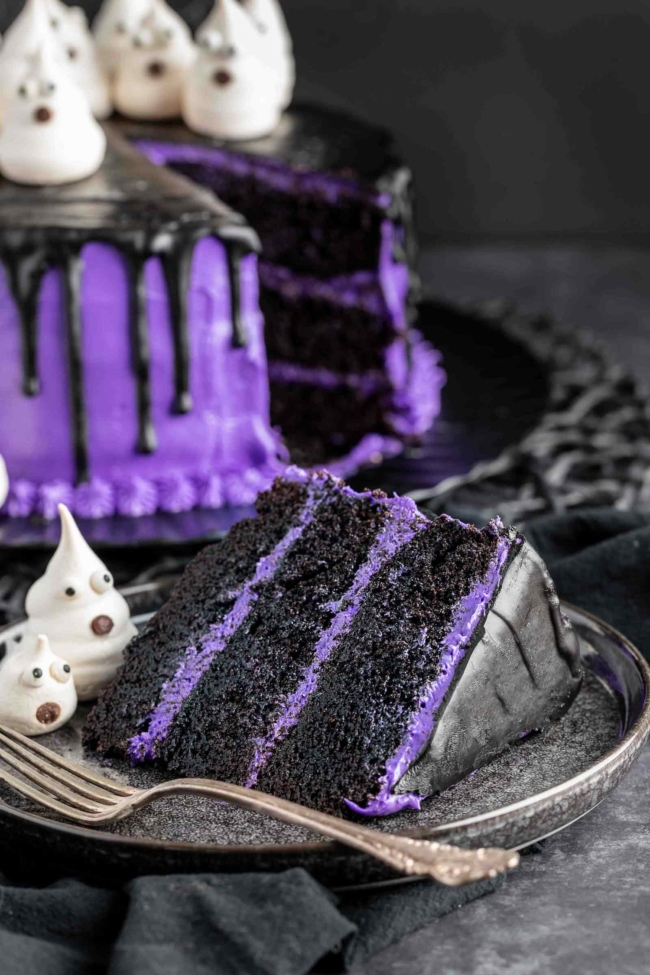
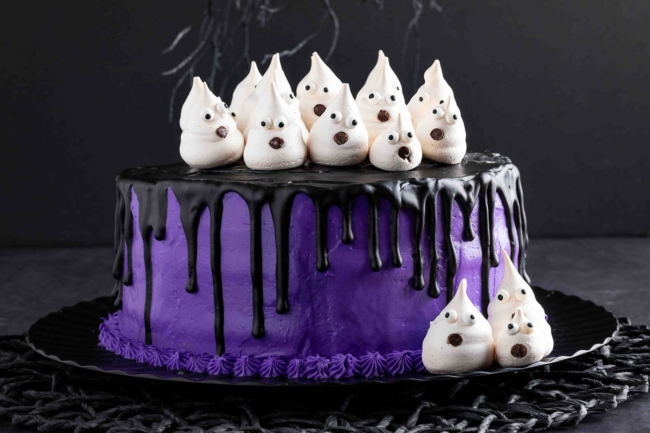
This ghost cake is a fun Halloween dessert made with three layers of moist chocolate cake, purple cream cheese frosting, a chocolate ganache drip and meringue ghosts. It looks impressive, but the recipe is designed to be manageable even if you don’t have much cake-decorating experience. If you’re short on time, skip the meringues and pipe frosting ghosts directly on the cake instead.
You can make the chocolate cake with all-purpose, whole wheat or gluten-free flour, and several parts can be prepared ahead to make decorating day easier.
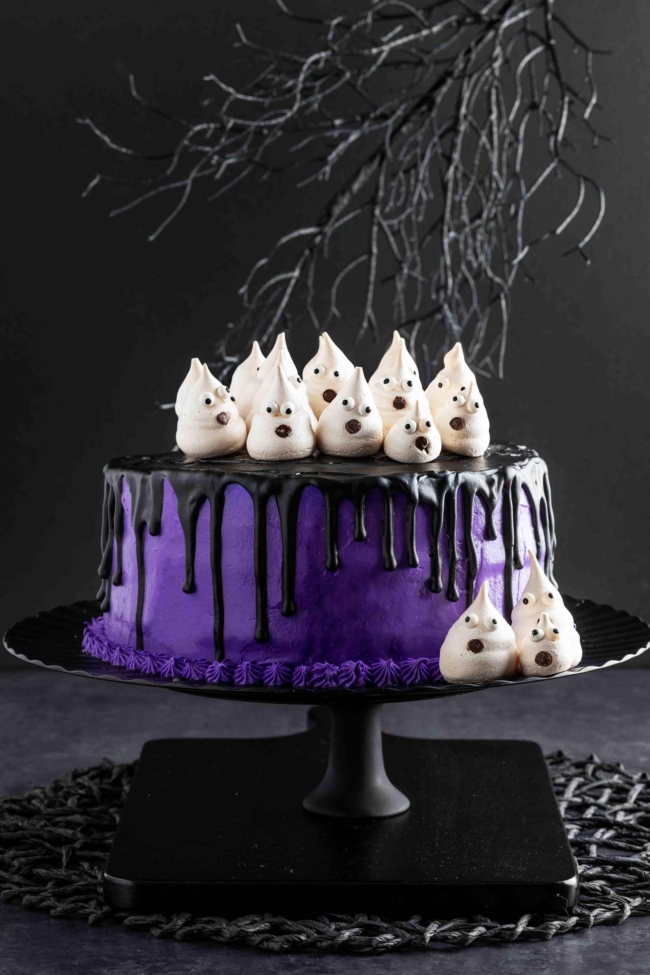
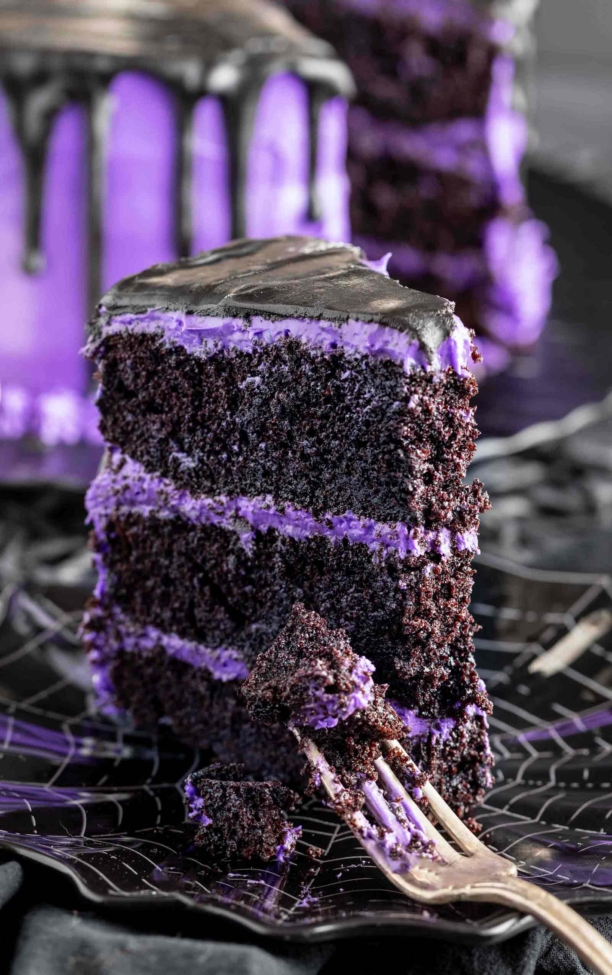
The chocolate cake is based on my Jack Skellington Cake, but uses a little more black cocoa and less Dutch-process cocoa. Both are adapted from Hershey’s One Bowl Chocolate Cake. I also use the same cake base for my Spiderweb Cake. If you’d rather make cupcakes, these Eyeball Cupcakes for Halloween use the version without black cocoa.
Ingredients
Please scroll down for the full recipe. These are just notes on select ingredients.
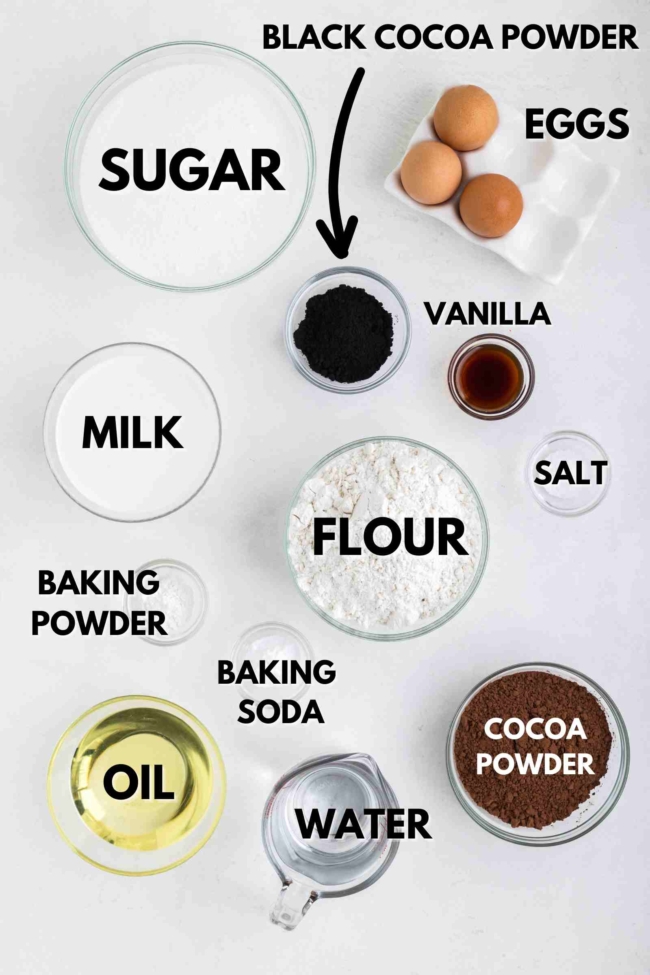
- Flour – use all-purpose, white whole wheat or whole wheat flour. For the gluten-free version, use Bob’s Red Mill 1-to-1 Gluten-Free Baking Flour; see the Gluten-Free Option section below for important details.
- Dutch-process cocoa powder – this gives the cake its deep chocolate flavor and color.
- Black cocoa powder – this is mainly used to deepen the color of the cake. If you don’t have it, you can replace it with more Dutch-process or regular cocoa powder. Regular cocoa will produce a lighter, slightly less chocolatey cake.
- Eggs – regular eggs or chia eggs work. The chia egg amounts are in the recipe notes.
- Milk – use any type you’d like. If using canned coconut milk, thin it with water until it’s similar in consistency to regular milk, and keep in mind that it may add some coconut flavor.
- Boiling water – the batter will be quite thin after you add it, which is normal.
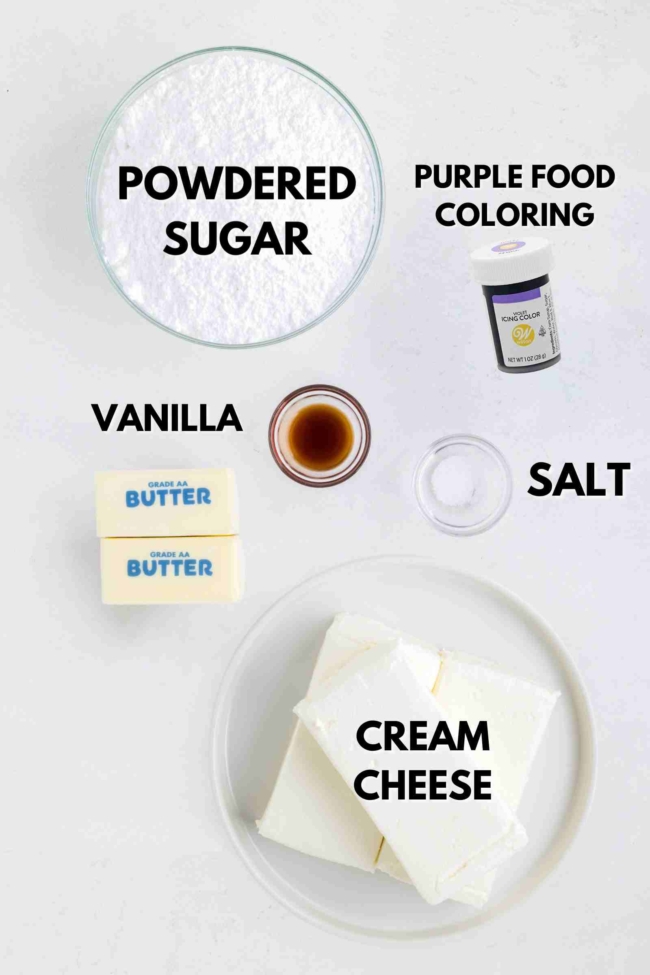
- Cream cheese – use full-fat cream cheese. If you’re outside the US, check the recipe notes for how to drain softer tub-style cream cheese before making the frosting.
- Purple food coloring – use gel or powdered food coloring rather than liquid, which can make the frosting too runny. I talk more about the brands I’ve used below.
- Ganache – you’ll need semi-sweet chocolate and heavy cream. For the dark color, use black gel food coloring or black cocoa powder with a little maple syrup or another tasteless liquid sweetener, such as agave or simple syrup.
Black Cocoa
Black cocoa is an extra-dark Dutch-process cocoa powder. This recipe only uses a small amount, mainly to make the chocolate cake darker, so the finished cake doesn’t have a strong Oreo flavor.
If you don’t have black cocoa, you can replace it with more Dutch-process or regular cocoa powder. Dutch-process cocoa will give you a lighter brown cake, while regular cocoa will make it lighter still and a little less intensely chocolatey.
If you’d like more ways to use up a package of black cocoa, try my Black Milkshake, Mummy Cookies or Black Ice Cream.
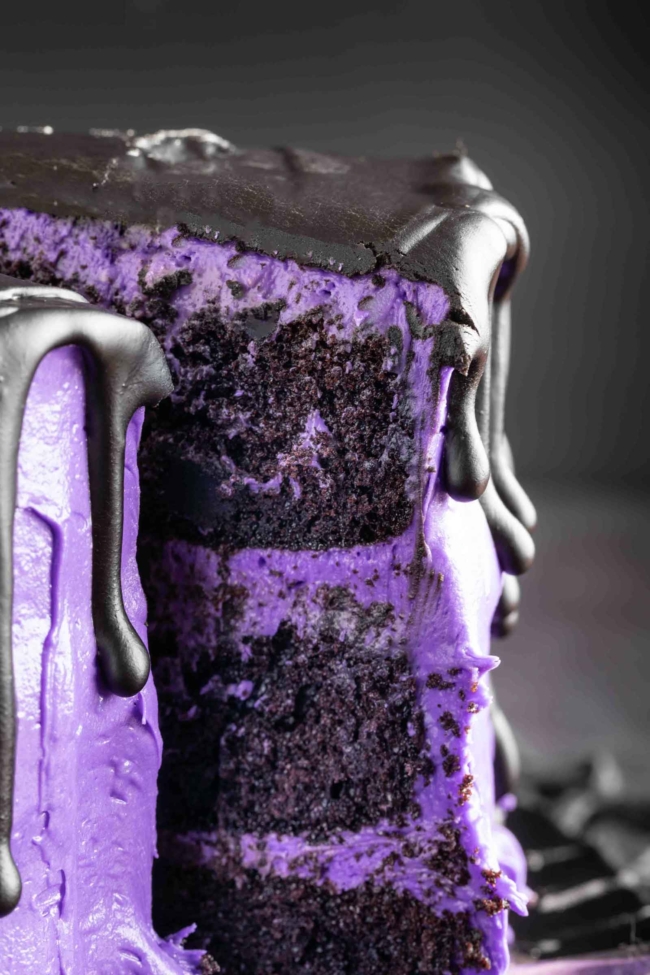
One odd but useful warning: black cocoa can retain its dark color as it passes through your digestive system, so don’t be alarmed by the color afterward.
How to Make It
This is just a quick visual overview. Please scroll down to the recipe card for the full instructions and exact amounts.
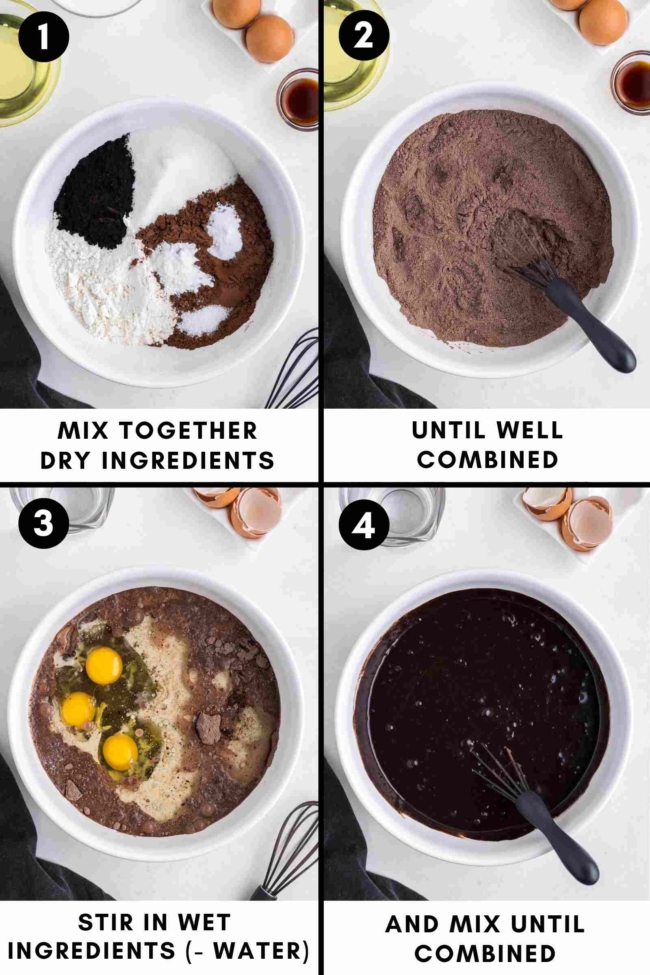
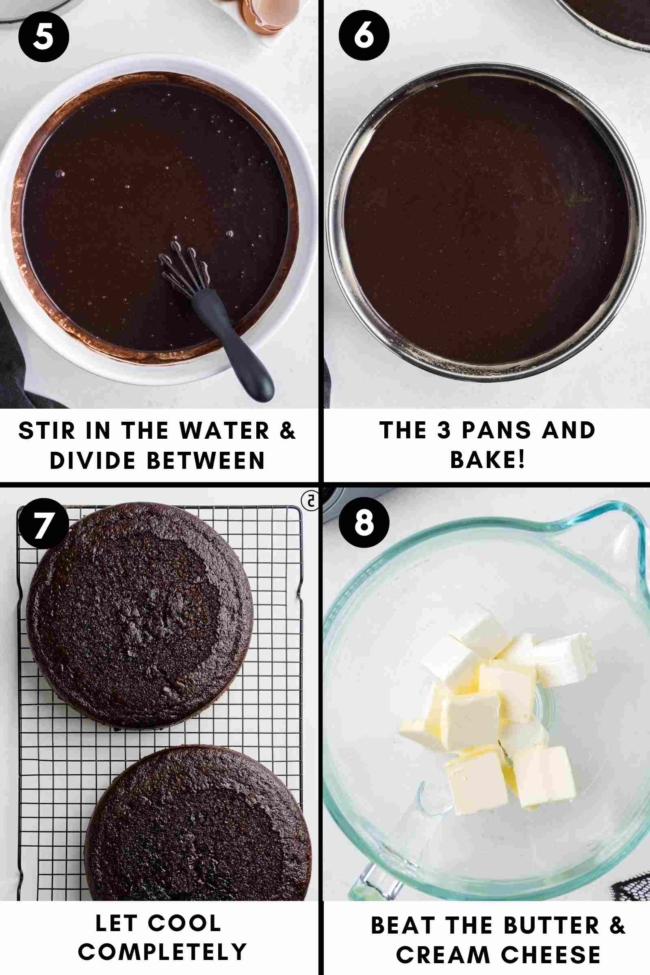
- Mix the dry cake ingredients together, then add the eggs, milk, oil and vanilla.
- Stir in the boiling water, divide the thin batter between three cake pans and bake.
- Cool the cake layers completely before assembling the cake.
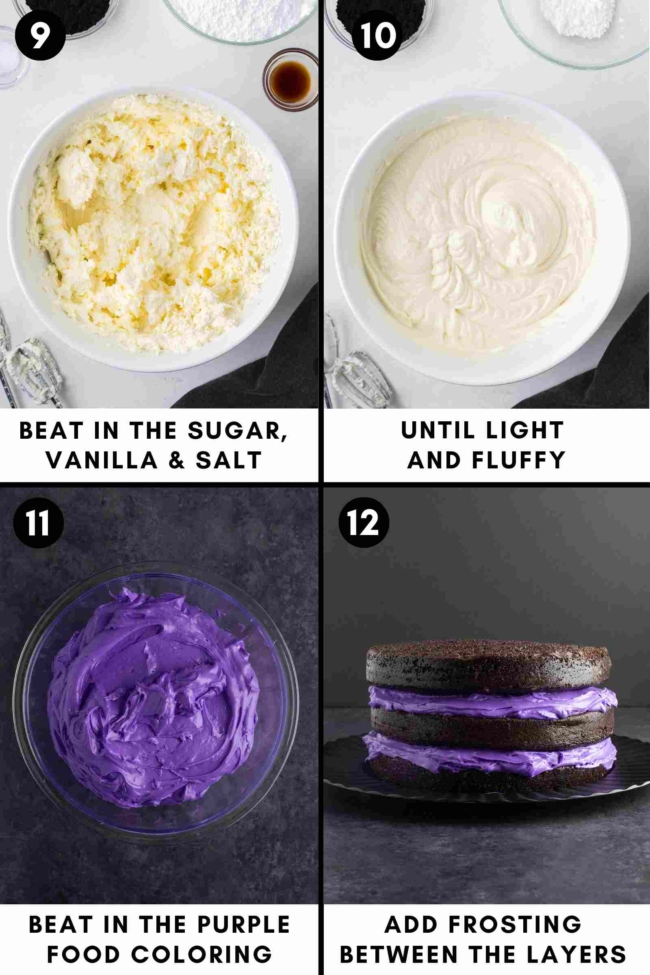
- Make the cream cheese frosting and tint it purple.
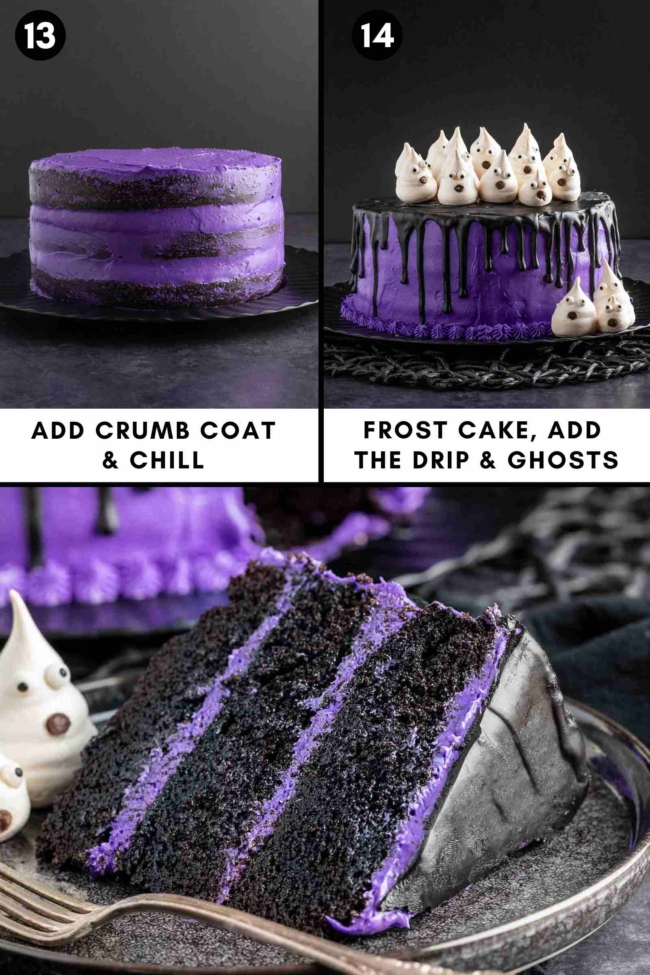
- Stack the layers with frosting, apply the crumb coat, chill and then add the final layer of frosting.
- Chill the frosted cake until firm, add the ganache drip and finish with the meringue ghosts just before serving.
What’s a Crumb Coat?
A crumb coat is a very thin layer of frosting that traps loose cake crumbs before you add the final layer of frosting. It makes it much easier to get a clean finish.
Working with chilled or frozen cake layers makes this even easier, although it isn’t required. Once the crumb coat is on, chill the cake for 20-30 minutes in the freezer or 1-2 hours in the refrigerator before adding the final frosting. You can also refrigerate it overnight if you want to spread the work over two days.
Ganache Drip
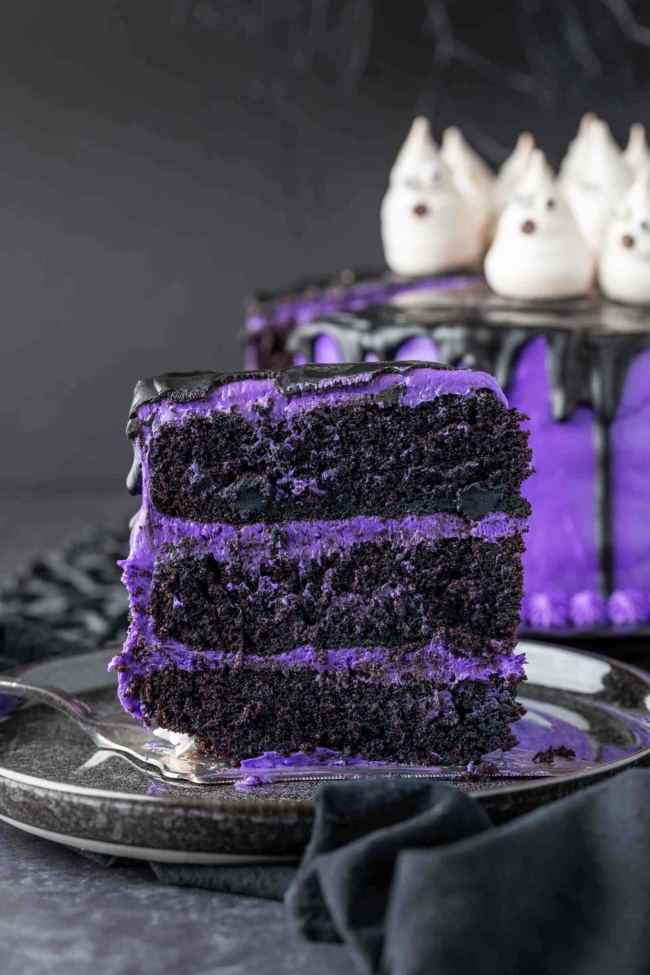
You have two options for the dark ganache: add black gel food coloring for a truly black drip, or add 2 1/2-3 teaspoons of black cocoa powder and, if you’d like, 1 teaspoon of maple syrup for a very dark brown ganache. The maple syrup is optional, but I prefer the flavor with it. The ganache still tastes like dark chocolate.
Let the ganache cool until it’s slightly warm and thick enough to drip slowly rather than run straight down the cake. Before touching the cake, test a drip on the bottom of an upside-down glass. If it runs too quickly, let it cool a little longer; if it’s too thick, warm it very briefly or add a tiny amount of cream.
I like using a plastic squirt bottle because it gives me more control, but a spoon also works. If you’re new to ganache drips, I found the video below helpful.
The video is set to start where she applies the drip, although the earlier part explains ganache consistency if you’d like more detail.
For the cleanest drip, the frosting needs to be very firm before you add the ganache. Chill the frosted cake for 4-8 hours, or even overnight. The exact time will depend on whether the cake layers were frozen and how cold the frosting was during assembly.
Ghost Meringues
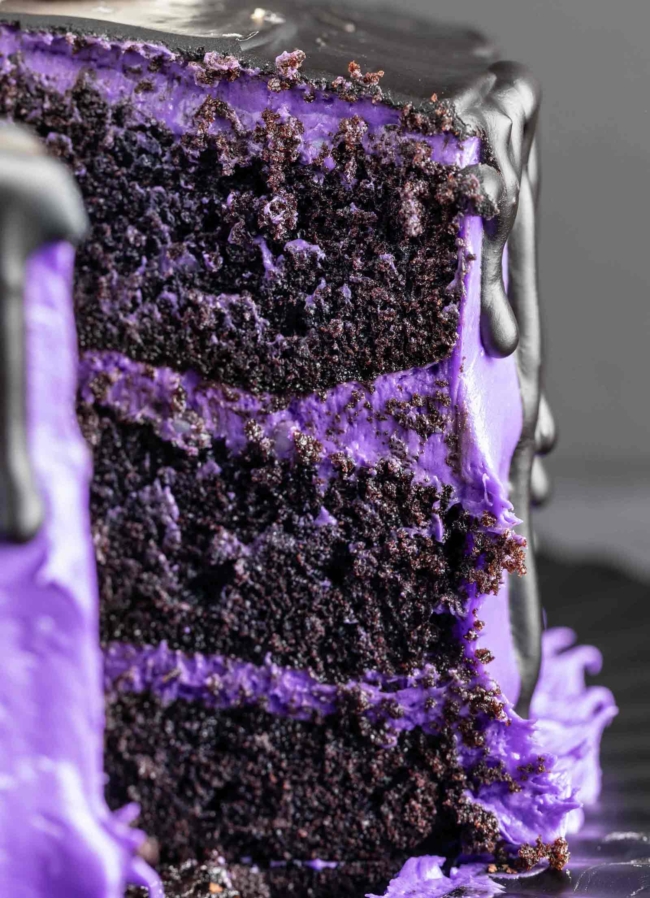
I topped this cake with my Ghost Meringues. They’re made with just egg whites, sugar and cream of tartar, and you can make them well ahead of the cake. I actually recommend making them a few days beforehand so you’re not rushed on decorating day.
Store the meringues in a dry, airtight container at room temperature for up to 2 weeks. Don’t refrigerate them, which can make them soggy, and I don’t recommend freezing them because they can become sticky.
I’ve also used them on my Halloween Cookie Cake and Halloween Milkshakes.
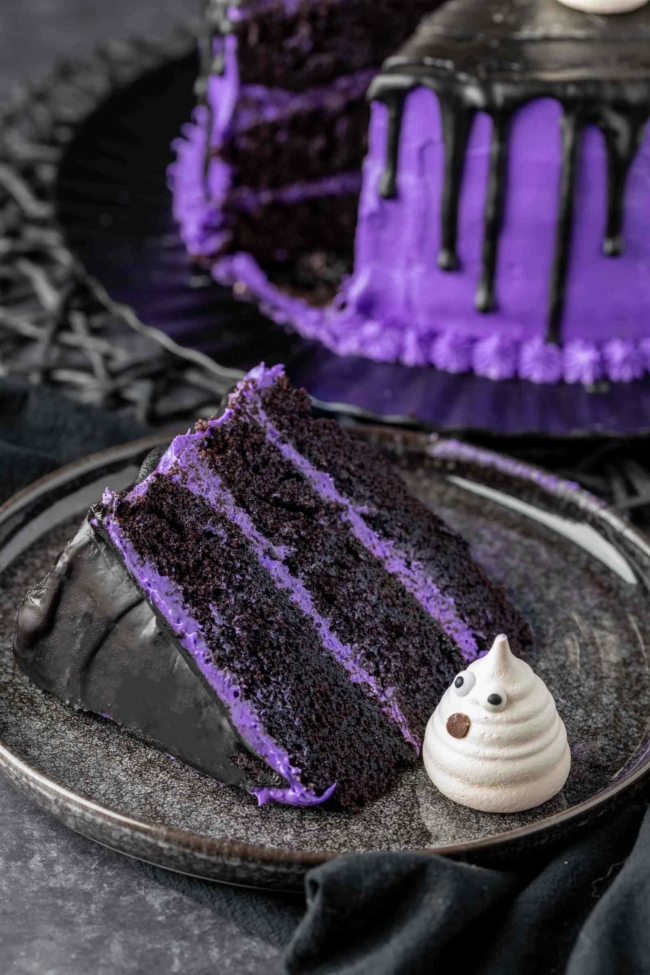
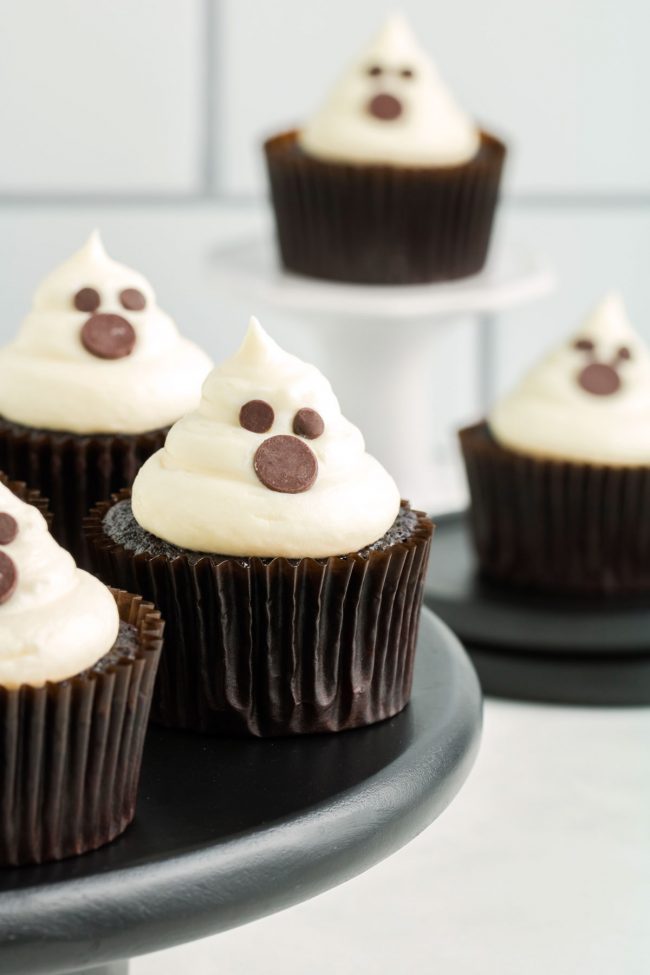
Short on time? Skip the meringues and pipe frosting ghosts directly onto the cake like I did for these Ghost Cupcakes. That recipe makes enough frosting for 16 cupcake ghosts, so half the amount should be plenty for about 8 ghosts on this 8-inch cake.
Food Coloring
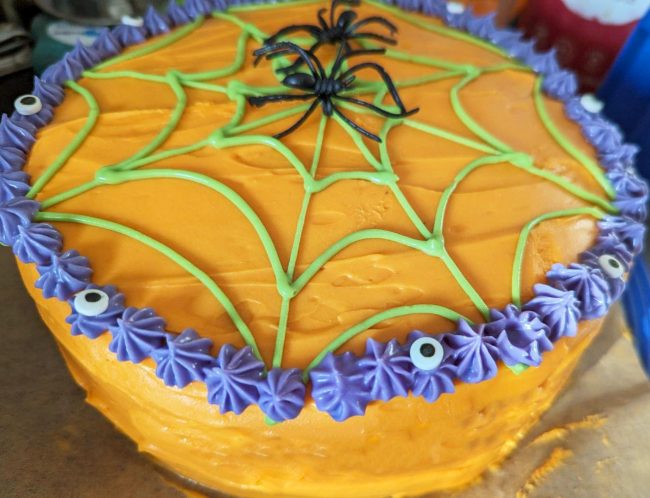
For the purple frosting, use gel or powdered food coloring rather than liquid, which can make cream cheese frosting too runny. I like the natural Supernatural Kitchen Food Colors and Color Kitchen, although they’re pricey. The purple frosting border in the photo below shows what Color Kitchen purple looks like with this cream cheese frosting, and you can make the color more intense if you’d like. For the ghost cake itself, the photographer used about 1 teaspoon of Wilton purple gel food coloring.
Make Ahead & Storage
You can make the whole cake in one day, but spreading the work over two days is much less hectic. I usually bake the cake layers and make the frosting the day before, then assemble and decorate the cake the day I plan to serve it.
- Cake layers – once completely cool, wrap the layers individually in plastic wrap and place them in a Ziploc bag. Store at room temperature for up to 2 days, refrigerate for up to 3 days or freeze for up to 3 months. Frozen layers are easy to work with and don’t need to be defrosted before assembling the cake.
- Cream cheese frosting – refrigerate for up to 4 days total or freeze for up to 3 months. I’ve personally kept it frozen for over a year with good results, but 3 months is a good make-ahead window. The 4-day refrigerator limit includes any time the frosting spends on the finished cake.
- Crumb-coated or frosted cake – once assembled, you can freeze the crumb-coated or completely frosted cake for up to 1 week. Wrap it well in plastic wrap and place it inside a large freezer-safe bag.
- Finished cake – refrigerate for up to 4 days, although I recommend preparing it no more than a day before serving for the best texture. Add the ghost meringues just before serving. If you have leftovers, remove the meringues before refrigerating the cake so they don’t become soggy.
Gluten-Free Option
I normally have good results with King Arthur Gluten-Free Measure for Measure Flour, but I do not recommend it for this cake. I tested the recipe seven times with King Arthur, adjusting the baking powder, baking soda, water, flour and black cocoa, and the cakes either collapsed as they cooled or were too sticky.
When I switched to Bob’s Red Mill 1-to-1 Gluten-Free Baking Flour, the cakes stopped collapsing, although they were still stickier than usual, likely because of the black cocoa powder. Reducing the baking soda, baking powder and water solved that problem. For the gluten-free version, use 2 1/2 cups + 2 tablespoons (363 grams) Bob’s Red Mill 1-to-1 and follow the recipe card below.
I haven’t tested another gluten-free flour blend successfully in this recipe, so I can’t guarantee the results with a different brand. Whatever you use would need to be a 1:1 substitute for all-purpose flour; coconut, almond and oat flour won’t work as substitutes here.
More Kid-Friendly Halloween Recipes
I hope you’ll enjoy this ghost cake! If you try it out, I’d love to hear your thoughts in the comments below. Thanks! 🙂
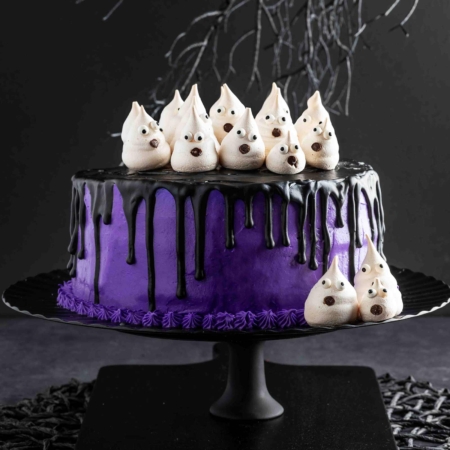
Ghost Cake
Ingredients
Cake:
- 3 cups (600 grams) granulated sugar or (580 grams) coconut sugar
- 2 1/2 cups + 2 tablespoons (328 grams) flour see notes
- 3/4 cup + 2 tbsp (101 grams) Dutch-process cocoa powder
- 1/4 cup (28 grams) black cocoa powder (or more Dutch-process)
- 1 1/2 teaspoons baking powder
- 1 1/2 teaspoons baking soda
- 1 1/2 teaspoons salt
- 3 large (50 grams each), out of shell eggs, room temp or chia eggs
- 1 1/2 cups (355 ml) milk
- 3/4 cup (177 ml) olive, canola or vegetable oil
- 1 tablespoon vanilla extract
- 1 cup + 2 tbsp (266 grams) boiling water
Frosting:
- 3 8-ounce (680 grams) packages (680 grams total) full-fat cream cheese, room temperature
- 1 cup + 2 tablespoons (253 grams) unsalted butter
- 3 3/4 cups (450 grams) powdered sugar (or more if you like)
- 1 1/2 teaspoons vanilla extract
- pinch of salt
- 1 teaspoon purple gel food coloring or Color Kitchen food coloring powder
Ganache drip:
- 1/2 cup (85 grams) semi-sweet chocolate chips or chopped chocolate
- 1/3 cup (80 ml) heavy cream
- black gel food coloring or 2 1/2-3 teaspoons black cocoa powder + 1 teaspoon maple syrup
Topping:
- meringue ghosts
Instructions
Make the cake:
- Preheat your oven to 350 °F (175 °C). Line three round 8" cake pans with parchment paper on the bottom and grease the pan sides.
- In a large mixing bowl, stir together the sugar, flour, Dutch-process cocoa, black cocoa powder, baking powder, baking soda and salt.3 cups (600 grams) granulated sugar or (580 grams) coconut sugar2 1/2 cups + 2 tablespoons (328 grams) flour3/4 cup + 2 tbsp (101 grams) Dutch-process cocoa powder1/4 cup (28 grams) black cocoa powder (or more Dutch-process)1 1/2 teaspoons baking powder1 1/2 teaspoons baking soda1 1/2 teaspoons salt
- Add eggs, milk, oil and vanilla.3 large (50 grams each), out of shell eggs, room temp or chia eggs1 1/2 cups (355 ml) milk3/4 cup (177 ml) olive, canola or vegetable oil1 tablespoon vanilla extract
- Mix until combined, and then stir in the boiling water. The batter will be quite thin.1 cup + 2 tbsp (266 grams) boiling water
- Divide the batter between the three prepared pans. That’s 658 grams of batter per pan (675 grams per pan if using Bob's GF flour).
- Bake for 24-28 minutes or until a toothpick comes out with some moist crumbs but no uncooked liquid.
- Let cool for 10 minutes in the pans, and then turn out onto a rack to cool completely - about 2 hours. My cakes weren't flat, but not very rounded, either. If you want to, you can level them (I didn't bother).
Prepare the frosting:
- In a large mixing bowl, beat the cream cheese and butter together with an electric hand mixer at medium speed until well combined. It's okay if it looks a little crumbly.3 8-ounce (680 grams) packages (680 grams total) full-fat cream cheese, room temperature1 cup + 2 tablespoons (253 grams) unsalted butter
- Gradually beat in the powdered sugar until totally combined, and then beat in the vanilla and salt.3 3/4 cups (450 grams) powdered sugar (or more if you like)1 1/2 teaspoons vanilla extractpinch of salt
- Beat in a little purple food coloring at a time until you're happy with the color. The photographer used about a teaspoon of Wilton purple gel food coloring.1 teaspoon purple gel food coloring or Color Kitchen food coloring powder
Assemble the cake:
- Place the bottom layer of cake, rounded side down, on the serving plate.
- Spread 1 1/4 cups (288 grams) of frosting over the bottom layer, almost until the edge.
- Put on the next cake layer, rounded side down, and spread the same amount of frosting over the top of that.
- Place the third cake layer on top of the frosting, rounded side up.
Crumb coat:
- Use 1/2 cup (115 grams) of frosting as a crumb coat. Keep the frosting refrigerated until it's ready to use. And if you ever think it's not firm enough, put it back in the fridge.
- Spread it all over the cake.
- Place the cake in the freezer for 20-30 minutes after putting on the crumb coat or for 1-2 hours in the fridge. You can also refrigerate it overnight to help break up the workload.
Frost:
- Reserve and refrigerate 3/4 cup (173 grams) of frosting to pipe little swirls at the base of the cake. Cover the cake with the remaining frosting.
- Place the cake in the fridge for 4-8 hours, or even overnight, so that it's as firm as possible. How long you'll need depends on if the cake layers were frozen and if/how long you chilled the frosting before and during the decorating process. With my very warm kitchen and not chilling the cake or the frosting, 4 hours was enough to firm it up.
- Pipe little swirls, stars, or whatever you'd like at the base of the cake.
Make the drip:
- Add the chocolate to a small heatproof bowl.1/2 cup (85 grams) semi-sweet chocolate chips or chopped chocolate
- Heat the heavy cream in a small saucepan over medium-high heat until hot and steamy but not bubbling.1/3 cup (80 ml) heavy cream
- Pour the hot cream over the chocolate and let sit for about a minute before stirring.
- You can either add black gel food coloring (about 1/4 to 1/2 teaspoon), and stir the chocolate until totally smooth OR you can stir in black cocoa powder. Taste and add 1 teaspoon maple syrup, if desired.black gel food coloring or 2 1/2-3 teaspoons black cocoa powder + 1 teaspoon maple syrup
- Let cool for about 8-12 minutes or until just slightly warm and thickened a bit.
- Pour the ganache into a plastic squirt bottle (if you have one). Use the bottom of a glass to test the drip's consistency. Turn the glass upside down and squeeze some ganache over the top of the glass bottom. If it's too runny, then wait a few minutes and then do another test on the bottom of the glass. If it's too thick, rewarm it just a tiny bit or add a tiny bit of cream.
- Do the drip around the cake, spread the remaining ganache on top of the cake, and smooth it out.
- Chill until hardened, about 30 minutes.
- Add the meringue ghosts just before serving.
How to store:
- If you want to make the cake elements in advance, let the layers cool, wrap the layers individually in plastic wrap and place inside a Ziploc bag. They can be stored at room temperature for up to 2 days, refrigerated for 3, or frozen for 3 months. No need to defrost before assembling the cake.
- The frosting can be refrigerated for up to 4 days total or frozen for up to 3 months.
- You can assemble the cake, add the crumb coat and frosting and then freeze it for up to a week. I would wrap it in plastic wrap and then place it in a big bag, just to be safe. Ghosts should always be added just before serving.
Notes
- You can use all-purpose flour, white whole wheat flour or whole wheat flour. If you're gluten-free, use 2 1/2 cups + 2 tablespoons (363 grams) Bob's Red Mill 1-to-1 Gluten-Free Baking Flour.
- If you want to make the cake eggless, mix together 3 tablespoons of ground chia seed with 1/2 cup + 1 tablespoon (133 grams) of water until well combined. Let sit for about 1-2 minutes or until goopy like regular eggs.
- You can use whatever type of milk you'd like. If using canned coconut milk, water it down so that it's runny like regular milk. Keep in mind the potential coconut flavor!
- If you're outside the US, your cream cheese is likely different from the US kind, which is firmer and better suited for baking than the kind typically used for spreading on toast (which is all you find elsewhere). For every 8 ounces (225 grams) of cream cheese required, buy a 300-gram package (store brands work just as well as Philadelphia). Place it in the center of a clean tea towel or cheesecloth and squeeze out the liquid until it reduces to 225 grams. For this recipe, you'll need to start with 900 grams of cream cheese and squeeze out the liquid until you’re left with 680 grams. Additionally, keep in mind that medium eggs in the EU are equivalent to large eggs in the US, so if you’re in the EU, use medium eggs.
- If using Color Kitchen natural food coloring, follow the directions on the box to make purple.
- The nutrition information provided is calculated as a courtesy and is only an estimate. I am not a licensed nutritionist or dietitian. For the most accurate nutritional data, consult a professional or use your preferred calculator.









Leave A Reply!