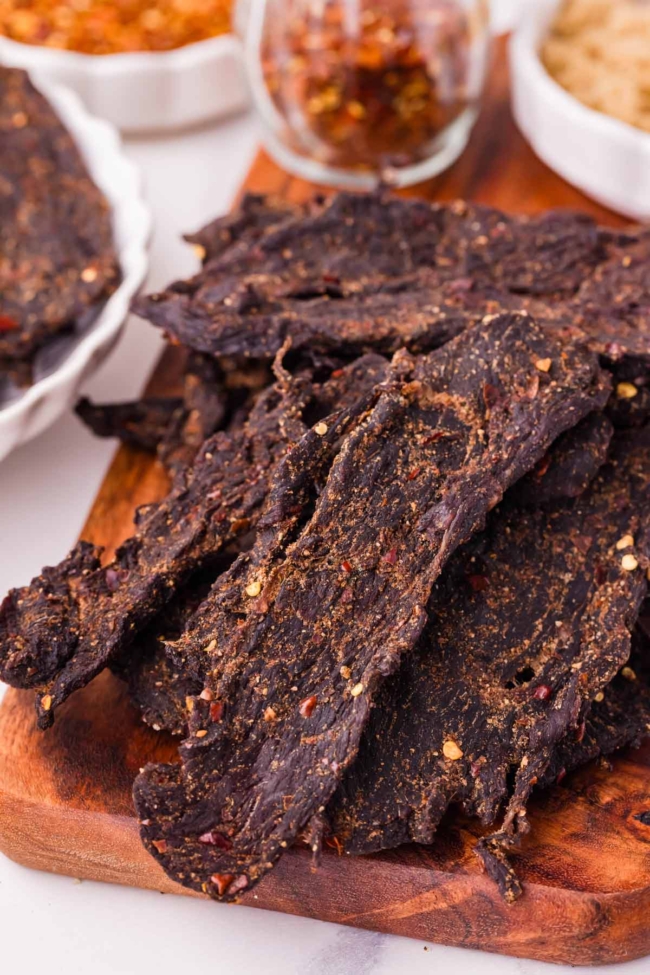
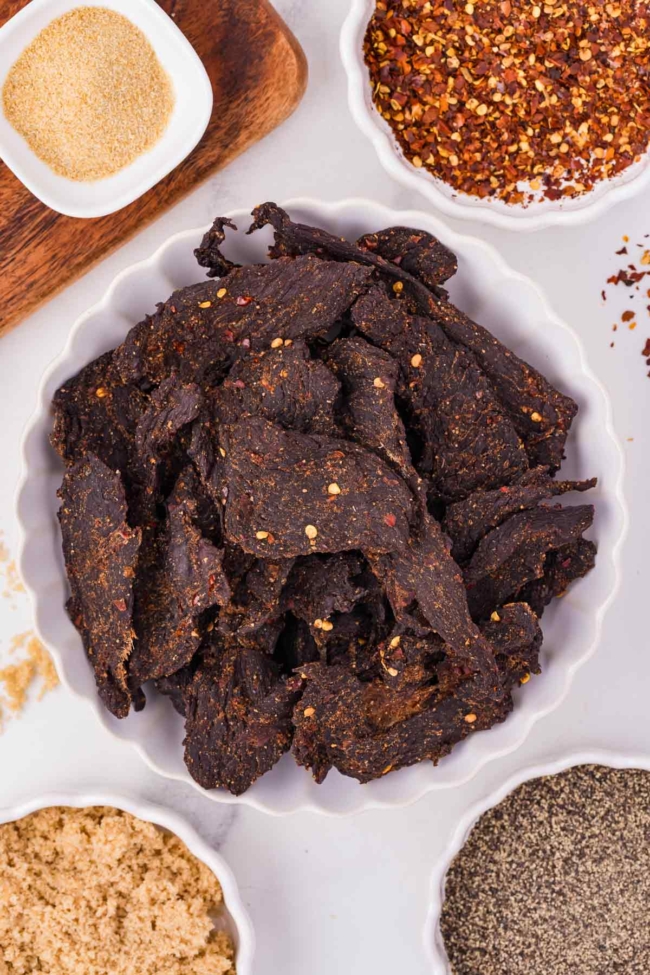
Venison jerky is a savory, chewy snack packed with smoky spices, a little sweetness and just enough heat to keep things interesting. The Worcestershire and soy sauce marinade adds loads of flavor without overpowering the venison, and you can easily adjust the sweetness and spice level to suit your taste.
This recipe comes from a family favorite that’s been made for years, with the seasonings adjusted over time to create a milder version that I think most kids will enjoy, too. It’s a great way to put lean cuts of deer meat to good use, especially when you have plenty of venison in the freezer. And once it’s finished, you have a satisfying, protein-rich snack ready whenever you want one.
If you’ve never made jerky before, don’t worry! I’ll show you how to slice the meat for your preferred texture, how to tell when it’s properly dried, and how to avoid the uneven drying that can make jerky take hours longer than expected. I’ve also included a super simple 10-minute oven treatment to reduce the risk of foodborne illness, since dehydrating meat alone may not kill harmful bacteria.
What’s to Love
- Great for lean cuts of venison – especially hindquarter cuts such as top round, bottom round and eye of round
- Adjustable sweetness – make the original family version without sugar or add brown sugar for a little sweetness
- Family-friendly spice level – the standard recipe has mild heat, with an easy option for spicier jerky
- Great for making ahead – prepare a batch and keep the finished jerky refrigerated or frozen for snacks
- No smoker needed – the smoked paprika provides smoky flavor using a regular dehydrator
Ingredients
Please scroll down for the full recipe. These are just notes on select ingredients.
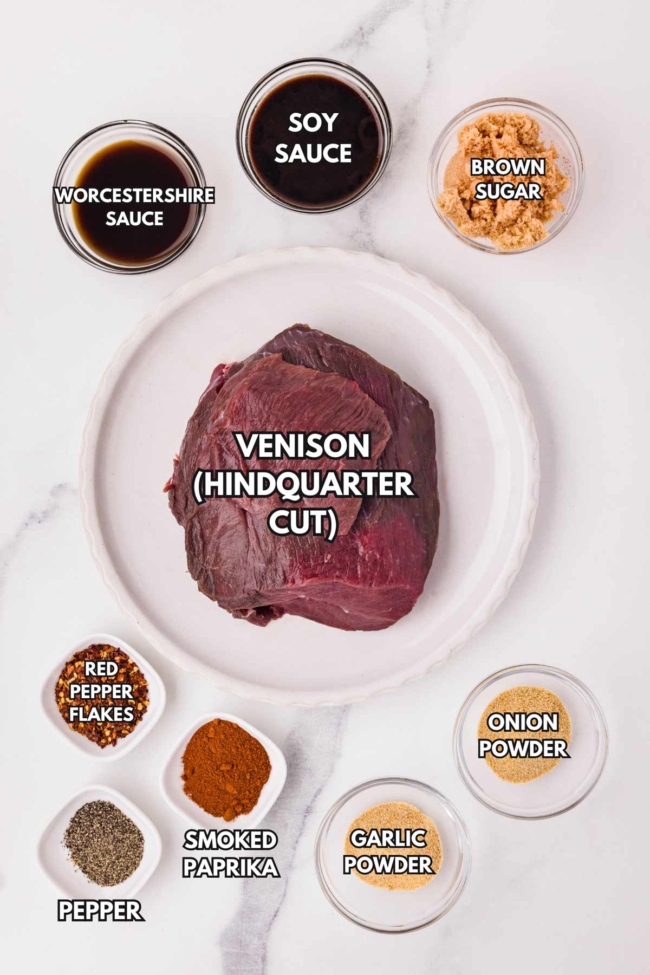
- Venison – use 2 to 2 1/2 pounds (907–1134 grams) of trimmed venison. Lean cuts such as top round, bottom round, eye of round and other hindquarter cuts work well. Remove as much visible fat, silver skin and connective tissue as possible. Fat can become rancid during storage, so it’s particularly important to remove it when making jerky. This recipe uses strips sliced from whole-muscle venison, not ground venison, which requires a different preparation method.
- Worcestershire sauce – adds a savory, tangy flavor to the marinade.
- Soy sauce – provides much of the saltiness and savory flavor. Liquid aminos have been tested as a 1:1 substitute, with no noticeable difference in flavor.
- Light brown sugar – 3 tablespoons (38 grams) adds a little sweetness without making the jerky overly sweet. The original family recipe didn’t contain sugar, so you can leave it out entirely. You can also use less or increase it to 1/4 cup (50 grams) if you’d like a sweeter version.
- Seasonings – onion powder, garlic powder, smoked paprika and coarsely ground black pepper give the jerky its savory, smoky flavor.
- Crushed red pepper flakes – the original family recipe used 1 tablespoon each of black pepper and red pepper flakes, but I’ve reduced both amounts to make the jerky more family-friendly. With 1 1/2 teaspoons of red pepper flakes, there’s a little heat, but it’s not overpowering, and I think it’s mild enough for most kids. For noticeably spicier jerky, increase the red pepper flakes to 1 tablespoon.
How to Make It
Making homemade venison jerky involves just a few steps: slicing the meat, mixing the marinade, letting it soak up the flavors and drying it. A short oven treatment after dehydrating provides an additional food-safety measure without changing the texture in testing.
Here’s an overview, with the full ingredient amounts and directions in the recipe card below.
1. Trim and Slice the Venison
Start by trimming away any visible fat, silver skin and connective tissue. A sharp, flexible knife, such as a fish fillet knife, works especially well for removing silver skin without wasting too much meat.
Next, identify the grain of the meat by looking for the long muscle fibers running in the same direction. For jerky that’s easier to chew, slice against the grain. If you prefer firmer, chewier jerky, slice with the grain instead.
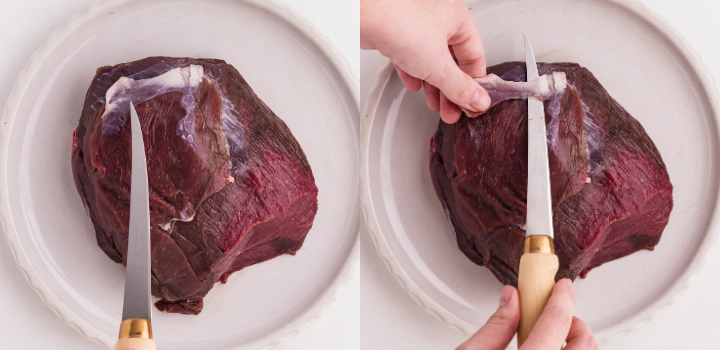
Cut the venison into uniform strips approximately 1/8–1/4 inch (0.3–0.6 cm) thick. Keeping the thickness consistent is particularly important for this recipe because the jerky needs an additional oven treatment after dehydrating. If some pieces finish drying much earlier than others, you’ll need to heat-treat them in separate batches.
If the meat is difficult to slice thinly, put it in the freezer for about 30–60 minutes first. Partially frozen venison is firmer and easier to cut into neat strips. You don’t want it frozen solid, though.
2. Mix the Marinade
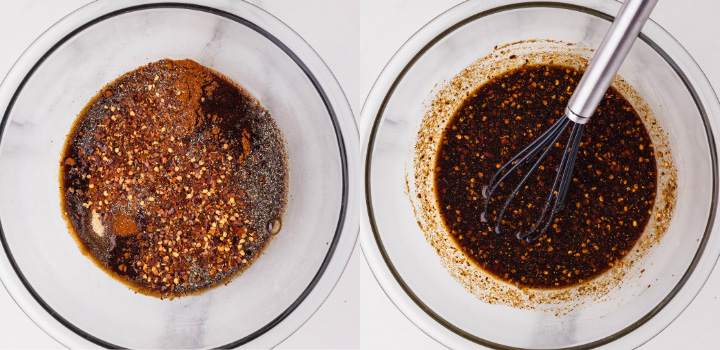
In a large mixing bowl, whisk together the Worcestershire sauce, soy sauce, brown sugar, onion powder, garlic powder, smoked paprika, black pepper and crushed red pepper flakes.
Mix until the brown sugar is mostly dissolved and the seasonings are evenly distributed throughout the liquid.
3. Marinate the Venison
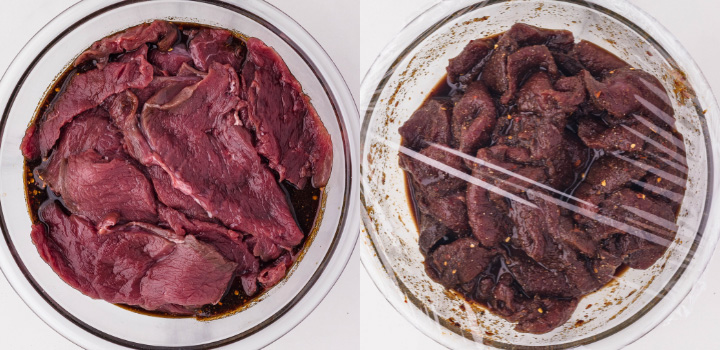
Add the sliced venison to the bowl and toss thoroughly, making sure every strip is coated with marinade.
Cover and refrigerate for at least 8 hours, preferably overnight, or up to 24 hours. Turn the meat occasionally so all the pieces spend time in contact with the marinade.
If you’d rather not dirty a large bowl, you can marinate the meat in a gallon-sized zip-top bag instead. Press out the excess air before sealing it so the marinade stays in contact with the meat.
4. Drain and Arrange the Strips
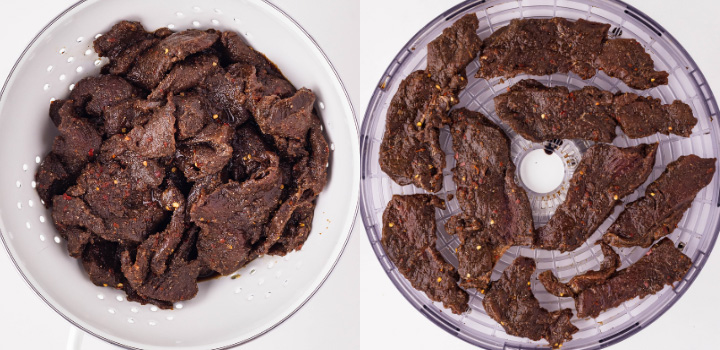
After marinating, drain the venison and discard the used marinade. Let as much excess liquid drip off as possible. You can pat the strips dry with paper towels if you like, although it’s not usually necessary.
Arrange the strips in a single layer on the dehydrator trays, leaving a little space between each piece so air can circulate. Don’t overlap the strips, which can prevent them from drying evenly.
5. Dehydrate the Venison
Use a temperature-controlled food dehydrator that can maintain 140°F (60°C), following the National Center for Home Food Preservation’s drying guidance. The exact drying time depends on the thickness of the strips, temperature, humidity and airflow.
In the original recipe, the jerky generally took 6–8 hours in an older fixed-temperature dehydrator. However, the appliance’s operating temperature wasn’t known. At 140°F (60°C), drying can take considerably longer. The National Center for Home Food Preservation gives a range of 10–24 hours for meat that wasn’t heated in the marinade before drying.
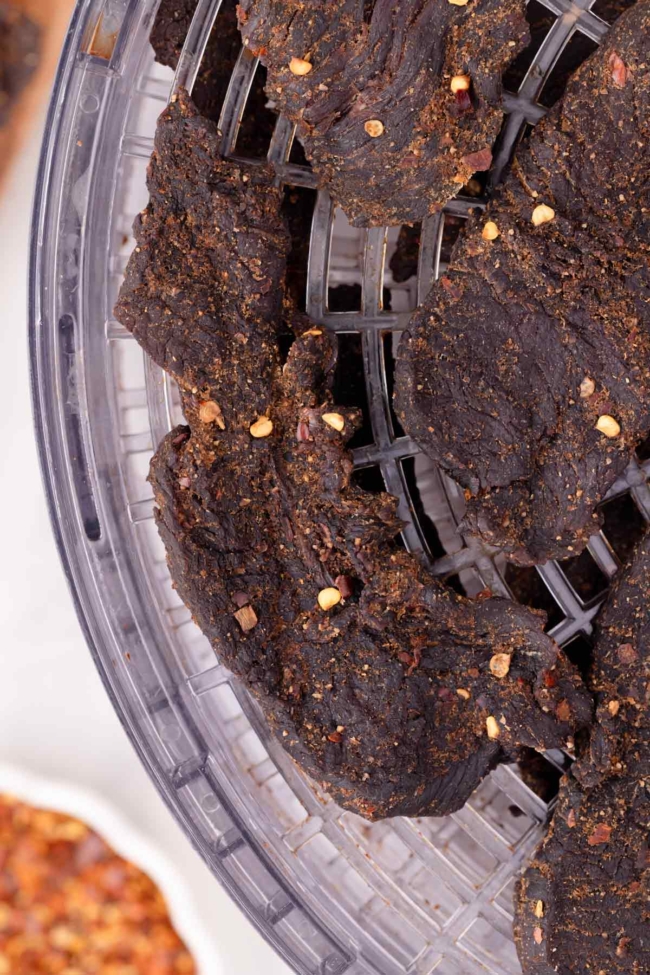
Begin checking the strips as they dry, removing individual pieces as they finish. If your dehydrator has uneven airflow, rotate the trays as needed.
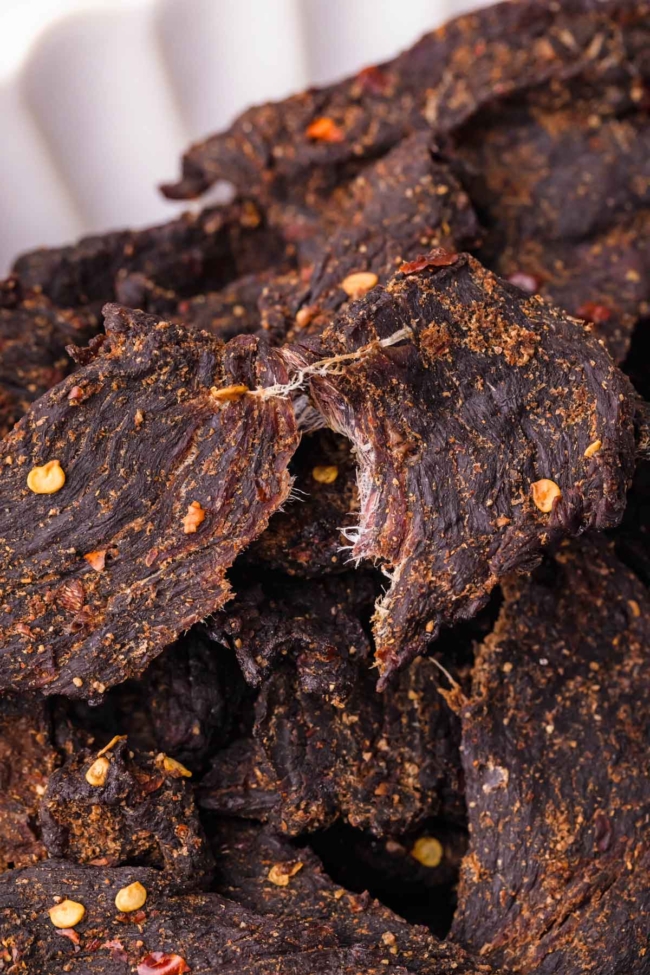
To check for dryness, remove a strip and let it cool to room temperature. Bend it gently in half. Properly dried jerky should bend and develop small cracks along the surface, with the meat fibers beginning to separate, but shouldn’t snap completely in half.
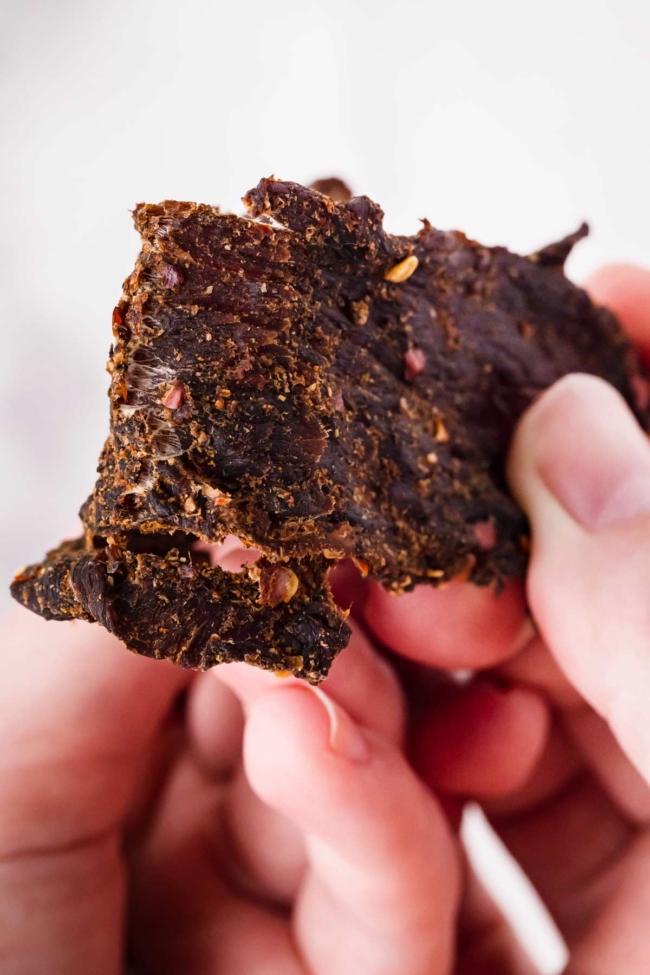
If the strip bends easily without cracking or still feels moist inside, continue dehydrating and check it again later.
The bend test helps determine when jerky is dry enough, but it doesn’t establish whether the meat has received adequate heat treatment to eliminate harmful bacteria. That’s why the additional oven step is important.
6. Heat the Jerky in the Oven
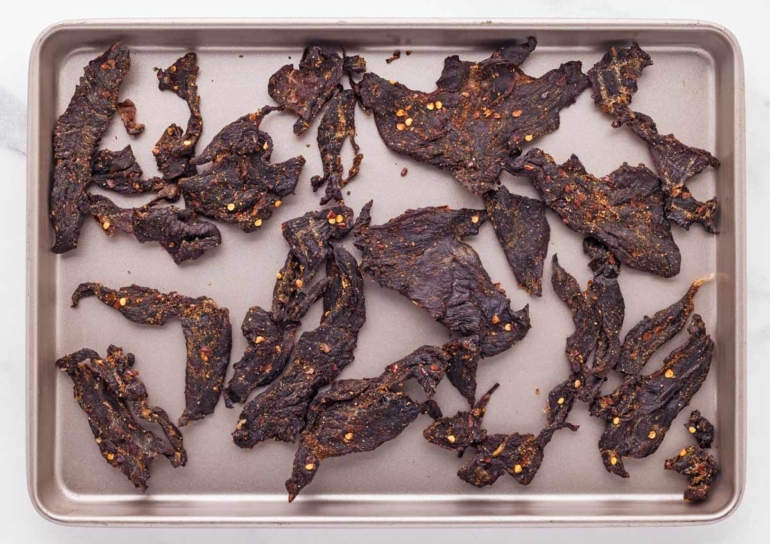
Once the jerky has finished dehydrating, preheat the oven to 275°F (135°C). Arrange the dried strips on a baking sheet in a single layer, close together but not touching or overlapping.
Place the baking sheet in the fully preheated oven for 10 minutes. This post-drying heat treatment follows the National Center for Home Food Preservation’s recommendation for strips originally sliced no thicker than 1/4 inch (0.6 cm).
I’ve tested this additional 10-minute oven treatment, and it didn’t change the jerky’s texture.
The USDA’s preferred method is to heat meat to an internal temperature of 160°F (71°C) before dehydrating, because bacteria become more heat-resistant as the meat dries. The post-drying oven treatment is an additional safety measure described by the National Center for Home Food Preservation, rather than the USDA’s preferred preheating method.
7. Cool and Store
Allow the finished jerky to cool completely before transferring it to airtight containers or vacuum-sealed bags. Refrigerate or freeze for storage.
Tips for Success
- Use a sharp, flexible knife – a fillet knife helps remove silver skin without cutting away too much meat
- Keep the slices the same thickness – in one of my batches, the thicker strips needed an additional 2 hours in the dehydrator after the thinner ones were finished. Because the jerky also needs a 10-minute oven treatment after dehydrating, uneven slices mean you’ll have to finish it in multiple batches. Take your time getting the thickness right, especially if you’re using a meat slicer.
- Partially freeze before slicing – firm meat is easier to cut thinly and evenly
- Don’t overcrowd the trays – leave space around the strips so warm air can circulate
- Rotate trays if needed – depending on your dehydrator, some trays may dry faster than others
- Cool before checking doneness – warm jerky feels more flexible than cooled jerky, so let a test piece cool before bending it
Troubleshooting
Do You Need Curing Salt for Venison Jerky?
No curing salt is needed for the method used in this recipe. Instead, the jerky is dehydrated and then given an additional 10-minute oven treatment following the National Center for Home Food Preservation’s recommendations. Be sure to follow the temperature, thickness and drying instructions carefully, and refrigerate or freeze the finished jerky rather than relying on it being shelf-stable.
Why Is My Venison Jerky Still Soft?
Jerky that’s still soft or moist inside may need additional drying time. The most common causes are strips that are too thick, uneven slicing, overcrowded trays or uneven airflow in the dehydrator.
Let a strip cool before checking it, since warm jerky will feel softer and more flexible. If it still feels moist inside or bends without developing small surface cracks, continue drying and check again periodically.
Why Is My Venison Jerky Tough?
Venison is naturally very lean, so homemade jerky will always have some chew. But if it’s especially tough, you may have sliced with the grain, cut the strips too thick or dried them longer than necessary.
For jerky that’s easier to chew, slice against the grain and keep the strips closer to 1/8 inch (0.3 cm) thick.
Do I Need to Flip Venison Jerky While Dehydrating?
Usually not. Most dehydrators circulate warm air around the meat, so you generally don’t need to flip the strips if they’re arranged in a single layer without overlapping.
However, if your dehydrator has uneven airflow, rotating the trays partway through drying can help.
Can You Marinate Venison Jerky Too Long?
It’s best to stay within the recommended 8–24-hour marinating window. Leaving the meat in a salty marinade for much longer can make the flavor too salty and may affect the texture.
Always marinate venison in the refrigerator, not at room temperature.
How Much Jerky Does 2 Pounds of Venison Make?
Two pounds (907 grams) of trimmed raw venison will make substantially less jerky after drying because so much moisture is removed. The recipe estimates approximately 3/4–1 pound (340–454 grams) of finished jerky, but the exact yield depends on the meat’s starting moisture content and how thoroughly it’s dried.
Make Ahead & Storage
Make ahead – you can prepare the marinade and slice the venison ahead of time. Once combined, keep the meat covered in the refrigerator for 8–24 hours before dehydrating.
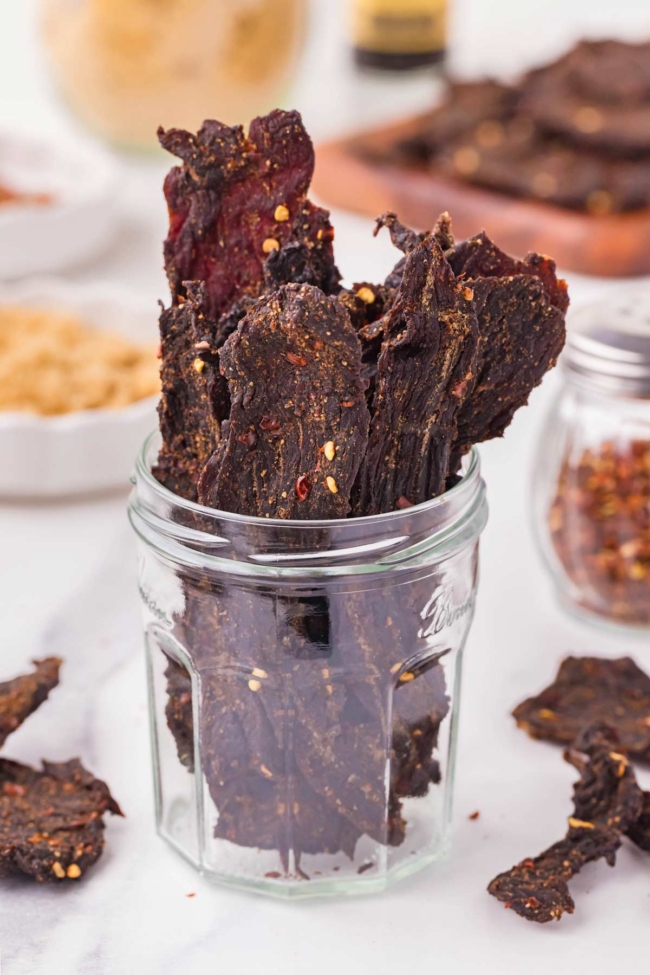
Refrigerating – allow properly heat-treated and thoroughly dried jerky to cool completely before transferring it to an airtight container or sealed bag. For a conservative approach, refrigerate and use within 1–2 weeks.
Freezing – freeze the completely cooled jerky in airtight freezer-safe bags or vacuum-sealed packages for up to 2 years. Portion it before freezing so you can remove only what you need. Thaw in the refrigerator.
The National Center for Home Food Preservation recommends refrigeration or freezing for the best storage quality. Don’t assume homemade jerky is shelf-stable unless it has been properly processed and dried.
More Venison Recipes
Have more venison in your freezer? Here are some other delicious ways to use it.
- Venison Chili – a hearty chili with ground venison, beans and tomatoes, with slow cooker and stovetop directions.
- Venison Hamburger Helper – a homemade version of the classic comfort food with ground venison, pasta and cheddar cheese.
- Venison Burgers – juicy burgers made with ground venison and cooked in a cast-iron skillet.
- Venison Casserole – a hearty baked ziti with ground venison, tomato sauce, sour cream and mozzarella.
- Venison Tenderloin – tender pan-seared venison finished with garlic herb butter.
For two more ways to use venison, my venison stew is perfect for tougher cuts that benefit from slow cooking, while this venison backstrap is a great choice when you want something special for dinner.
Have you tried making homemade venison jerky? I’d love to hear whether you prefer yours mild or spicy, with or without brown sugar! Leave a comment and recipe rating below.
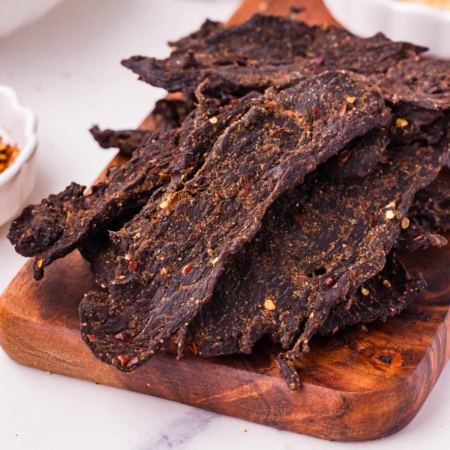
Venison Jerky
Ingredients
- 2-2 1/2 pounds (907-1133 grams) boneless, lean venison, preferably a hindquarter cut such as top round, bottom round or eye of round weighed after trimming
- 1/2 cup (118 ml) Worcestershire sauce
- 1/2 cup (118 ml) soy sauce
- 3 tablespoons packed light brown sugar
- 1 tablespoon onion powder
- 1 tablespoon garlic powder
- 2 teaspoons smoked paprika
- 1 1/2 teaspoons coarsely ground black pepper
- 1 1/2 teaspoons crushed red pepper flakes or to taste
Instructions
- Using a sharp knife, remove all visible fat, silver skin and connective tissue from the venison. Slice into uniform strips 1/8–1/4 inch (0.3–0.6 cm) thick. For jerky that's easier to chew, slice against the grain (across the muscle fibers). For firmer, chewier jerky, slice with the grain (in the same direction as the fibers). Keep the strips as uniform as possible. In one batch, my thicker strips took an additional 2 hours to dry. Uneven slices also mean you'll need to do the final oven treatment in separate batches.
- In a large mixing bowl, whisk together the Worcestershire sauce, soy sauce, brown sugar, onion powder, garlic powder, smoked paprika, black pepper and crushed red pepper flakes until the brown sugar is mostly dissolved and the seasonings are evenly combined.
- Add the sliced venison and toss until all the strips are thoroughly coated. Cover and refrigerate for 8–24 hours, turning occasionally to redistribute the marinade.
- Drain the venison, allowing excess marinade to drip off. Pat dry with paper towels if desired. Discard the used marinade.
- Arrange the venison strips in a single layer on the dehydrator trays, leaving a little space between each piece. Don’t overlap the strips.
- Set a temperature-controlled dehydrator to 140°F (60°C). Dehydrate until the strips are dry, checking individual pieces as they finish and rotating trays if necessary. The original recipe typically took 6–8 hours in a fixed-temperature dehydrator. At 140°F (60°C), drying may take considerably longer, with the National Center for Home Food Preservation giving a range of 10–24 hours for meat not heated before drying. Judge doneness by texture rather than time alone.
- To check for dryness, remove a strip and let it cool. Gently bend it in half. Properly dried jerky should bend and develop small surface cracks, with the meat fibers beginning to separate, without snapping completely in half. If the strip feels moist inside or bends without cracking, continue drying.
- Once the jerky is dry, preheat the oven to 275°F (135°C). Arrange the strips on a baking sheet in a single layer without touching or overlapping. Heat in the fully preheated oven for 10 minutes. This post-drying treatment is recommended by the National Center for Home Food Preservation for strips originally sliced no thicker than 1/4 inch (0.6 cm), and it was tested with this recipe without a noticeable change in texture.
- Allow properly heat-treated and thoroughly dried jerky to cool completely before transferring it to an airtight container or sealed bag. For a conservative approach, refrigerate and use within 1–2 weeks. For longer storage, freeze the cooled jerky in airtight freezer-safe bags or vacuum-sealed packages for up to 2 years. Portioning it before freezing makes it easy to remove just what you need. Thaw in the refrigerator.
Notes
- Timing – the total time is based on 8 hours of marinating and 10 hours of dehydrating. Marinating can take up to 24 hours, and dehydrating may take 10–24 hours. Allow additional time for cooling.
- Liquid aminos – can replace soy sauce 1:1, with no noticeable difference in flavor.
- Brown sugar – omit for a savory version, use less for a subtler sweetness, or increase to 1/4 cup (50 grams) for sweeter jerky.
- Spice level – 1 1/2 teaspoons of crushed red pepper flakes produces mild heat. Increase to 1 tablespoon for noticeably spicier jerky, or reduce or omit for less heat.
- Gluten-free option – use gluten-free soy sauce or verified gluten-free liquid aminos and gluten-free Worcestershire sauce.
- The nutrition information provided is calculated as a courtesy and is only an estimate. I am not a licensed nutritionist or dietitian. For the most accurate nutritional data, consult a professional or use your preferred calculator.









Leave A Reply!