Whole wheat sourdough bread can still have a soft, well-structured crumb, and this 50/50 loaf is designed to do exactly that. Equal amounts of bread flour and whole wheat flour give it plenty of whole wheat character without producing an overly dense loaf.
This is a higher-hydration dough, so it should feel soft and tacky, but it should also develop enough strength to hold together and maintain its shape. The additional water is worked in gradually, which lets you stop when the dough has reached the right consistency for the flour you’re using.
If you’re newer to sourdough and want to start with a more basic loaf first, try my Overnight Sourdough Bread. For another overnight loaf with a soft crumb, honey and oats, try my Honey Oat Sourdough.
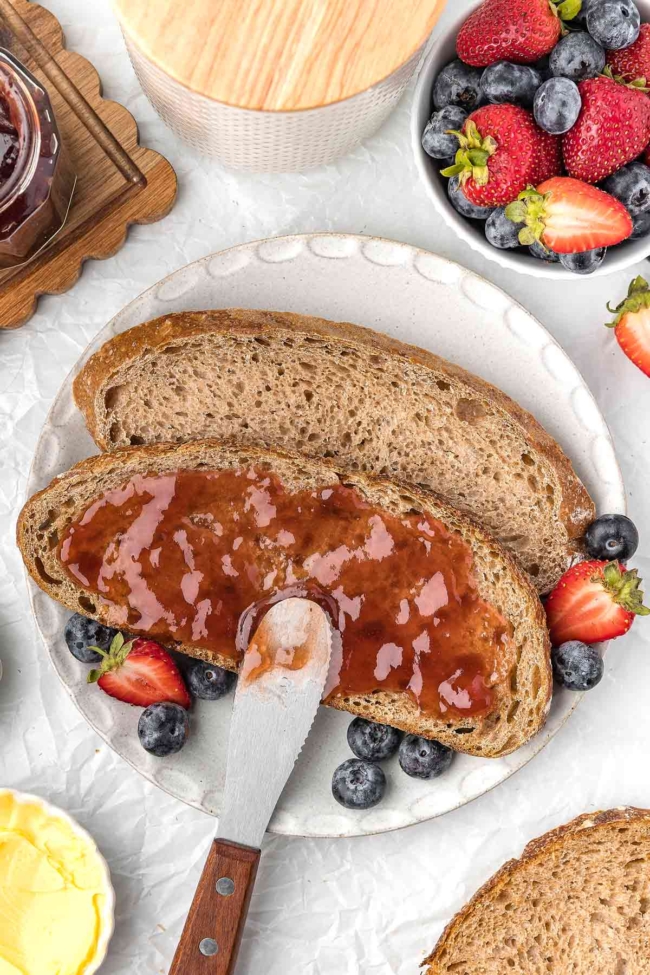
What’s to Love
- 50/50 whole wheat loaf – equal amounts of bread flour and whole wheat flour give it plenty of whole wheat flavor without making it overly dense.
- Soft, well-structured crumb – the higher-hydration dough bakes up with a soft interior while still holding its shape well.
- Flexible water amount – add the reserved water gradually and stop when the dough reaches the right consistency for your flour.
- Overnight cold proof – shape the loaf in the evening and bake it the next morning.
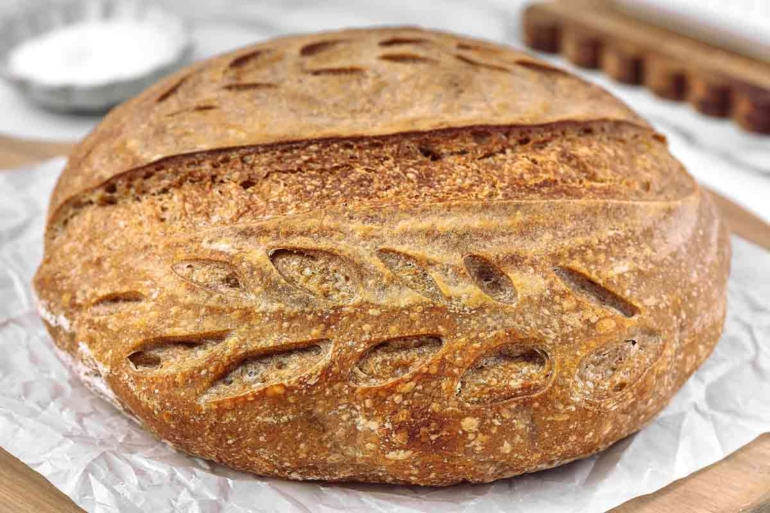
Ingredients
Please scroll down for the full recipe. These are just notes on select ingredients.
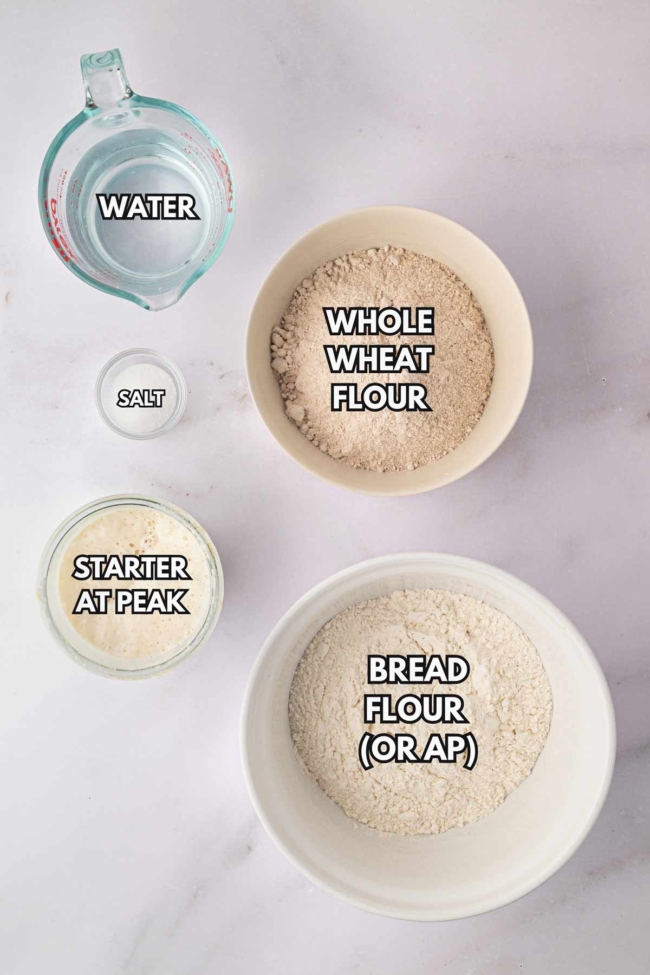
- Sourdough starter – use a ripe, active 100%-hydration sourdough starter. The levain is a small portion of starter that’s fed specifically for this loaf. To prepare the levain, you’ll combine 25 grams of starter with bread flour, whole wheat flour and water, then let it rise until it’s bubbly, active and near its peak. This generally takes 3-5 hours, depending on the temperature and activity of your starter. If you have discard to use instead, try these Sourdough Cinnamon Muffins.
- Bread flour – this recipe was tested with King Arthur Bread Flour. Its gluten strength helps support both the 50% whole wheat flour and the higher hydration.
- All-purpose flour – Costco Organic All-Purpose Flour was also tested successfully in place of the bread flour. This particular flour has relatively high protein for an all-purpose flour, so other lower-protein all-purpose flours may behave differently, especially when you add the reserved water.
- Whole wheat flour – King Arthur Whole Wheat Flour was used during testing. It gives the loaf its deeper whole wheat flavor, and dough containing this much whole wheat can ferment more quickly than a mostly-white sourdough.
- Water – start with 350 grams in the autolyse, then add up to another 35 grams gradually as needed. Whole wheat flour absorbs more water than white flour, which is one reason this dough can handle a relatively high hydration. A version using 370 grams total added water was also tested successfully, while the full 385 grams worked well when incorporated gradually. With all 385 grams, the total hydration is approximately 87%. You may not need that much water, since flour brand, age and storage conditions, along with your environment, can all affect absorption.
How to Make It
This is an overview of the process. See the recipe card below for the full measurements and detailed instructions.
Prepare the levain – combine the ripe starter, bread flour, whole wheat flour and water. Let it rise for about 3-5 hours, or until it’s bubbly, active and near its peak.
Autolyse the flour – mix the bread flour, whole wheat flour and 350 grams of water until there are no dry spots. Cover and rest for 30 minutes. This gives the flour time to hydrate and begins gluten development before the levain and salt are added.
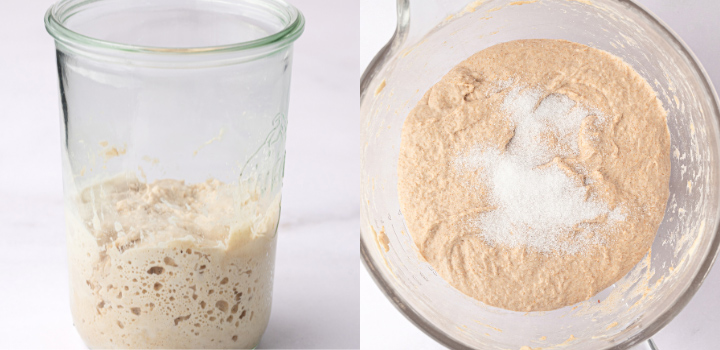
Mix the dough – incorporate the levain by hand or with a stand mixer according to the directions in the recipe card. Gradually work in the salt and up to 35 grams of additional water. The goal is a soft, tacky and cohesive dough that still has enough strength to hold together. Don’t assume you need all of the water. Don’t worry if it temporarily looks messy – when the additional water goes in, the dough may become loose, slippery or even look as though it’s falling apart. Continue working it and give the gluten time to reorganize. It should start coming back together.
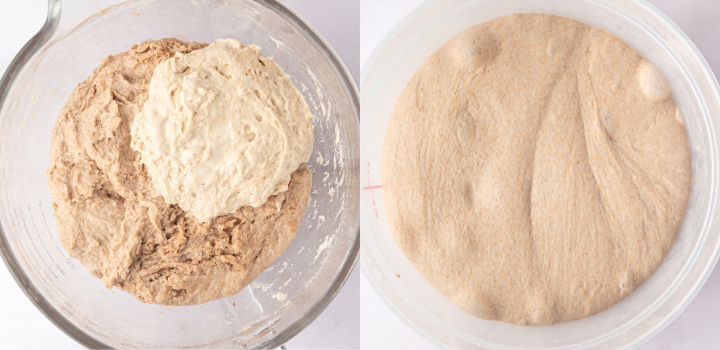
Perform the stretch-and-folds – do 3 sets about 30 minutes apart. For each set, gently stretch one side of the dough upward and fold it over itself, then rotate the bowl and repeat on all four sides. Avoid aggressively stretching the dough, especially once it becomes more aerated. If it still feels loose after the third set, add a fourth.
Finish bulk fermentation – continue fermenting until the dough has visibly risen and looks aerated, puffy and pillowy. You should see bubbles developing along the sides or surface, and the dough should have a gentle jiggle when you move the bowl. Don’t wait for it to double in size.
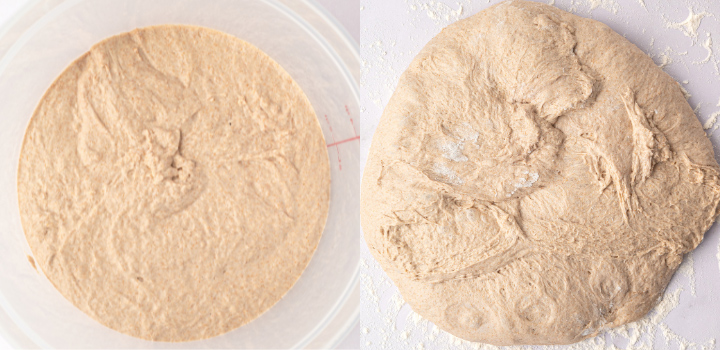
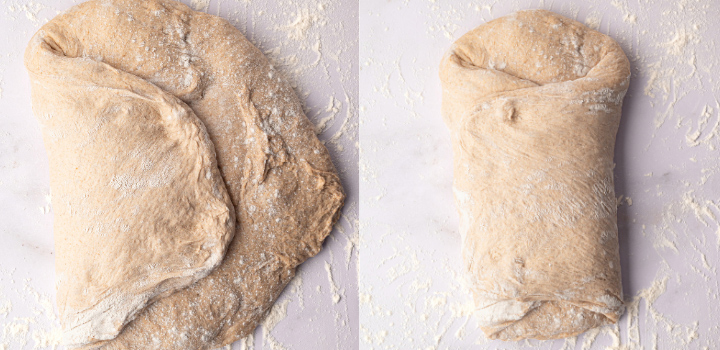
Preshape the dough – turn it onto a lightly floured surface and gently form a loose round, using a bench scraper to create some surface tension without pressing out the air. Rest uncovered for about 20 minutes. Keeping this preshape produced a taller, more structured boule during testing.
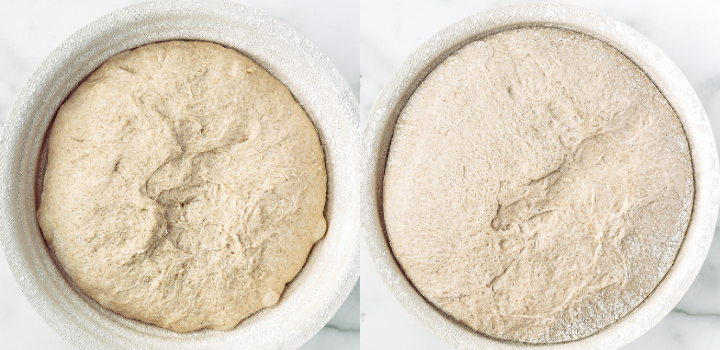
Shape and cold proof – shape the dough into a tight boule without aggressively degassing it, then place it seam-side up in a well-floured 9-10-inch (23-25-cm) banneton. Cover and refrigerate for 10-14 hours.
Bake – preheat a covered Dutch oven at 475°F (245°C) for about 30 minutes. Score the cold loaf and bake it covered for 25 minutes. Once the center is around 190°F (88°C) or higher, uncover it, reduce the temperature to 450°F (230°C) and continue baking for about 20-25 minutes, or until deeply golden and 205-210°F (96-99°C) inside.
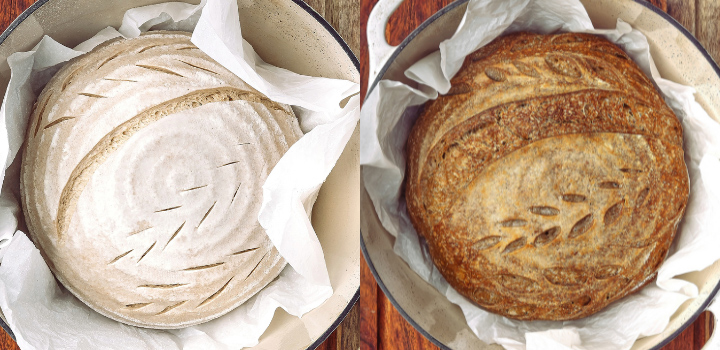
Cool completely – wait at least 2 hours before slicing. Cutting into the bread too early can release steam before the crumb has finished setting and can leave it gummy.
Tips for Success
- Protect the bottom crust if necessary – if your oven tends to brown the bottom of sourdough too quickly, place an empty baking sheet on the rack directly below the Dutch oven to help buffer the heat.
- Extra steam is optional – the covered Dutch oven already traps enough steam for good oven spring. If your Dutch oven manufacturer says it’s safe, you can add 2-3 ice cubes beside the parchment for additional steam.
- For more even browning – during the final few minutes, you can carefully move the loaf to an oven-safe wire rack set over a baking sheet.
Troubleshooting
My dough is sticky – a tacky dough is expected here. This is a higher-hydration dough, and whole wheat flour absorbs water differently than white flour. Avoid adding extra flour unless it’s absolutely necessary, since that can make the finished loaf denser. As the gluten develops through mixing and folding, the dough should become smoother and more manageable.
My dough looks like it’s falling apart after I add the water – that’s normal. Adding water after gluten development has already begun can temporarily make the dough look loose, slippery or broken. Continue mixing and folding, and it should gradually come back together.
The dough becomes very loose as I add the extra water – stop adding it. The additional 35 grams is a maximum, not a requirement. The dough should remain soft and tacky but still cohesive and strong enough to hold together.
My dough still feels weak after 3 stretch-and-folds – add a fourth set. Three sets are usually sufficient, but the dough itself is the best guide. If it already feels smooth, strong and able to hold its shape after the third set, you don’t need another.
I’m not sure when bulk fermentation is finished – don’t wait for the dough to double. Look for visible expansion, bubbles, an aerated and pillowy texture and a gentle jiggle when the bowl is moved. Whole wheat can ferment quickly, and starter strength, dough temperature, room temperature and flour can all affect the timing. The dough cues matter more than the clock.
Can I skip the preshape? – you can, but it was worth keeping during testing. The preshape helps organize the dough and build surface tension before final shaping, and it produced a taller, more structured boule.
Can I cold proof the loaf longer than 14 hours? – fermentation slows in the refrigerator, but it doesn’t stop completely. The target for this loaf is 10-14 hours. Around 16 hours can be a reasonable upper limit depending on your refrigerator and dough temperature, but a significantly longer proof increases the risk of overproofing, weakened structure and a loaf that spreads more during baking.
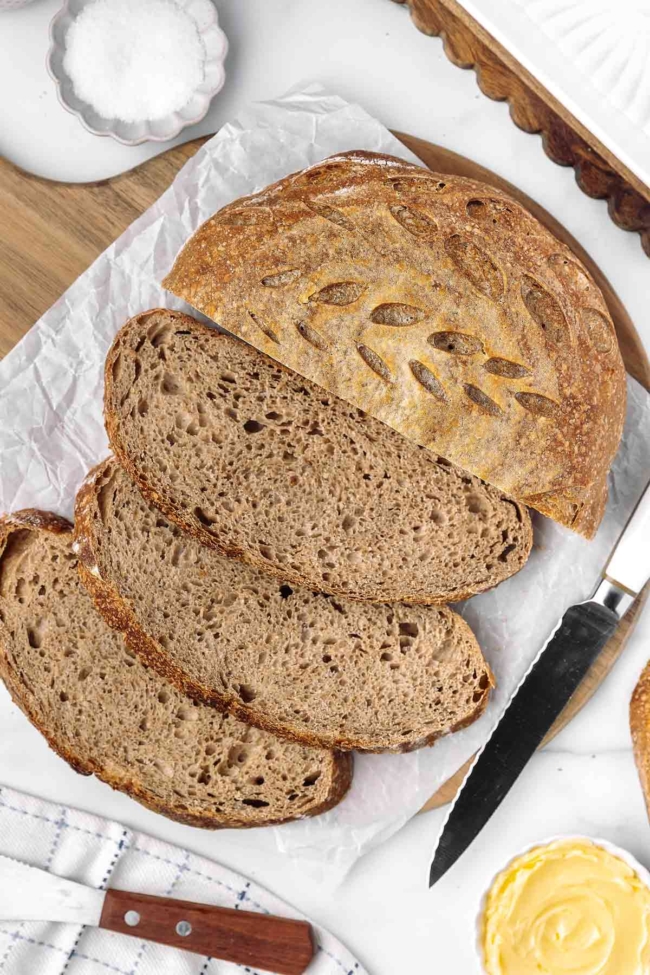
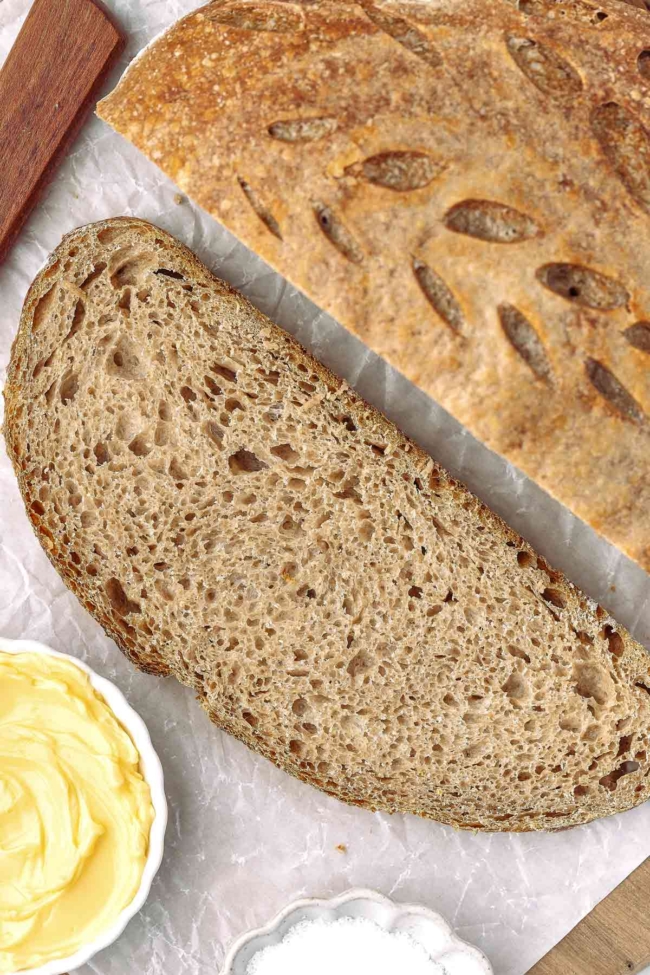
The crumb seems gummy – check the center of the loaf after the first 25 minutes of covered baking. It should be around 190°F (88°C) or higher before you remove the lid. Finish baking until the center reaches 205-210°F (96-99°C), and don’t slice the loaf for at least 2 hours after baking.
Suggested Timeline
Sourdough timing can vary depending on starter activity, dough temperature, room temperature and other environmental factors. The schedule below is simply a helpful planning example. Use the dough cues in the recipe rather than the clock alone.
| Time | What to Do |
|---|---|
| 10:00 AM | Prepare the levain and let it become active and bubbly, about 3-5 hours. |
| 1:30-2:30 PM | Once the levain is ready, mix the dough and begin the autolyse. Continue with the remaining mixing steps. |
| 2:30-7:00 PM | Complete the stretch-and-folds and bulk fermentation, depending on dough temperature and activity. Follow the dough cues rather than the clock alone. |
| 7:00 PM | Preshape and shape the dough. |
| 7:30 PM | Cover and refrigerate the shaped loaf. |
| 5:30-9:30 AM the next morning | Bake after approximately 10-14 hours of cold proofing. |
Try not to extend either fermentation stage simply because the clock says you have more time. The dough should be ready for shaping when it shows the signs described in the recipe. If it finishes bulk fermentation earlier than expected, it’s better to shape and refrigerate it rather than intentionally extending bulk fermentation.
Make Ahead & Storage
The overnight cold proof is built into the recipe, making this a convenient loaf to prepare the day before you want to bake it. Once shaped, refrigerate the dough for 10-14 hours and bake it cold from the refrigerator the next morning.
Let the loaf cool completely before storing it. Keep it at room temperature in a bread bag or another breathable container for up to 3 days.
For longer storage, slice the completely cooled loaf and freeze it in an airtight freezer bag for up to 3 months. Remove individual slices as needed and thaw them at room temperature or gently reheat them.
And if you have bread that’s beginning to get stale, it’s perfect for using in this Panzanella Salad.
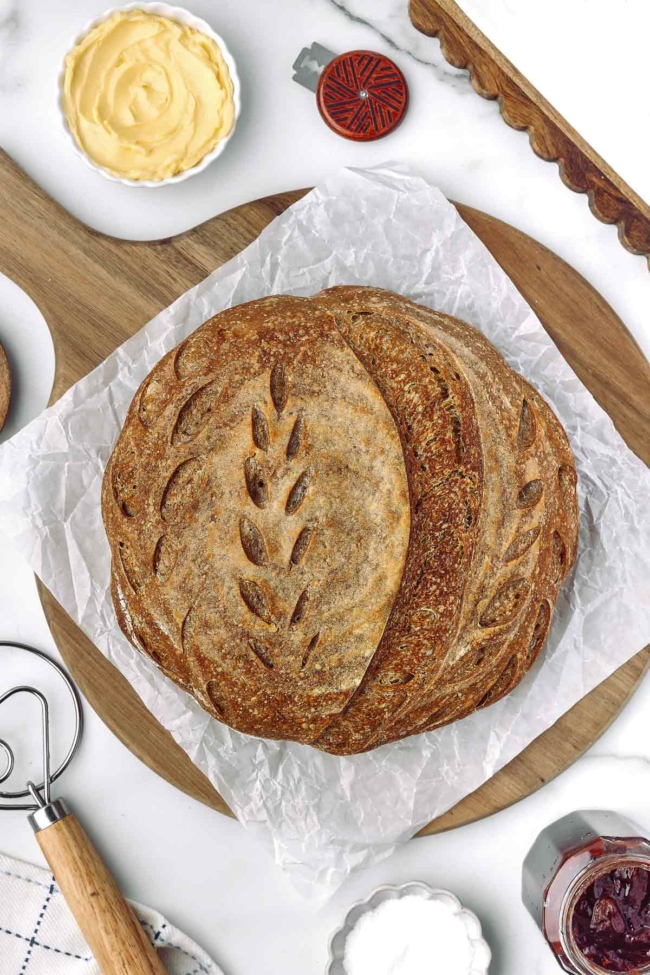
What to Serve With Whole Wheat Sourdough Bread
The whole wheat flavor works especially well with soups and other hearty meals, while toasted slices are great for breakfast.
- Corn Chowder – serve thick slices alongside the creamy corn and potato chowder.
- Instant Pot Bean Soup – a hearty soup that’s great with sourdough on the side.
- Instant Pot Colcannon Soup – the tangy whole wheat bread pairs well with the creamy potato soup.
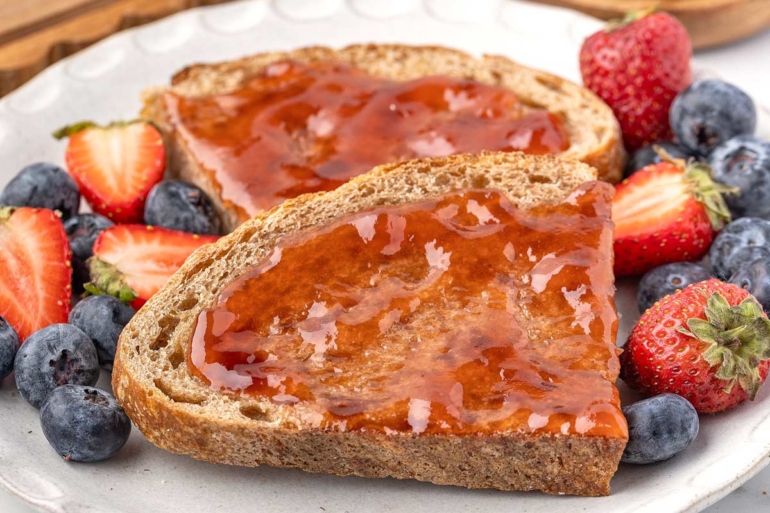
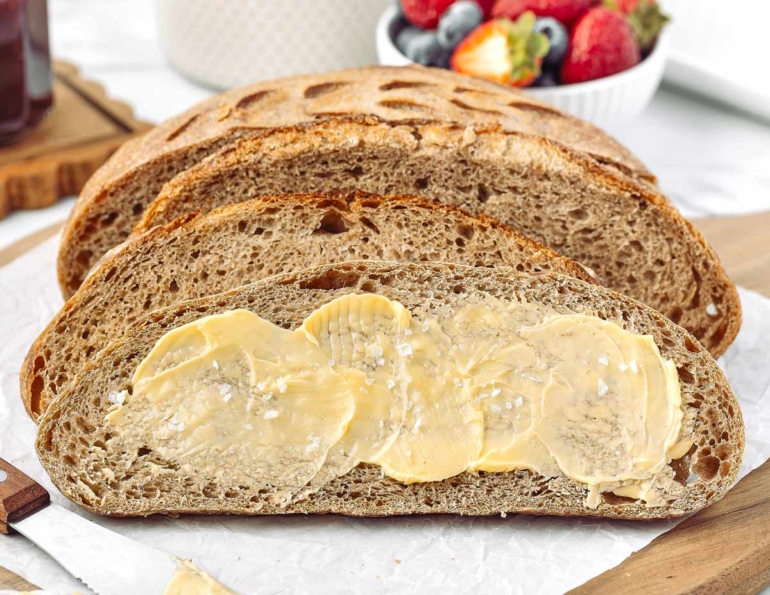
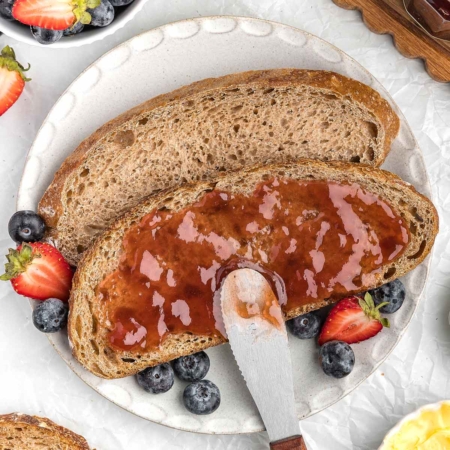
- For breakfast – toast a slice and serve it with butter, jam, eggs or your favorite spread.
Have you tried this 50/50 Whole Wheat Sourdough Bread?
I’d love to hear how it turned out! Leave a comment below and let me know.
Whole Wheat Sourdough Bread
Ingredients
Levain:
- 25 grams ripe 100%-hydration sourdough starter
- 25 grams bread flour I used King Arthur Bread Flour
- 25 grams whole wheat flour I used King Arthur Whole Wheat Flour
- 50 grams water
Dough:
- 225 grams bread flour
- 225 grams whole wheat flour
- 350 grams water plus up to 35 grams additional water as needed
- 125 grams ripe levain
- 11 grams fine sea salt
Instructions
Prepare the levain:
- Combine the sourdough starter, bread flour, whole wheat flour and water. Mix until no dry flour remains. Cover and let the levain rise at room temperature until it is bubbly, active and near its peak, about 3-5 hours depending on temperature and starter activity.25 grams ripe 100%-hydration sourdough starter25 grams bread flour25 grams whole wheat flour50 grams water
Autolyse:
- Add the bread flour, whole wheat flour and 350 grams water to a large mixing bowl. Mix until all of the flour is hydrated and no dry spots remain.225 grams bread flour225 grams whole wheat flour350 grams water
- Cover and let the dough rest for 30 minutes.
- This is an autolyse, which allows the flour to fully hydrate and begins gluten development before the levain and salt are added.
If mixing the dough by hand:
- Add the ripe levain to the autolysed dough. Work it into the dough by gently pinching, folding and squeezing until the levain is evenly incorporated.125 grams ripe levain
- Cover and let the dough rest for about 20 minutes.
- Sprinkle the salt evenly over the dough and work it in thoroughly. Begin adding up to 35 grams additional water gradually, working the dough between additions.11 grams fine sea salt
- You may not need all of the additional water. The goal is a soft, cohesive dough that is tacky but still has enough strength to hold together. If the dough becomes excessively loose or difficult to handle, stop adding water.
- When the additional water is added, the dough may temporarily look loose, slippery or even as though it has started to fall apart. This is normal. Continue mixing, folding and working the dough, and it will begin to come back together as the gluten develops.
- Cover and let the dough rest for 30 minutes.
If using the stand mixer method:
- After the 30-minute autolyse, add the ripe levain to the dough and mix using the dough hook on low speed for about 3-4 minutes, or until the levain is fully incorporated and the dough looks cohesive.125 grams ripe levain
- Add the salt, then gradually add up to 35 grams additional water while mixing on low speed. You may not need all of the water. Add it slowly and allow each addition to incorporate before adding more.11 grams fine sea salt
- The dough may look loose or messy when the additional water is first incorporated. Continue mixing briefly until the dough comes back together. It does not need to reach a full windowpane at this stage.
- Cover and let the dough rest for 30 minutes.
- Continue with the stretch-and-folds during bulk fermentation as directed below.
Bulk fermentation and stretch-and-folds:
- Once the dough has rested, begin the bulk fermentation stage.
- Perform 3 sets of stretch-and-folds, spaced about 30 minutes apart.
- For each set, gently stretch one side of the dough upward and fold it over itself. Rotate the bowl and repeat on all four sides. Avoid aggressively stretching the dough, especially as it becomes more aerated.
- After the third set, assess the dough. If it already feels strong and smooth and holds its shape well, no additional folds are necessary. If it still feels loose or lacks structure, perform a fourth set.
- Continue bulk fermentation after the final set of folds until the dough has visibly risen and looks noticeably aerated and puffy. You should see bubbles developing along the sides and surface, and the dough should have a soft, pillowy appearance with a gentle jiggle when the bowl is moved.
- Because this dough contains 50% whole wheat flour, fermentation can move more quickly than a mostly-white sourdough. Rather than waiting for the dough to double in size, use the appearance and feel of the dough to determine when bulk fermentation is complete.
Preshape:
- Turn the dough out onto a lightly floured work surface.
- Gently shape it into a loose round, using a bench scraper to help create some surface tension without pressing the air out of the dough.
- Let the dough rest uncovered for about 20 minutes.
Final shape:
- Lightly flour the top of the dough and carefully flip it over so the floured side is underneath.
- Shape the dough into a tight boule, creating enough surface tension for the loaf to hold its shape while still being gentle enough to preserve the fermentation you've developed.
- Place the shaped dough seam-side up in a well-floured 9-10-inch (23-25-cm) banneton.
- Cover and refrigerate for 10-14 hours.
Bake:
- Place a Dutch oven with the lid on in the oven and preheat to 475°F (245°C) for about 30 minutes.
- When ready to bake, carefully turn the cold dough onto a piece of parchment paper.
- If there is excess flour on the surface, lightly mist the loaf with water to reduce the floury appearance. Do not saturate the dough.
- Score the loaf with a lame or sharp razor.
- Carefully transfer the dough to the preheated Dutch oven and cover with the lid.
- Bake at 475°F (245°C) for 25 minutes.
- Check the internal temperature in the center of the loaf. It should be around 190°F (88°C) or higher before removing the lid. If it is still considerably below 190°F (88°C), continue baking covered for a few additional minutes and check again.
- Once the loaf reaches around 190°F (88°C) or higher, remove the lid and reduce the oven temperature to 450°F (230°C).
- Continue baking uncovered for about 20-25 minutes, or until the loaf is deeply golden brown and the internal temperature reaches 205-210°F (96-99°C).
- For more even browning, you can carefully transfer the loaf to an oven-safe wire rack set over a baking sheet for the final few minutes of baking.
- Remove the bread from the oven and allow it to cool completely on a wire rack before slicing. For the best crumb texture, allow at least 2 hours of cooling time.
Notes
- Costco Organic All-Purpose Flour was also tested successfully in place of the bread flour. Because flour strength and absorption vary, other all-purpose flours may behave differently.
- You may not need all 35 grams of additional water. A version using 370 grams total added water was also tested successfully. Add the water gradually and stop when the dough is soft, tacky and cohesive but still strong enough to hold together.
- Don't wait for the dough to double during bulk fermentation. Look for visible expansion, bubbles, a pillowy texture and a gentle jiggle when the bowl is moved.
- A 10-14 hour cold proof works well. Fermentation continues in the refrigerator, and significantly extending the proof beyond about 14-16 hours can increase the risk of overproofing.
- The nutrition information provided is calculated as a courtesy and is only an estimate. I am not a licensed nutritionist or dietitian. For the most accurate nutritional data, consult a professional or use your preferred calculator.









Leave A Reply!