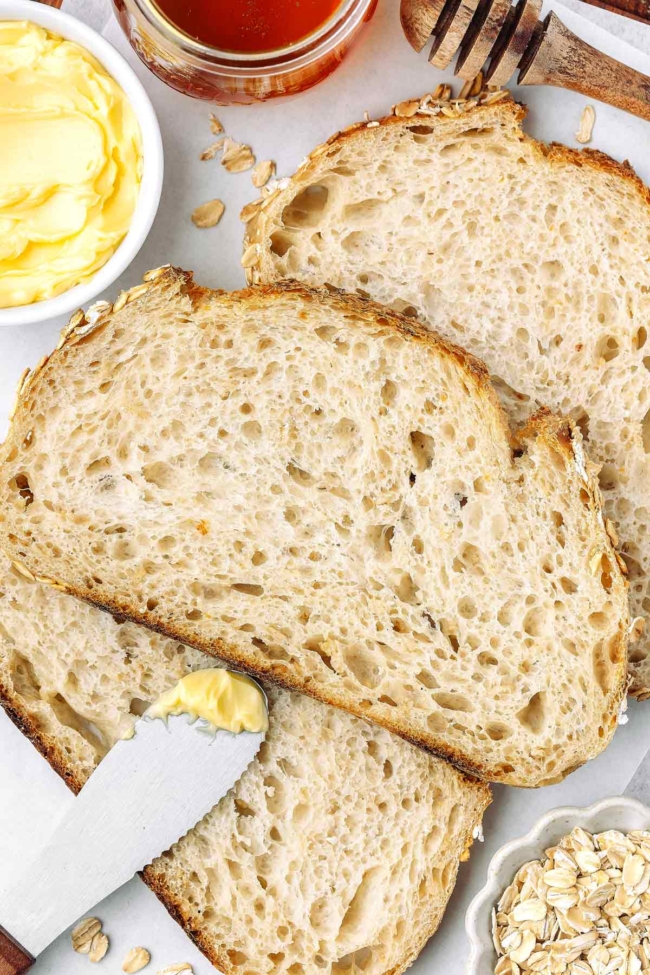
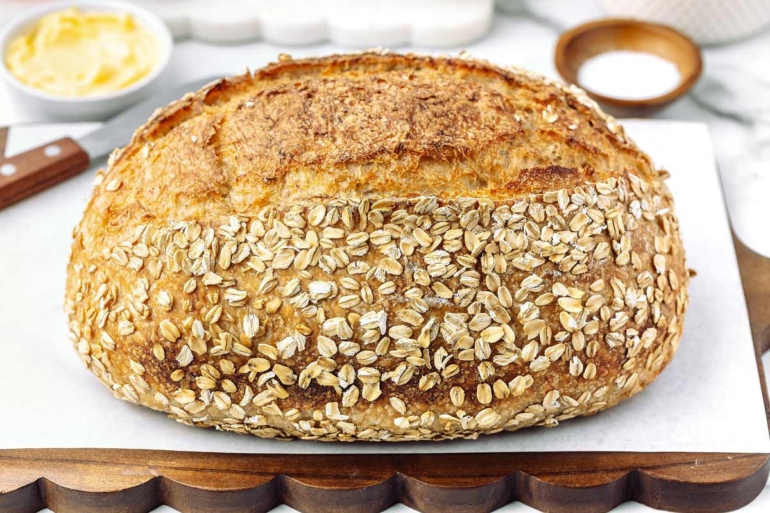
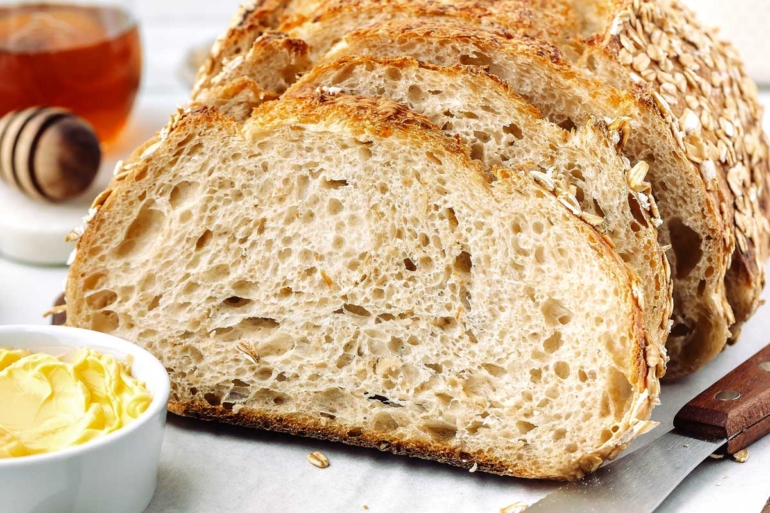
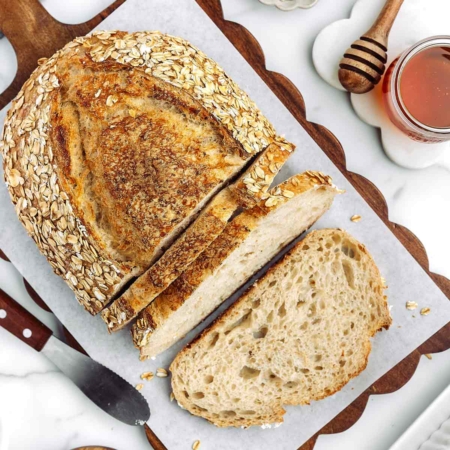
This honey oat sourdough bread has a soft, tender crumb, subtle honey sweetness, and a beautiful oat-coated crust. A small amount of whole wheat flour adds a little earthy flavor without overpowering the loaf.
This is a slightly more advanced sourdough recipe because the hydrated oats and honey make the dough softer and stickier than a basic sourdough loaf. The shaped loaf is refrigerated overnight before baking the next day, so you’ll need to plan ahead.
If you’re new to sourdough, I recommend getting comfortable with a traditional sourdough loaf like this traditional overnight sourdough bread before trying this one.
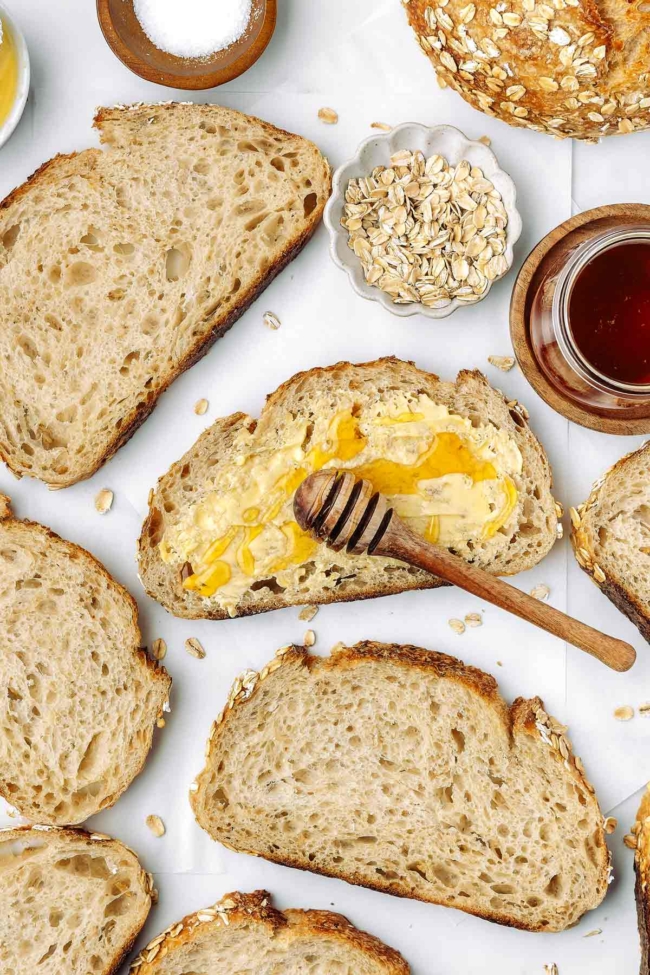
The hydrated oats keep the bread tender while adding a pleasant oat flavor and texture. The finished loaf is especially good toasted with butter and honey, but it also works well with savory toppings. And if you’re just looking to use up some sourdough starter, these sourdough cinnamon muffins are a great choice.
Ingredients
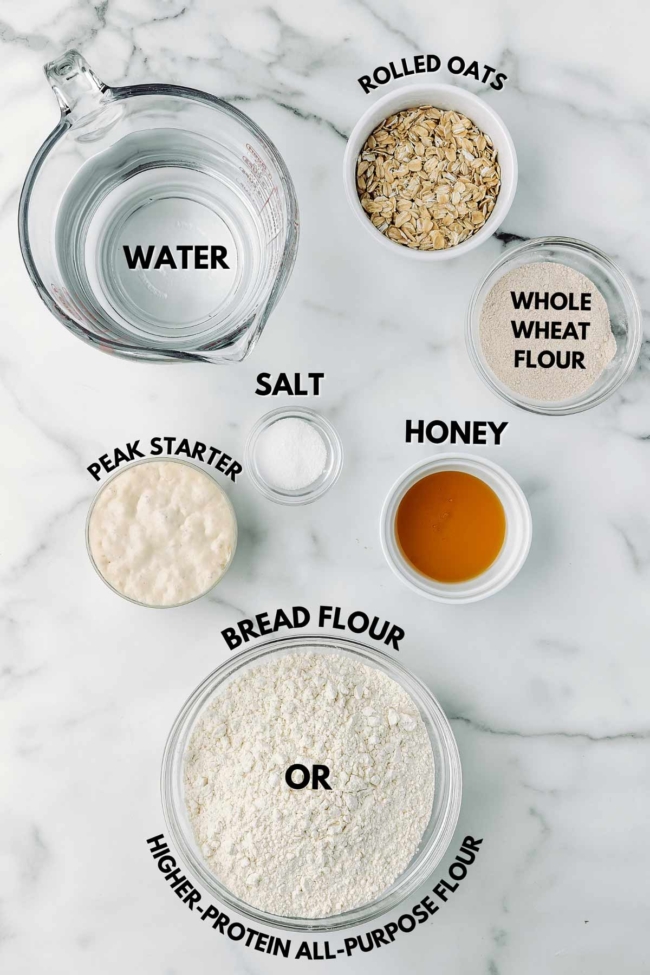
Please scroll down for the full recipe. Here are a few notes about the ingredients that matter most for this loaf.
- Oats – use old-fashioned rolled oats rather than quick oats or steel-cut oats. They’re hydrated with hot water before being added to the dough.
- Sourdough starter – use an active 100% hydration starter that is at or near its peak when you mix the dough. A weak or overripe starter can make fermentation take considerably longer.
- Bread flour or all-purpose flour with a higher protein content – bread flour or a all-purpose flour with approximately 11.5-12.5% protein works well. The dough is soft and sticky, so a stronger flour helps it develop enough strength to hold its shape. I used Costco Organic All-Purpose Flour, which has 11.5% protein. While it is labeled as all-purpose flour, its protein content is relatively high for all-purpose flour and is suitable for this bread. I live in Germany but developed and tested this recipe using US flour, so I haven’t tested it with German flour. If you’re baking outside the US, look for a flour with a similar protein content rather than relying on the name of the flour, since flour classifications and strength can vary considerably between countries.
- Whole wheat flour – a small amount adds earthy flavor and extra depth. You can replace it with more bread flour or all-purpose flour if you prefer an all-white loaf, or use rye flour for a slightly earthier flavor. For more whole wheat flavor, try my 50/50 Whole Wheat Sourdough Bread, which uses equal parts bread flour and whole wheat flour for a soft, well-structured crumb.
- Honey – honey provides mild sweetness and contributes to the soft texture of the bread. You can replace it with an equal weight of maple syrup.
- Additional rolled oats – these are used to coat the outside of the loaf. Applying them before the dough goes into the banneton helps them adhere securely.
Why hydrate the oats?
The oats are hydrated separately before they are added to the dough. This allows them to absorb water ahead of time so they stay tender in the finished bread rather than pulling moisture from the surrounding crumb. It also makes them easier to incorporate without prolonged mixing.
Let the oats cool completely before adding them to the dough. Warm oats can raise the dough temperature and affect fermentation.
How to make honey oat sourdough
This dough is softer and stickier than a basic sourdough loaf because of the hydrated oats and honey, so the process is a little different from a traditional sourdough.
As a reminder, you’ll want to have your starter at or near peak when the starter is added to the other ingredients.
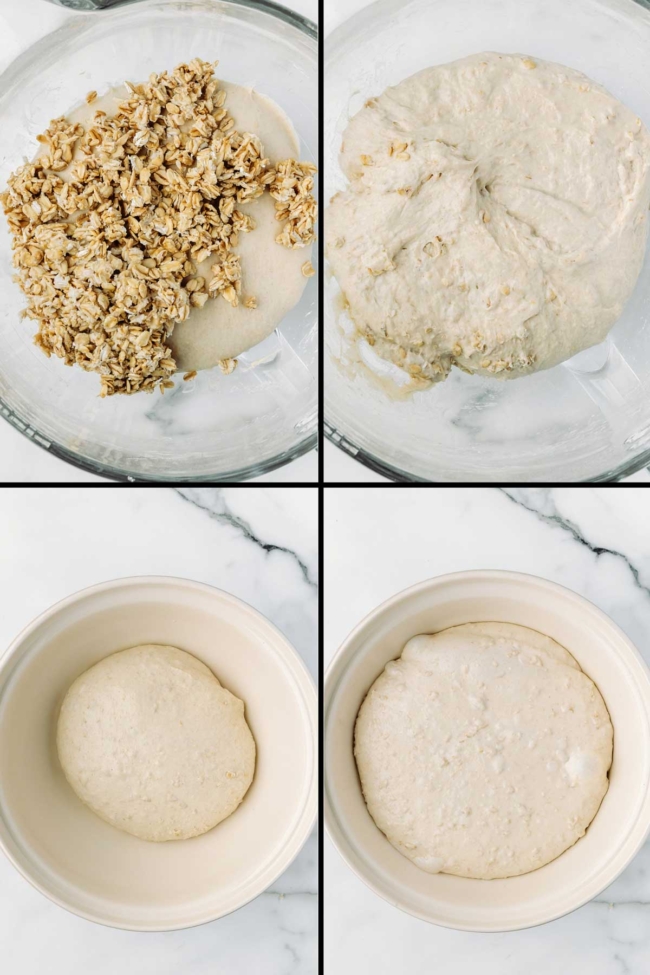
Hydrate the oats. Pour hot water over the rolled oats and let them soften. Cool completely before adding them to the dough.
Mix the dough. Combine the starter, water, honey, and flours. After a short rest, add the salt and gradually add the reserved water as needed. Continue mixing until the dough develops enough strength to pass the windowpane test.
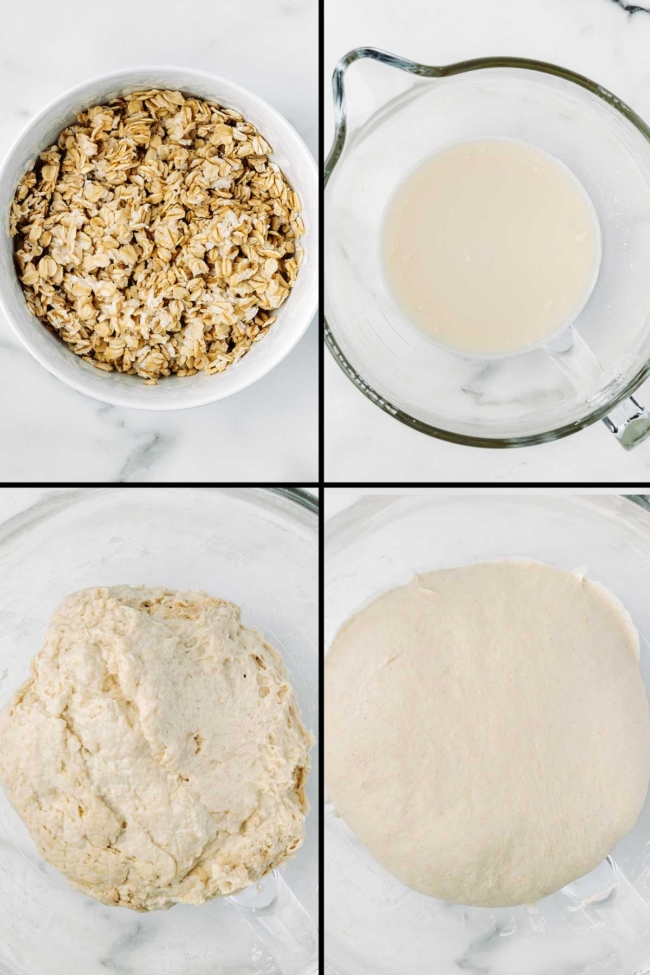
Add the oats and strengthen the dough. Mix in the cooled hydrated oats, then transfer the dough to a bowl or dough container. After a short rest, perform two coil folds about 30 minutes apart. If the dough still feels particularly slack, you can give it one additional gentle fold.
Finish bulk fermentation. Let the dough continue fermenting undisturbed until it has risen by about 30-50%, looks puffy and aerated, and jiggles gently when the container is moved.
Shape and coat with oats. Pre-shape the dough and let it rest for 15-20 minutes. Shape it into a tight round or batard, then lightly mist the outside with water and roll it in additional oats. Place it seam-side up in a lightly floured banneton. The oat coating is optional, so you can leave the loaf plain if you prefer.
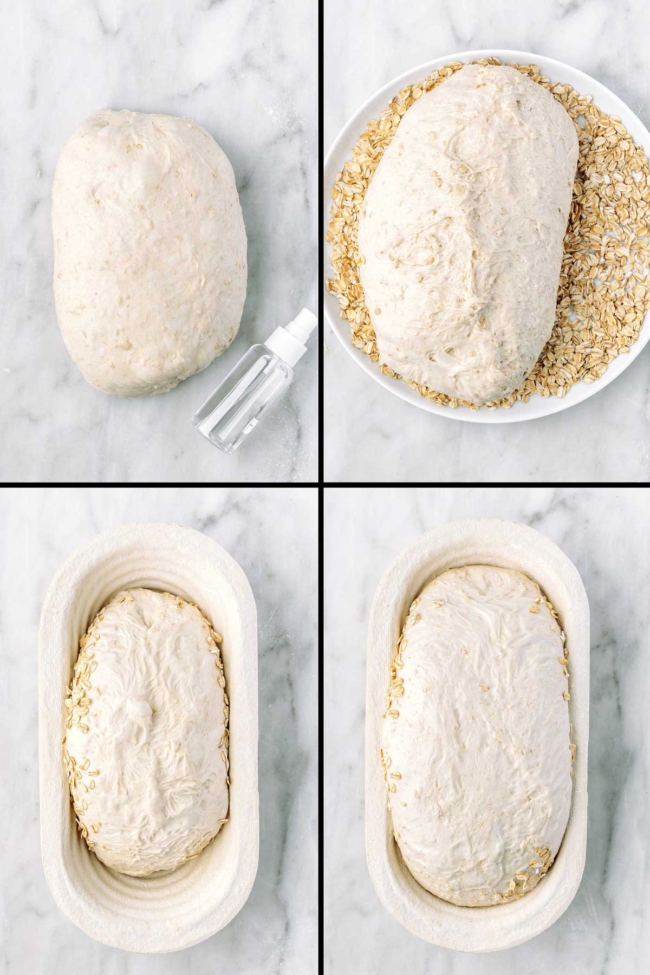
Cold proof. Cover and refrigerate for 12-16 hours.
Bake. Place a baking sheet on the rack below your Dutch oven or bread oven to help protect the bottom of the loaf from excessive direct heat. Preheat your oven and baking vessel thoroughly. Turn the cold dough onto parchment, score it with one long cut, and bake covered at 475°F (245°C). Reduce the temperature and finish uncovered until the crust is deeply golden and the center reaches approximately 205-210°F (96-99°C). The covered baking time gives the large loaf time to cook through while protecting the oat topping from becoming too dark. Removing the lid allows the crust to brown and the oats to toast.
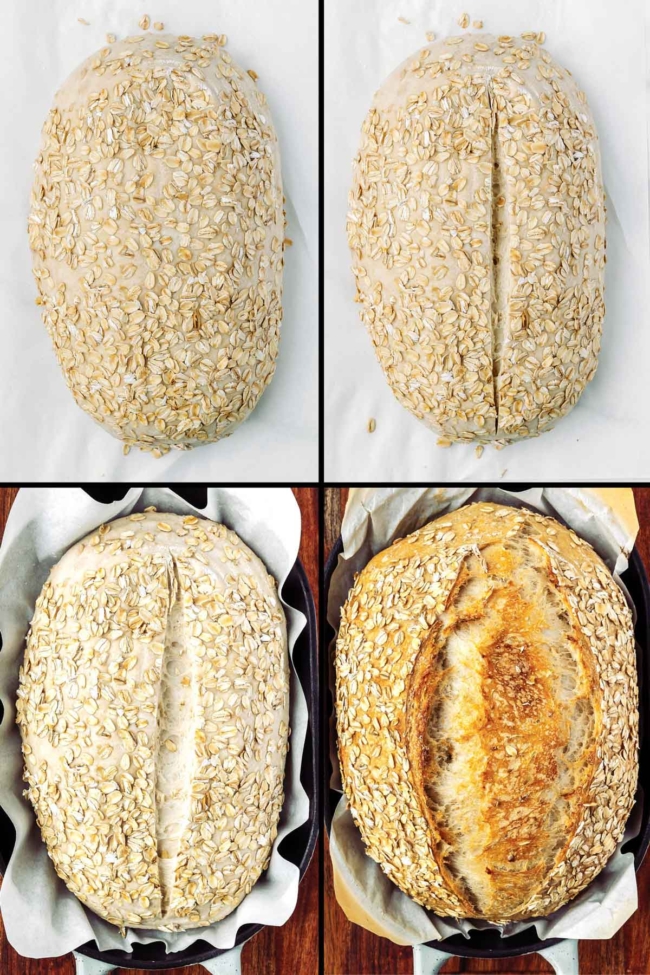
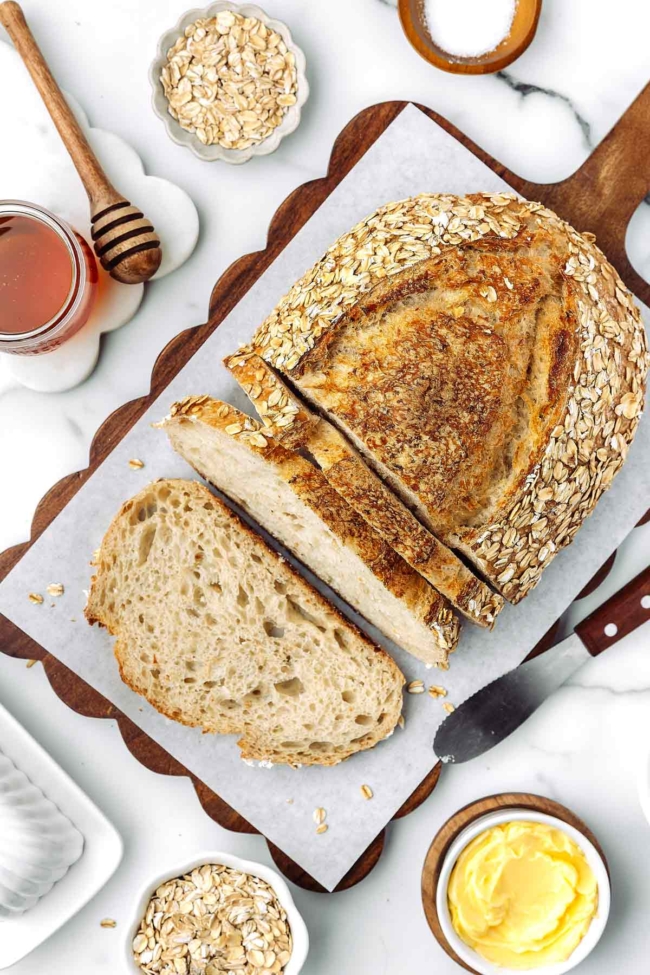
Let the bread cool completely on a wire rack before slicing. The crumb continues to set as it cools, so cutting into it while it is still warm can make it seem gummy.
Example timeline
Sourdough fermentation varies with starter strength, dough temperature, flour, and room temperature, so use this as a framework rather than a strict schedule. The timing of bulk fermentation is the biggest variable in this schedule. Do not shape the dough simply because the clock says it is time. If it reaches the proper volume and shows the other signs of readiness earlier or later, adjust the rest of the schedule accordingly.
Example schedule for bread ready to slice around 2-3 PM
This example assumes your starter typically reaches its peak about 4 hours after feeding. Adjust the feeding time according to your starter’s normal activity.
| Time | What to do |
|---|---|
| 8:00 AM | Feed your sourdough starter |
| 11:30 AM | Hydrate the oats with hot water |
| 12:00 PM | Mix the starter, 280g water, honey, and flours |
| 12:00-12:30 PM | Let the dough rest |
| 12:30 PM | Add the salt and reserved water; mix until the dough passes the windowpane test, approximately 8-10 minutes |
| About 12:40 PM | Add the cooled hydrated oats and mix until evenly distributed |
| About 12:45 PM | Transfer the dough to a bowl or dough container and gently fold it over itself 2-3 times |
| 1:15 PM | First coil fold |
| 1:45 PM | Second coil fold |
| 2:15 PM | Optional third coil fold, if needed |
| After the final fold | Continue bulk fermentation until the dough has increased by about 30-50%, looks puffy and aerated, has visible bubbles, and jiggles gently when moved |
| About 5:30 PM* | Pre-shape the dough |
| 5:30-5:50 PM | Bench rest |
| 5:50 PM | Final shape and coat the loaf with oats |
| About 6:00 PM | Place the loaf in the banneton and refrigerate for 14-16 hours |
| 8:30 AM the next day | Begin preheating the oven to 475°F (245°C) |
| 9:00 AM | Once the oven reaches 475°F (245°C), place the Dutch oven or bread oven inside and preheat the baking vessel for another 25-30 minutes |
| About 9:50 AM | Turn out and score the cold dough |
| 10:00 AM | Bake |
| 10:25-10:30 AM | Remove the lid, reduce the oven temperature to 425°F (220°C), and continue baking uncovered |
| 10:30-10:40 AM | Finish baking and transfer the bread to a cooling rack |
| About 1:30-2:30 PM | The bread should be cool enough to slice |
* The end of bulk fermentation is the least predictable part of the schedule. The 5:30 PM time is only an example based on a moderate fermentation. If the dough reaches the proper volume and shows the other signs of readiness earlier or later, shape it when it is ready and adjust the remaining schedule accordingly.
Tips for Success
- Let the hydrated oats cool completely before adding them to the dough.
- Use the windowpane test to judge gluten development rather than relying on a specific mixer time.
- Add the reserved water gradually. Depending on your flour, you may not need all of it.
- Use damp hands and a bench scraper when handling the sticky dough.
- Watch the dough during bulk fermentation rather than relying entirely on the clock. Look for a 30-50% increase in volume, a puffy appearance, bubbles, and a gentle jiggle.
- Apply the oat coating before placing the loaf in the banneton. This gives you a more even coating and helps the oats stay attached.
- Keep the loaf covered for most of the bake, then watch the oat topping closely during the uncovered portion so it becomes golden and toasted without getting too dark.
Can I make this without a stand mixer?
Yes. A stand mixer makes the dough easier to develop, but you can mix it by hand.
Combine the starter, water, honey, and flours, then let the dough rest before adding the salt. Work the dough with wet hands using folding and gentle kneading until it develops enough strength to pass the windowpane test. Add the cooled hydrated oats and gently work them into the dough.
A dough scraper and wet hands make this sticky dough much easier to handle.
Can I make the cold proof longer?
I recommend staying within the 12-16 hour range while you’re learning the recipe. Longer fermentation may work depending on your starter and refrigerator, but this dough has a soft structure and can become more difficult to handle as fermentation continues.
Storage
Allow the bread to cool completely before storing.
Store it at room temperature in a bread bag, paper bag, or loosely wrapped in a clean kitchen towel. For the best texture, enjoy it within 2-3 days.
Avoid refrigerating the finished bread unless necessary, as refrigeration can cause sourdough bread to become stale more quickly.
Freezing
This bread freezes very well. For everyday use, allow the loaf to cool completely, slice it and freeze the slices in a freezer-safe bag or container. Place parchment between the slices if desired.
Individual slices can be removed from the freezer and toasted directly from frozen.
For longer storage, you can also wrap the whole loaf well and freeze it. Let it thaw at room temperature before serving, then refresh it briefly in the oven if desired.
❤️ Have you tried this honey oat sourdough bread? ❤️
Please leave a ✍️ review and ⭐ rating to let me know how it turned out. I appreciate it so much! 💛
Honey Oat Sourdough
Ingredients
Hydrated Oats
- 60 grams (2/3 cup) old-fashioned rolled oats
- 80 grams (1/3 cup) water approximately 170°F
Dough
- 100 grams (1/2 cup) active sourdough starter
- 300 grams (1 1/4 cups) water, divided approximately 68-75°F (20-24°C)
- 30 grams (1 1/2 tablespoons) honey
- 400 grams (3 1/3 cups) bread flour or higher-protein all-purpose flour see notes
- 50 grams (1/3 cup + 1 tablespoon) whole wheat flour
- 10 grams (1 3/4 teaspoons) kosher salt
- additional flour for dusting and shaping as needed
- additional rolled oats for coating as needed
Instructions
- Combine the rolled oats and 80g of the water, heated to approximately 170°F (77°C), in a small bowl. Stir well to make sure all of the oats are moistened. Cover and let sit for at least 30 minutes, or until the oats are soft and have absorbed the water. Set aside to cool completely before adding to the dough.60 grams (2/3 cup) old-fashioned rolled oats80 grams (1/3 cup) water
- Add the active sourdough starter, 280g of the room-temperature water, and honey to the bowl of a stand mixer fitted with a dough hook. Mix briefly on low speed until the starter and honey are evenly distributed.100 grams (1/2 cup) active sourdough starter300 grams (1 1/4 cups) water, divided30 grams (1 1/2 tablespoons) honey
- Add the bread flour and whole wheat flour. Mix on low speed just until no dry flour remains and a rough dough forms. Cover and let rest for approximately 30 minutes.400 grams (3 1/3 cups) bread flour or higher-protein all-purpose flour50 grams (1/3 cup + 1 tablespoon) whole wheat flour
- Add the salt and begin mixing on low speed. Gradually add some or all of the remaining 20g water as needed. Continue mixing until the dough becomes smoother, more elastic, and develops enough strength to pass the windowpane test. To test the dough, take a small piece and gently stretch it between your fingers. It should stretch thin enough to see light through it without immediately tearing.10 grams (1 3/4 teaspoons) kosher salt
- The windowpane test is more important than the mixing time. In a KitchenAid-style stand mixer, this may take approximately 8-10 minutes, but mixing time will vary depending on your mixer, flour, speed, and dough temperature. Do not continue mixing simply to reach a specific amount of time if the dough has already developed sufficient strength.
- Check the dough temperature during mixing if possible. A finished dough temperature around 75-78°F (24-26°C) is ideal, although a slightly warmer or cooler dough can still work. If the dough becomes too warm during mixing, stop the mixer and allow the dough to rest and cool before continuing. Mixer friction can raise the dough temperature quickly, particularly if the mixer bowl is already warm from a previous batch.
- Once the dough passes the windowpane test, add the cooled hydrated oats. Mix on low speed for approximately 1-2 minutes, or just until the oats are evenly distributed. Avoid prolonged mixing once the oats have been added.
- Transfer the dough to a lightly greased or dampened bowl or dough container. Using damp hands, gently fold the dough over itself 2-3 times to bring it together into a cohesive ball and encourage even distribution of the oats. This does not count as one of the formal coil folds.
- Cover the dough and let rest for approximately 30 minutes.
- Perform a coil fold. With damp hands, gently slide both hands underneath the center of the dough and lift it upward, allowing the ends to stretch and drape underneath. Lower the dough back into the bowl, then rotate the bowl and repeat on the opposite side. The goal is to gently strengthen the dough without aggressively stretching or tearing it.
- Perform a second coil fold approximately 30 minutes later. If the dough still feels particularly slack, you can perform one additional gentle coil fold another 30 minutes later. If the dough already feels strong and holds its shape well, two coil folds are sufficient.
- Continue bulk fermentation after the final coil fold. The time spent resting between and after the coil folds is part of the total bulk fermentation time. The total fermentation time will vary depending on your dough temperature, room temperature, starter activity, and environment.
- The dough is ready to shape when it has increased in volume by approximately 30-50%, looks noticeably puffy and aerated, has bubbles visible around the edges and throughout the dough, and jiggles gently when the bowl is moved. The dough does not need to double in size.
- Lightly flour your work surface if needed and turn out the dough. This is a soft, sticky dough, so don't be afraid to use a small amount of additional flour if necessary. If your dough feels manageable, use very little flour. A bench scraper is particularly helpful for handling and shaping this dough.
- Gently pre-shape the dough into a loose round or oval, depending on your desired final shape. Let rest uncovered for 15-20 minutes.
- Shape the dough into a tight round or batard, creating enough surface tension to help the loaf hold its shape without aggressively tightening or deflating the dough.
- Place a generous layer of rolled oats on a plate or shallow dish. Lightly mist the outside of the shaped loaf with water, then carefully transfer the dough to the oats using a bench scraper. Gently roll the loaf through the oats and lightly press the oats into the surface so they adhere. Applying the oats before the loaf goes into the banneton will give you the most secure and even coating.
- Lightly dust a banneton with flour. A heavy coating is not necessary because the oats help prevent the dough from sticking, but a light dusting provides additional insurance. Place the shaped loaf seam-side up in the prepared banneton.
- Cover and refrigerate for 12-16 hours.
- Place a sheet pan on the oven rack below where your Dutch oven or bread oven will sit. This helps protect the bottom of the loaf from excessive direct heat and browning.
- Preheat the oven to 475°F (245°C). Once the oven has reached 475°F (245°C), place the Dutch oven or bread oven inside and allow the baking vessel to preheat for an additional 25-30 minutes.
- Remove the cold dough from the refrigerator and carefully turn it out onto parchment paper. If the dough feels particularly soft after the cold proof, you can place it in the freezer for approximately 15-20 minutes before turning it out and scoring. This is simply to firm the dough and make handling and scoring easier.
- If you notice an area where the oat coating is particularly sparse after turning the dough out of the banneton, lightly mist that small area with water and gently press a few additional oats onto the surface. This is optional and purely aesthetic; don't try to completely re-coat the loaf at this stage.
- Score the loaf with a sharp bread lame or razor using one confident, long cut.
- Carefully transfer the loaf to the preheated Dutch oven or bread oven and cover.
- Bake covered at 475°F (245°C) for approximately 25-30 minutes, checking the internal temperature toward the end of this time. The center of the loaf should be approaching approximately 195–200°F before removing the lid.
- Reduce the oven temperature to 425°F (220°C) and remove the lid. Continue baking uncovered for approximately 5-10 minutes, watching the crust and oat topping closely. In testing, approximately 7 minutes uncovered produced the best balance of a deeply golden crust and pleasantly toasted oats.
- The loaf is finished when the crust is deeply golden and the center reaches approximately 205-210°F (96-99°C).
- Transfer the bread to a wire rack and allow it to cool completely before slicing.
Notes
- For the most accurate and consistent results, weighing ingredients in grams is strongly recommended, as volume measurements can vary. I highly recommend using a kitchen scale! The cup measurements are close approximations and may not be exact.
- Bread flour or a higher-protein all-purpose flour with approximately 11.5-12.5% protein works well. The dough is soft and sticky, so a stronger flour helps it develop enough strength to hold its shape. I used Costco Organic All-Purpose Flour, which has 11.5% protein. While it is labeled as all-purpose flour, its protein content is relatively high for all-purpose flour and is suitable for this bread. I live in Germany but developed and tested this recipe using US flour, so I haven’t tested it with German flour. If you’re baking outside the US, look for a flour with a similar protein content rather than relying on the name of the flour, since flour classifications and strength can vary considerably between countries.
- The recipe calls for 300 grams total water, but 20 grams is held back during mixing and added gradually as needed. Depending on the flour you use, you may not need all of the reserved water.
- The nutrition information provided is calculated as a courtesy and is only an estimate. I am not a licensed nutritionist or dietitian. For the most accurate nutritional data, consult a professional or use your preferred calculator.









Leave A Reply!