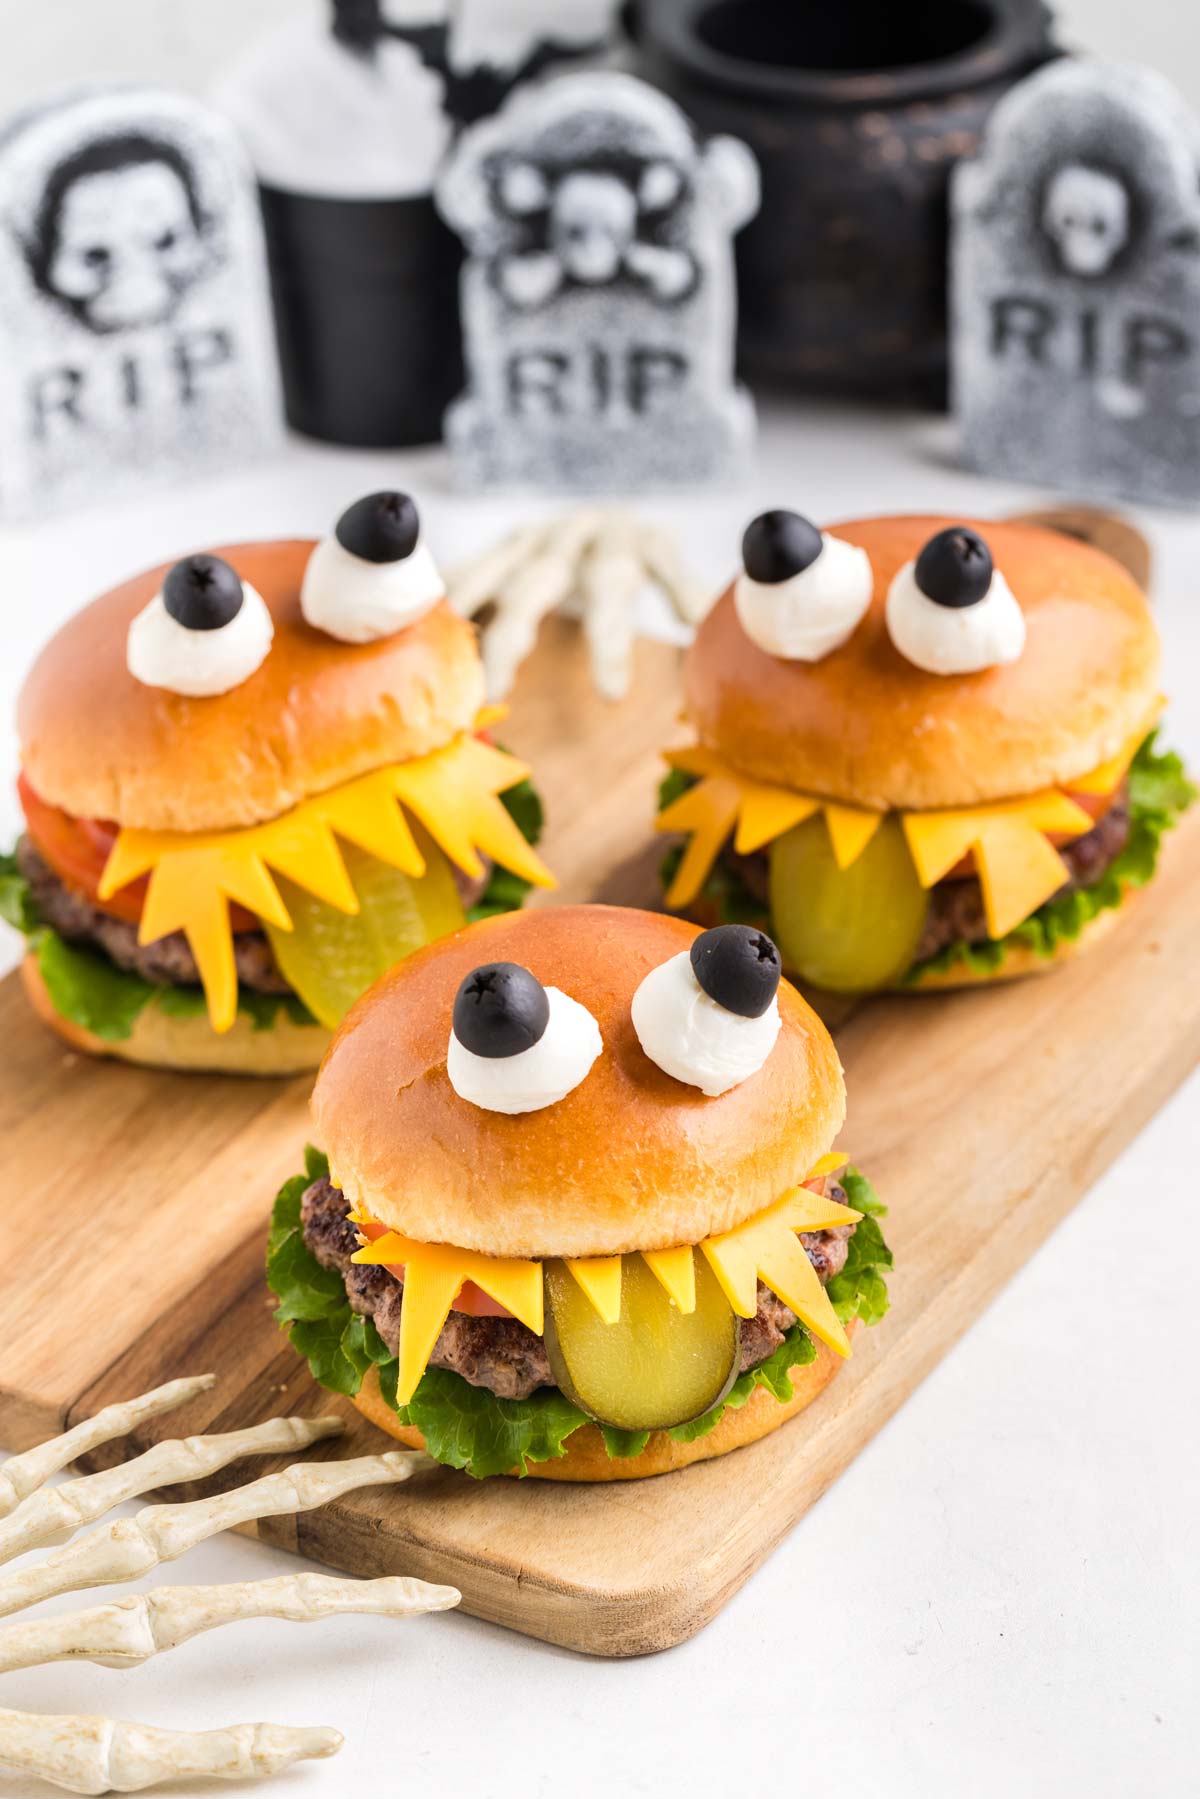
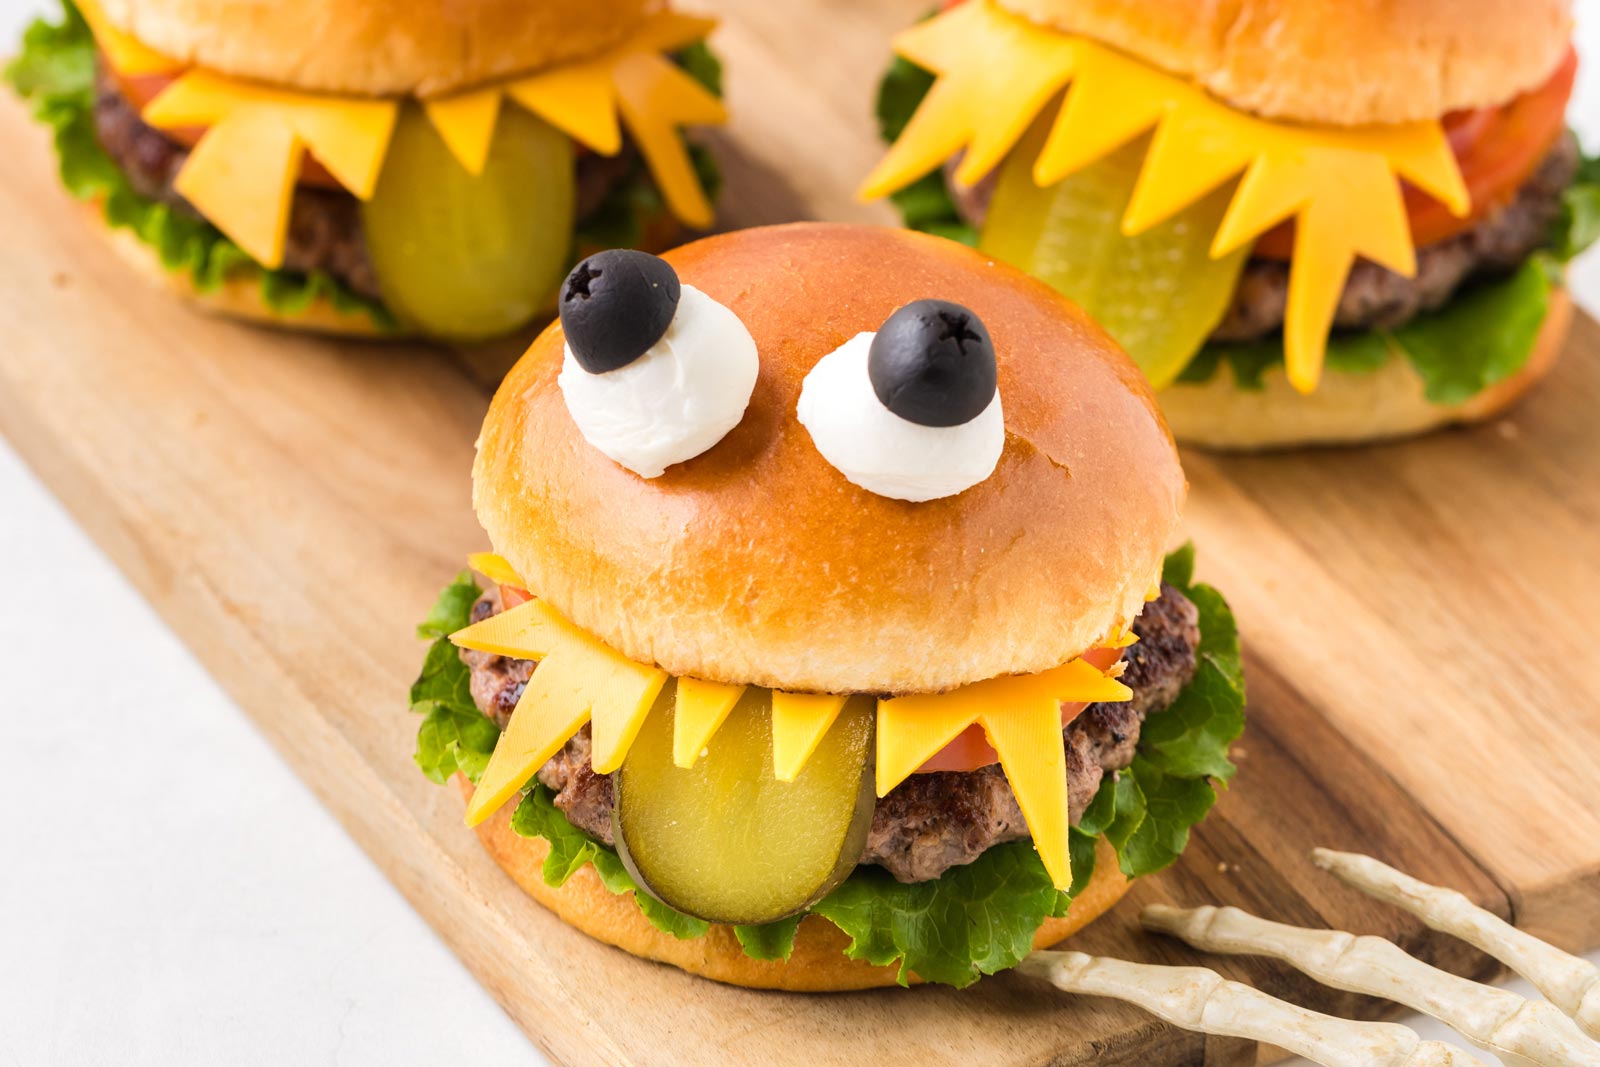
These monster burgers are an easy Halloween dinner that turns regular burgers into cute little monsters with cheddar teeth, pickle tongues and mozzarella-and-olive eyes. They look like a lot of fun, but they’re surprisingly simple to put together and ready in about 35 minutes.
They’re a fun way to make Halloween dinner feel special without food coloring or a bunch of unusual ingredients. Kids can help assemble their own monster faces once everything is prepared, and you can easily make the burgers gluten-free by using gluten-free hamburger buns.
And they’re not just for Halloween. These would also be really cute for a kid’s birthday party or monster-themed party any time of year.
What’s To Love
- Fun Halloween dinner for kids and adults.
- Ready in about 35 minutes.
- Uses simple burger ingredients.
- Easy to customize with your favorite toppings.
- Can easily be made gluten-free.
- Kids can help assemble the monster faces.
- Cook the patties in a skillet, on the grill, in the air fryer or on a smoker.
Ingredient Notes
Please scroll down for the full recipe. These are just notes on select ingredients.
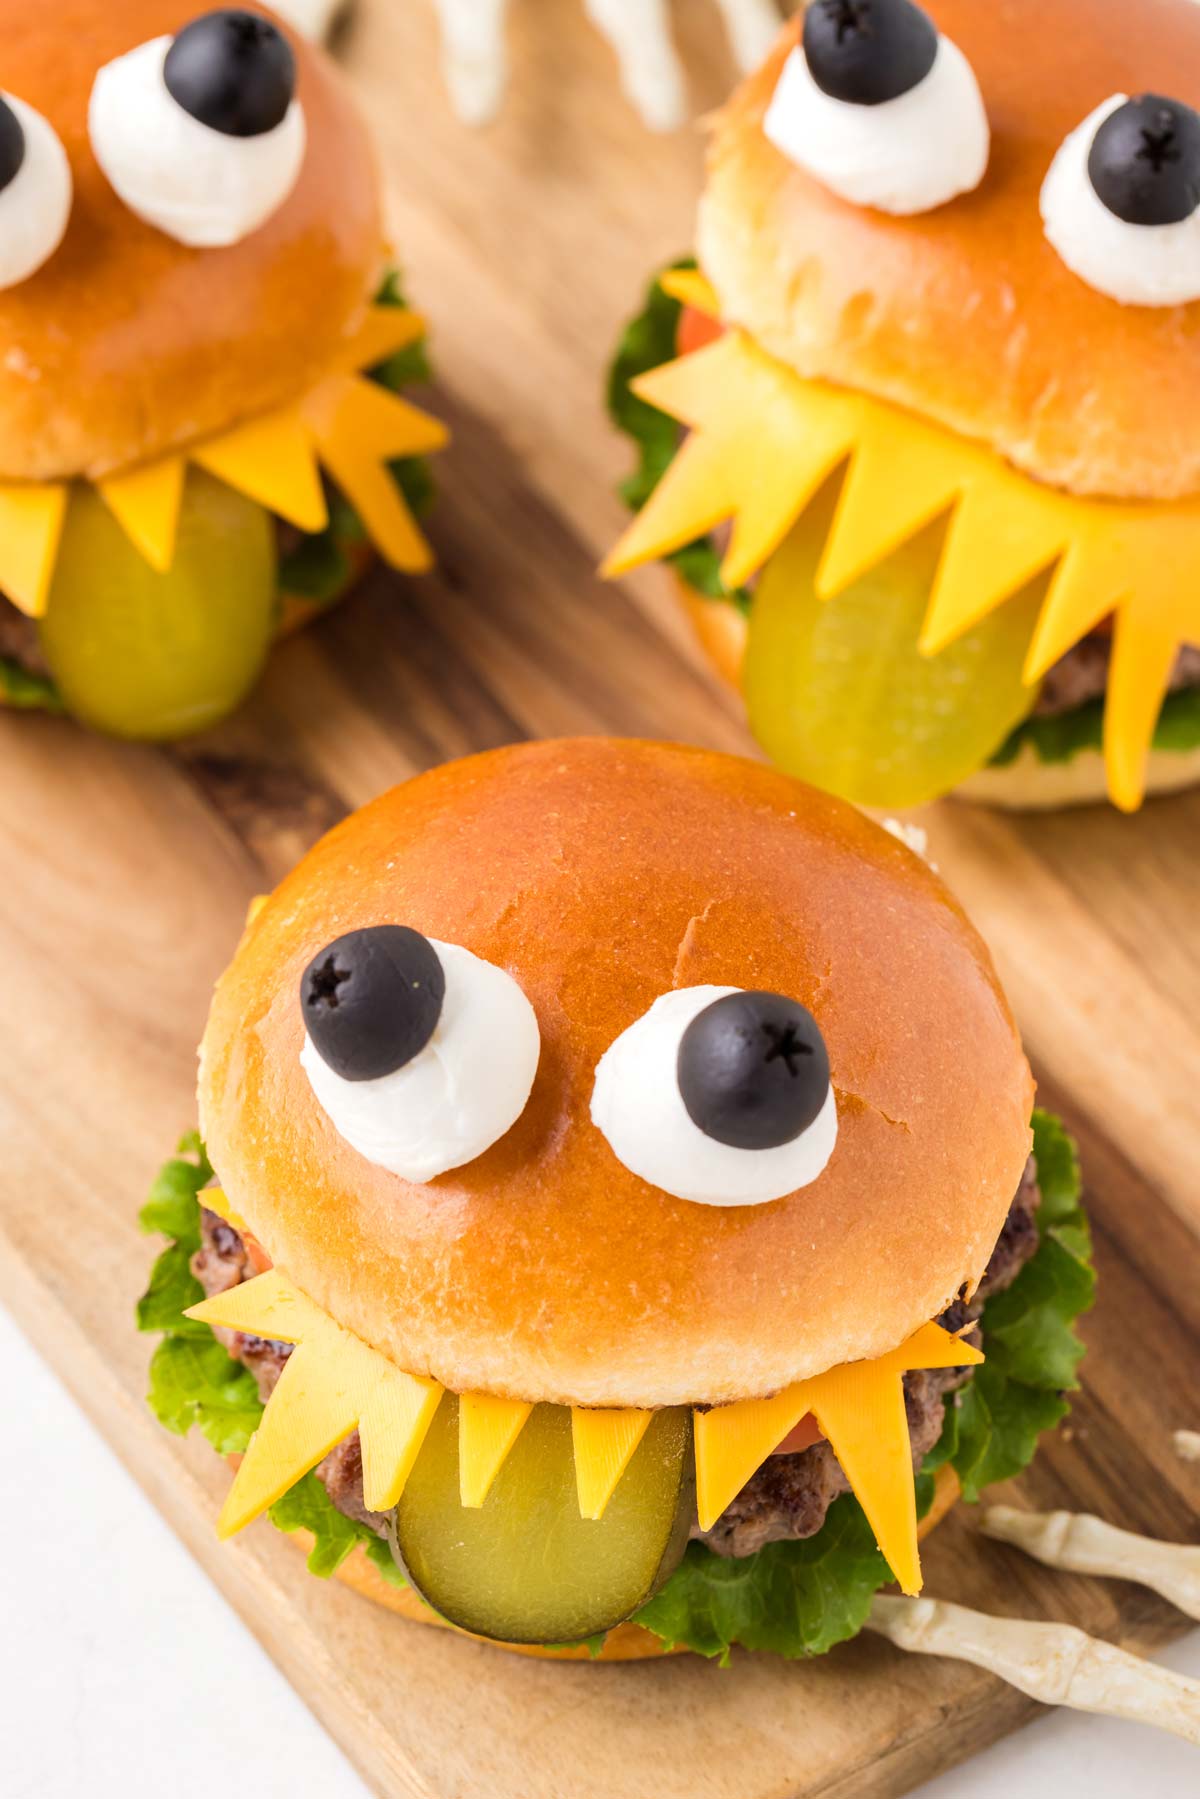
- Ground beef – I use 80/20 ground beef for juicy burgers. The recipe makes four 5-ounce (140-gram) patties, but you can adjust the size to suit your kids and hamburger buns. If you’d rather use turkey, these Air Fryer Turkey Burgers work well in place of the beef patties. For a meatless version, use your favorite veggie burger patties
- Salt – regular salt works, but I especially like smoked hickory sea salt on these burgers.
- Cheddar cheese – orange cheddar gives the monsters nice bright teeth. Choose sliced cheese that’s flexible enough to bend slightly rather than a very firm cheese that cracks when bent.
- Pickles – long pickle slices work especially well because they can hang out of the burgers like monster tongues.
- Mozzarella and black olives – bocconcini or other mini mozzarella balls and medium black olives make the monster eyes. The mozzarella balls used here are a little over 1 ounce (28 grams) each.
- Hamburger buns – any hamburger buns work. La Boulangère brioche burger buns from Safeway were used in the photos. Look for buns that aren’t squashed so your finished monster faces hold their shape nicely. Use gluten-free hamburger buns if needed.
For an easy fresh side, serve the burgers with this Skeleton Veggie Tray..
How to Make Monster Burgers
The monster faces look elaborate, but they’re easy to put together.
- Form four 5-ounce (140-gram) beef patties, making each one about 1 inch wider than its hamburger bun.
- Press a shallow indentation into the center of each patty with your thumb to help prevent the burgers from puffing up in the middle as they cook.
- Season both sides with salt and pepper and cook the burgers using your preferred method.
- While the patties cook, prepare the mozzarella-and-olive eyes, tomato slices, pickle tongues and cheddar teeth.
- Let the burgers cool for a few minutes before assembling them so the hot patties don’t melt the cheddar teeth.
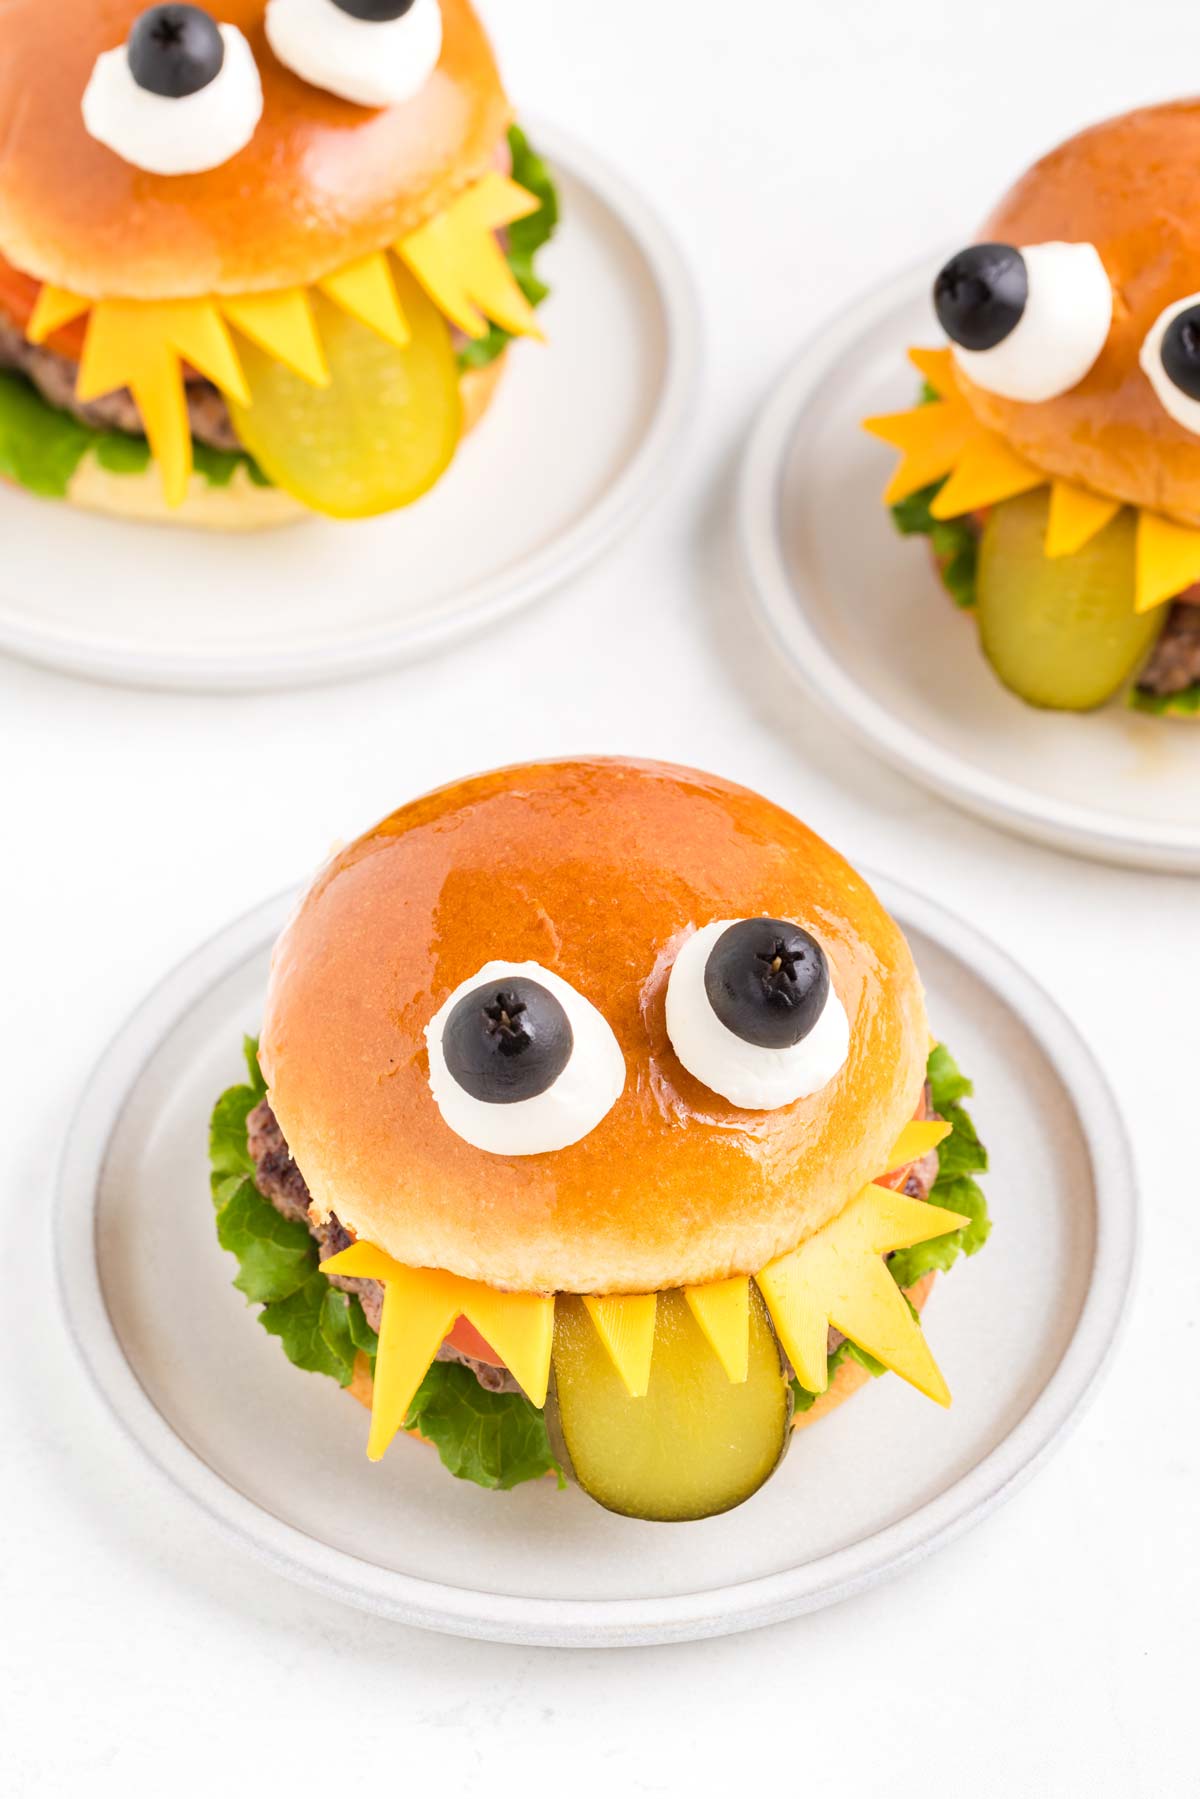
- Add lettuce to the bottom bun, followed by the burger patty, two tomato slices, a pickle tongue and the cheddar teeth.
- Add the top bun and two monster eyes.
- Remove the toothpicks before eating, especially when serving children.
Tips for Success
- Make the patties wider than the buns. The patties will shrink somewhat as they cook, so make them about 1 inch wider than your hamburger buns.
- Make an indentation in the center. Pressing your thumb into the middle helps prevent the burgers from puffing up like meatballs while cooking.
- Don’t press down on the patties. You’ll press out the fat and juices and can end up with dry burgers.
- Flip the patties only once. This helps you get a good sear on both sides.
- Let the burgers rest. This gives the juices time to redistribute through the meat.
- Cook according to temperature rather than time. Cooking times are estimates because the thickness of the patties and your equipment affect how quickly they cook.
- Don’t add the cheddar while the burgers are piping hot. You want distinct monster teeth rather than melted cheese.
- Pat wet ingredients dry. Pat the mozzarella balls and tomato slices dry with paper towels so they don’t make the burgers unnecessarily wet.
- Toast the buns if you’d like. You can toast or grill them or use them straight from the package.
- Remove the toothpicks before eating. This is particularly important when serving these burgers to children.
- Scale the recipe as needed. This recipe makes 4 burgers, but you can easily double or triple it.
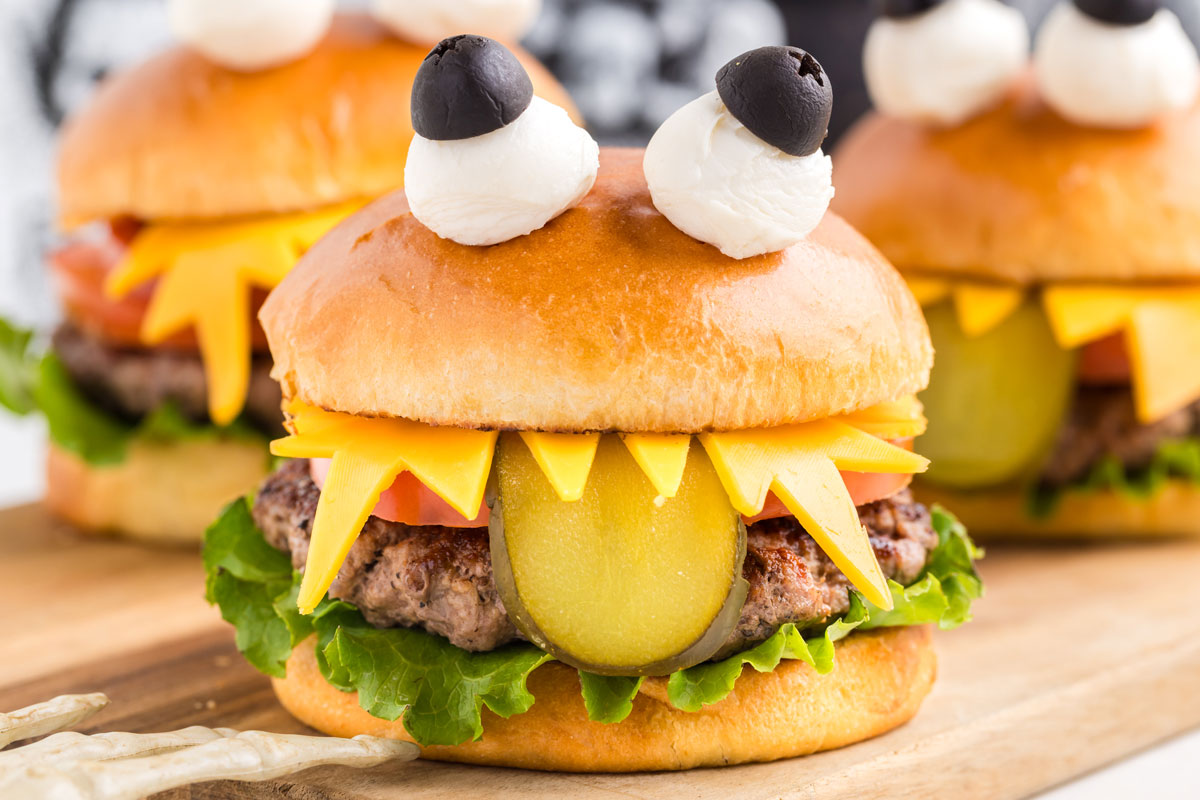
How Long Does It Take to Cook the Patties?
It’s best to cook burgers according to internal temperature rather than time. Any cooking times given here are general estimates.
The USDA recommends cooking ground beef to a minimum internal temperature of 160 °F (71 °C), measured with a food thermometer.
If you intentionally prefer a medium burger, an internal temperature of about 145 °F (63 °C) will generally leave a little pink in the center. Keep in mind that this is below the USDA-recommended safe minimum temperature for ground beef and therefore carries a greater food-safety risk.
Also, don’t judge a burger’s doneness by color alone. Ground beef can still be pink after reaching 160 °F (71 °C), or it can turn brown before it reaches a safe temperature. A food thermometer is the most reliable way to check.
How to Cook the Burger Patties
You can cook the patties however you’d like. These times are estimates, so use a food thermometer to check the internal temperature.
- Pan-fry – heat a skillet over medium-high heat. Add a little oil to prevent sticking. Cook for about 5 to 6 minutes on the first side, flip once and continue cooking until the burgers reach your desired doneness.
- Grill – heat the grill to 400 °F (204 °C). Place the patties over direct heat and sear for 5 to 6 minutes. Flip once and grill for another 4 to 5 minutes, or until they reach your desired internal temperature. Don’t overcrowd the grill or the patties may not cook evenly.
- Air fryer – set the air fryer to 375 °F (190 °C) and place the patties in a single layer with space around each one. Flip after 6 minutes and cook for a few more minutes, or until they reach your desired internal temperature.
- Smoker – smoking takes longer, but the flavor is incredible. Follow my Smoked Burgers recipe for the patties, then add the monster toppings after cooking.
If you’re following USDA food-safety guidance, make sure ground beef reaches 160 °F (71 °C) before removing it from the heat rather than relying on carryover cooking to bring it to that temperature.
How to Assemble the Monster Faces
For the eyes, cut each black olive in half and place an olive half on top of a mini mozzarella ball with the little “star” side facing up. Secure the olive and mozzarella together with a toothpick.
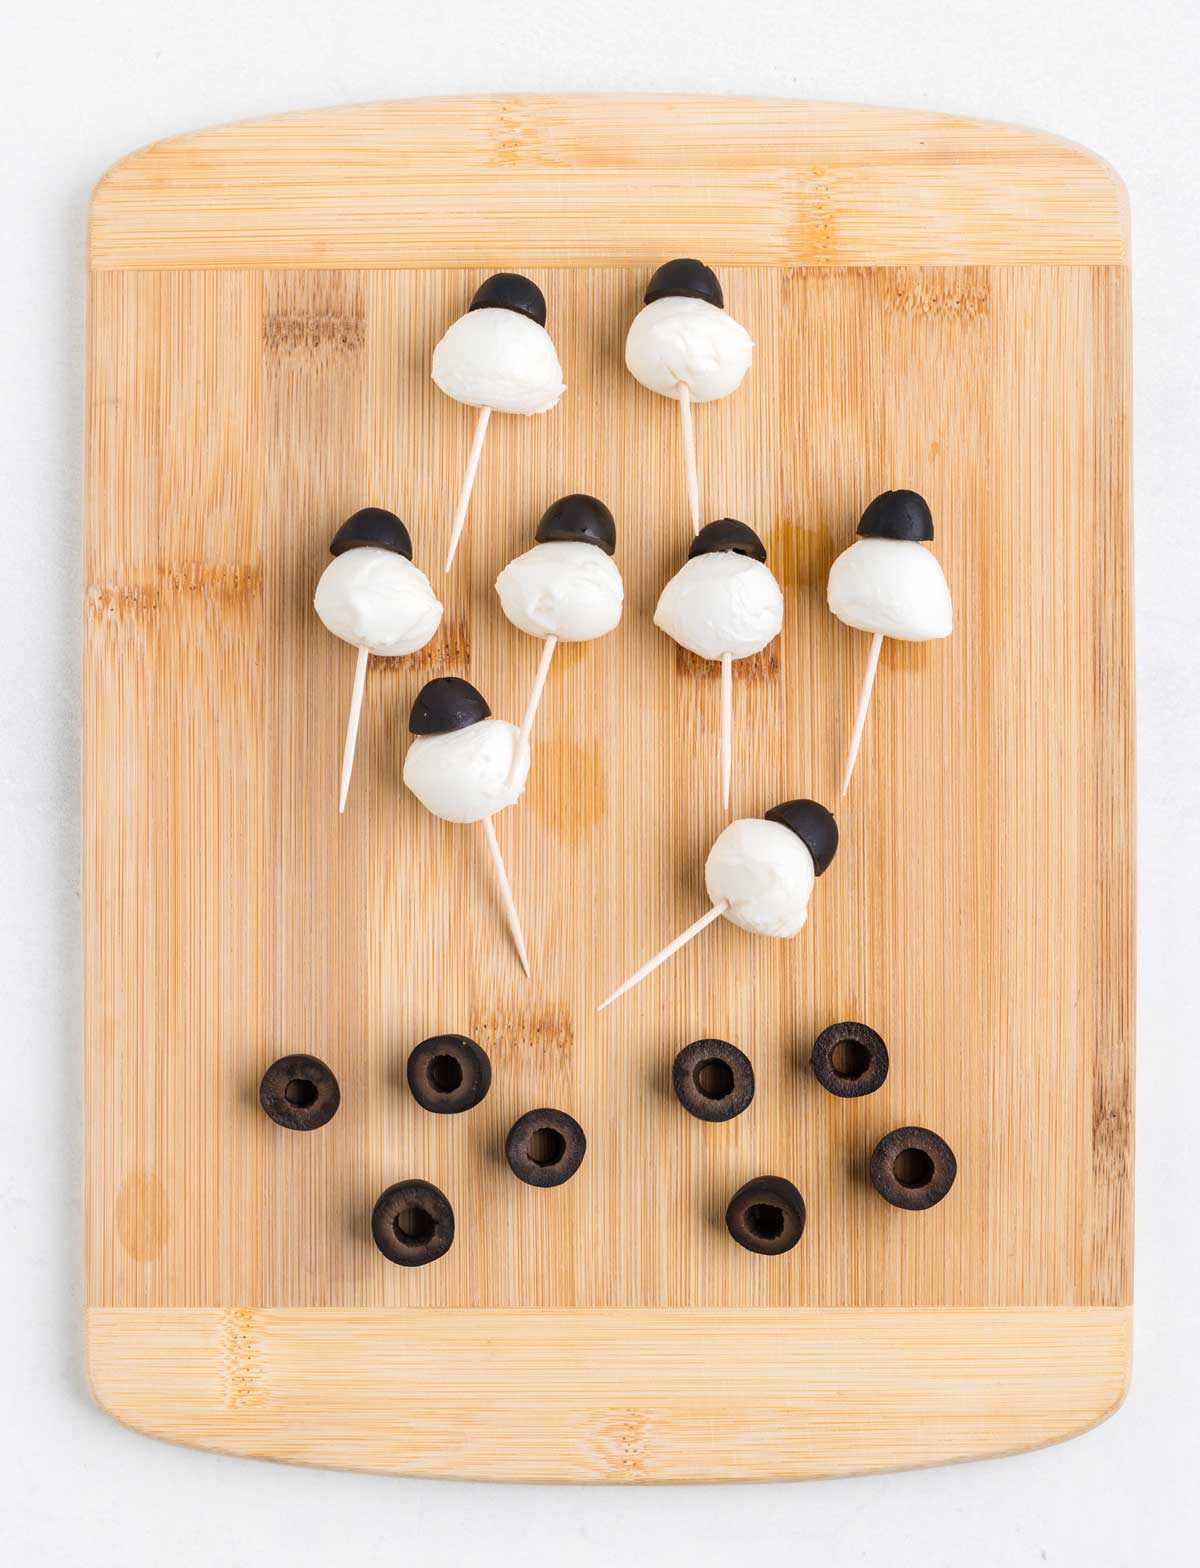
Cut 8 tomato slices from about 2 tomatoes. They should be thick enough to hold their shape without being thin and floppy, but not so thick that they’re awkward to eat. Place them on a paper towel and pat them dry.
For the teeth, cut small triangles from one edge of each cheddar slice. Don’t cut away too much cheese because you want the pointed teeth to hang out from under the top bun.
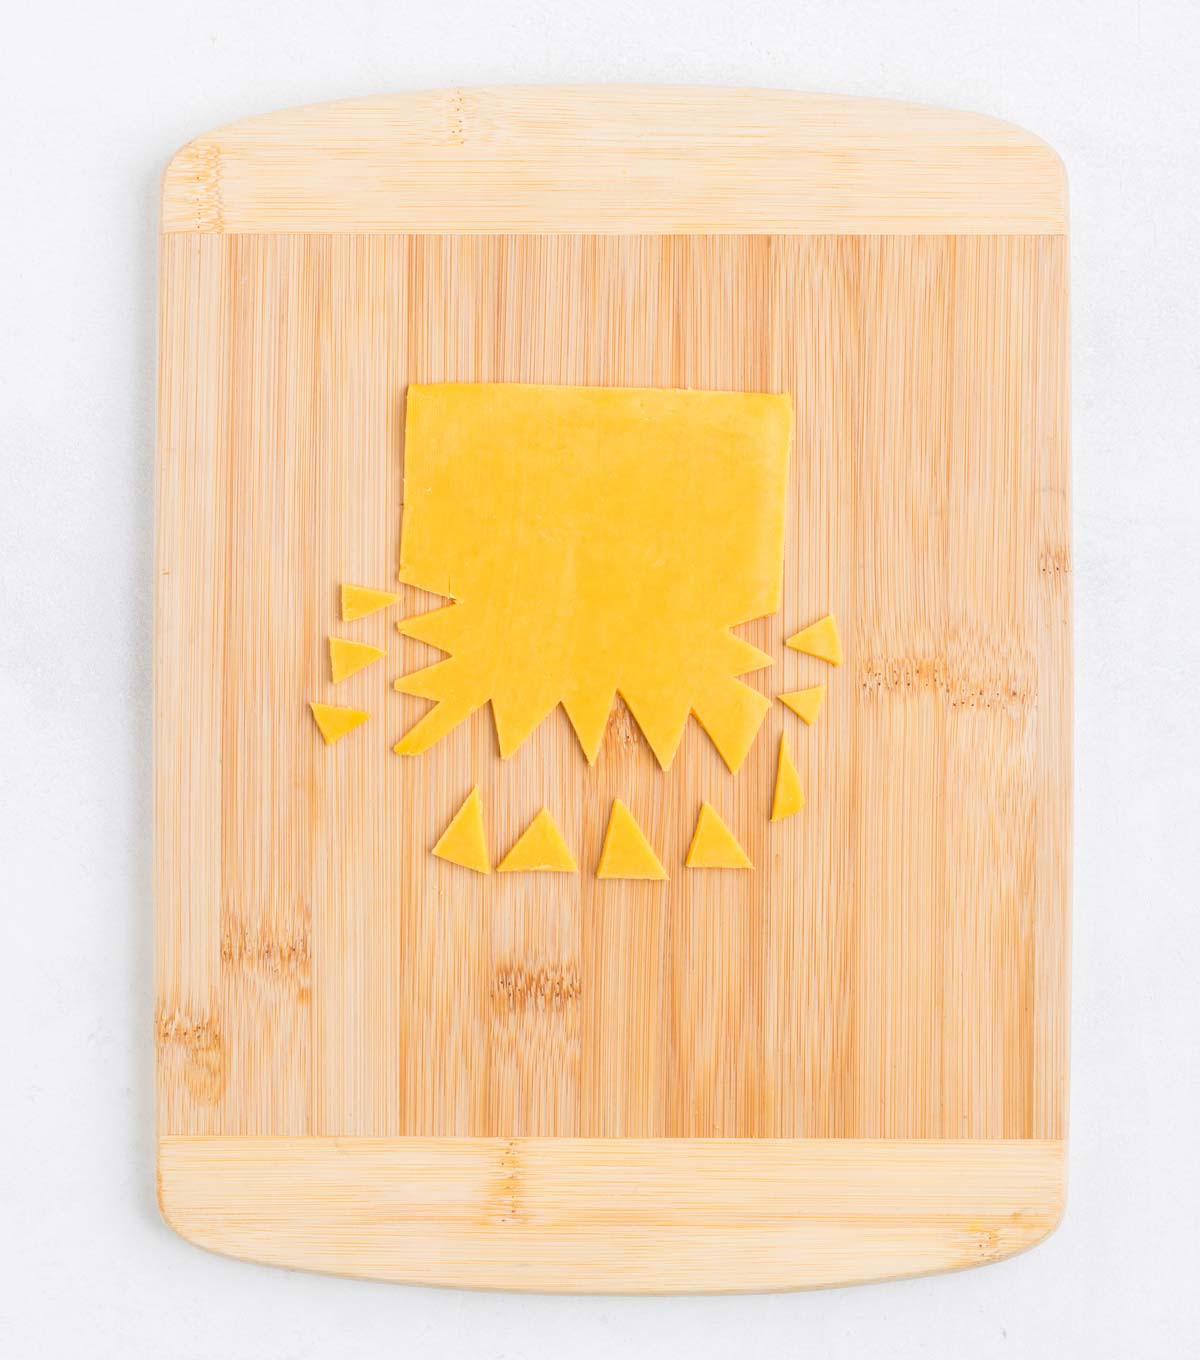
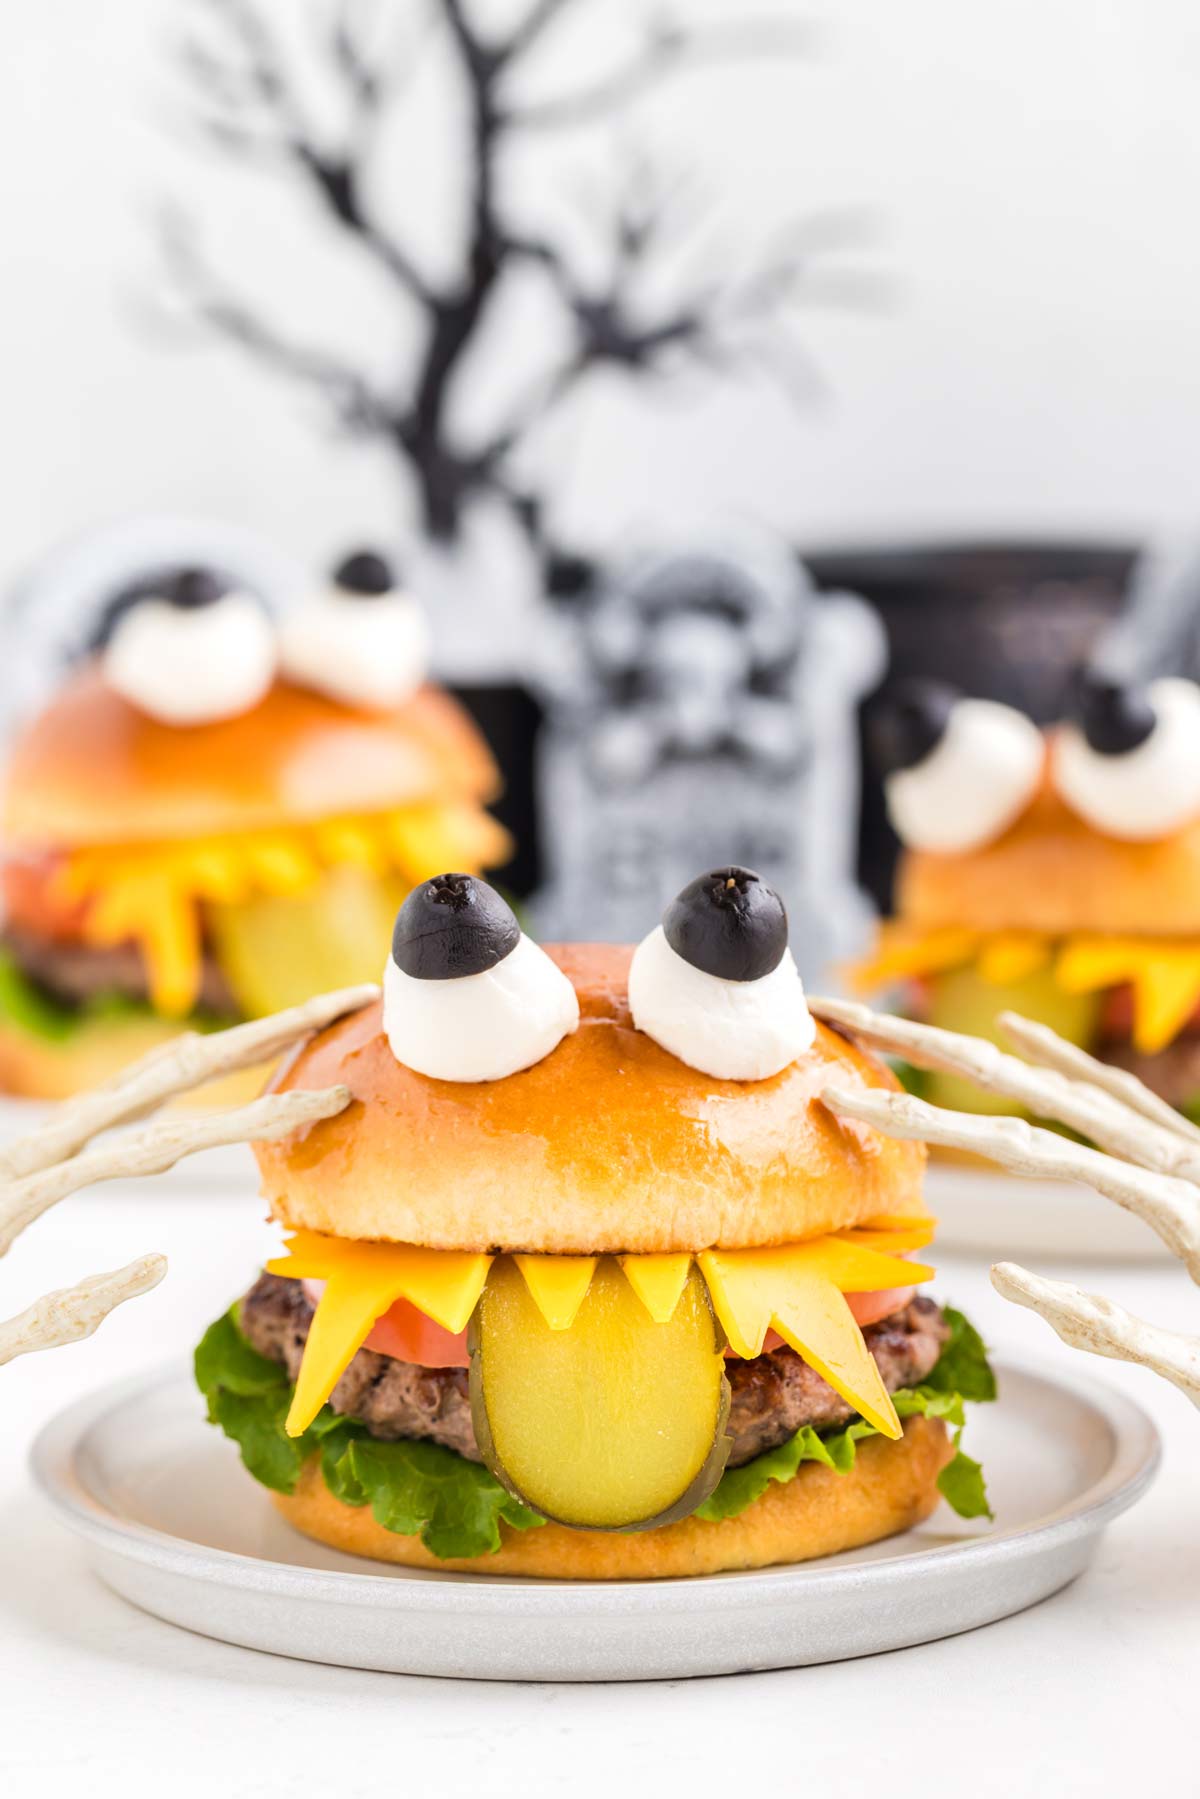
To assemble each monster, start with the bottom bun and add a piece of lettuce. Place the cooked burger patty on top, followed by two tomato slices next to each other and a pickle slice in the middle for the tongue. Add the cheddar with the teeth pointing outward, then finish with the top bun and the two mozzarella-and-olive eyes.
You can even add Homemade Ketchup if you’d like some gory monsters.
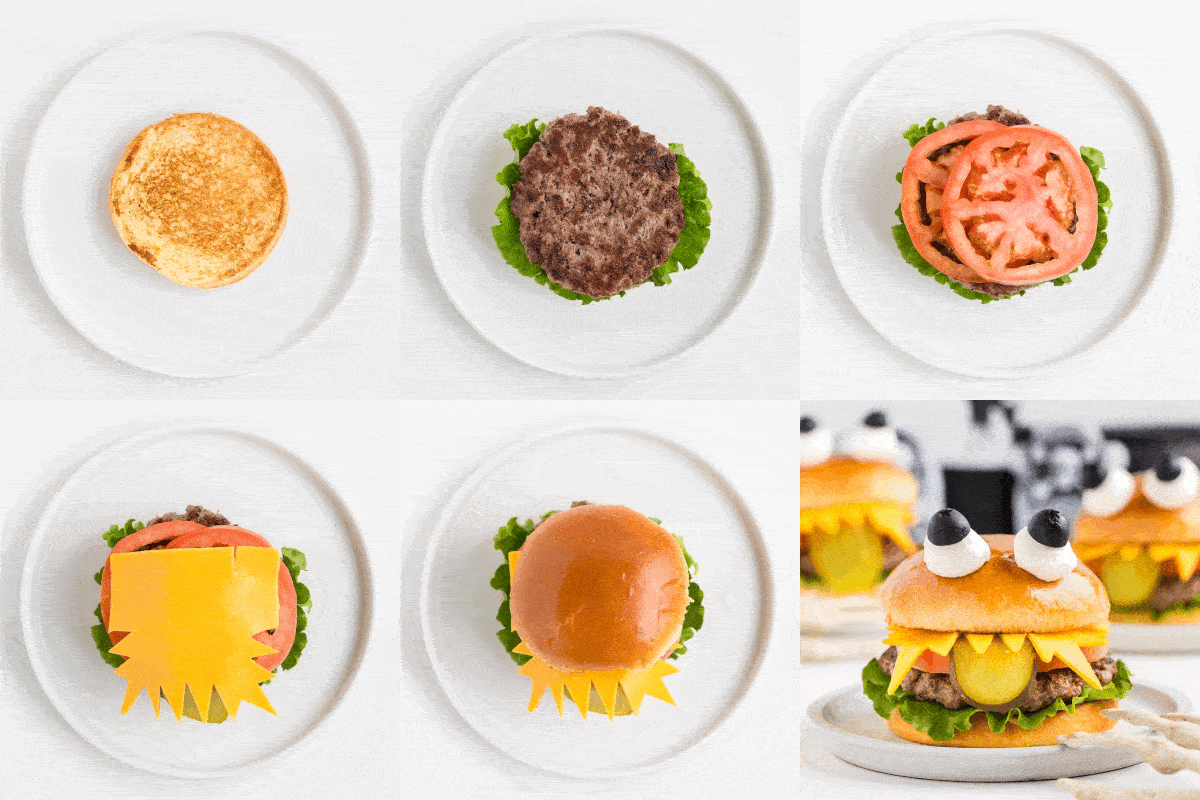
And here are the individual photos in case that GIF moves a little too quickly. 😆
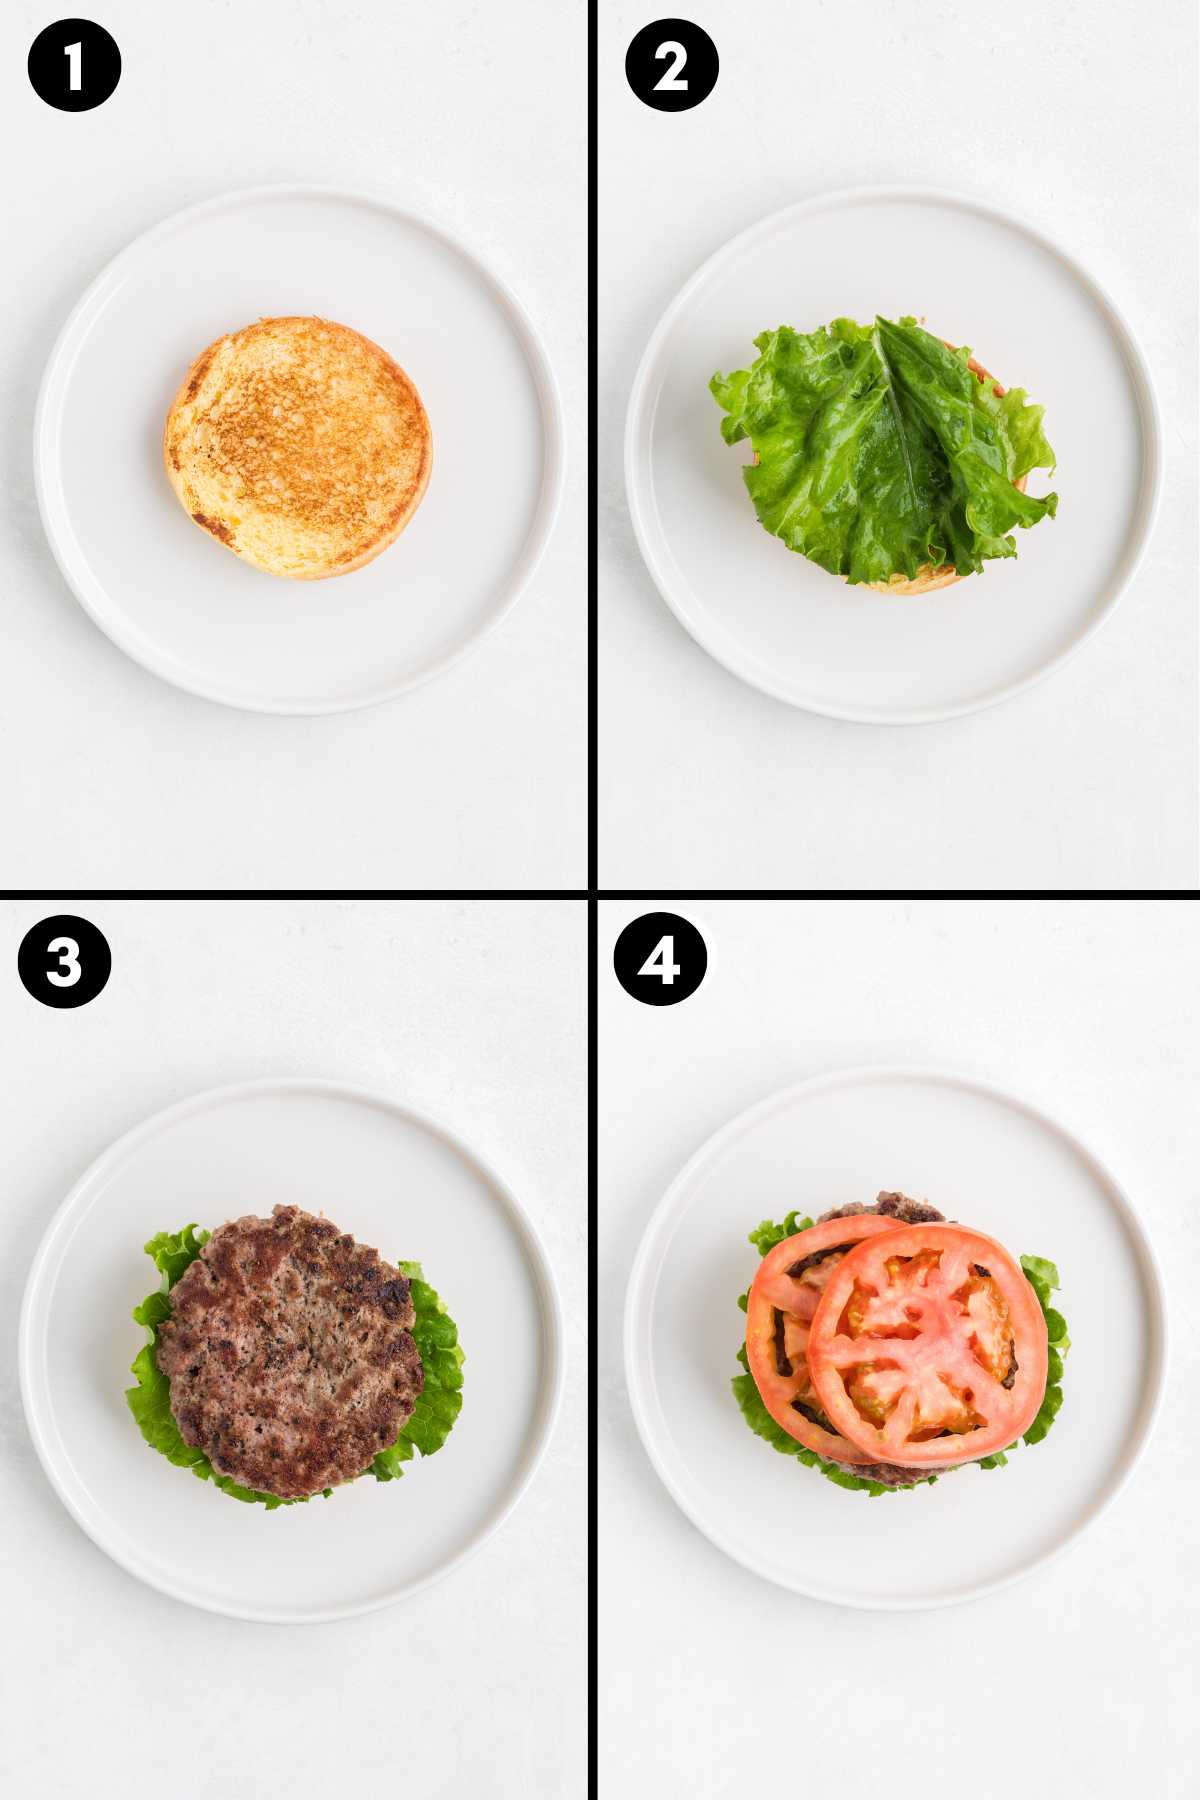
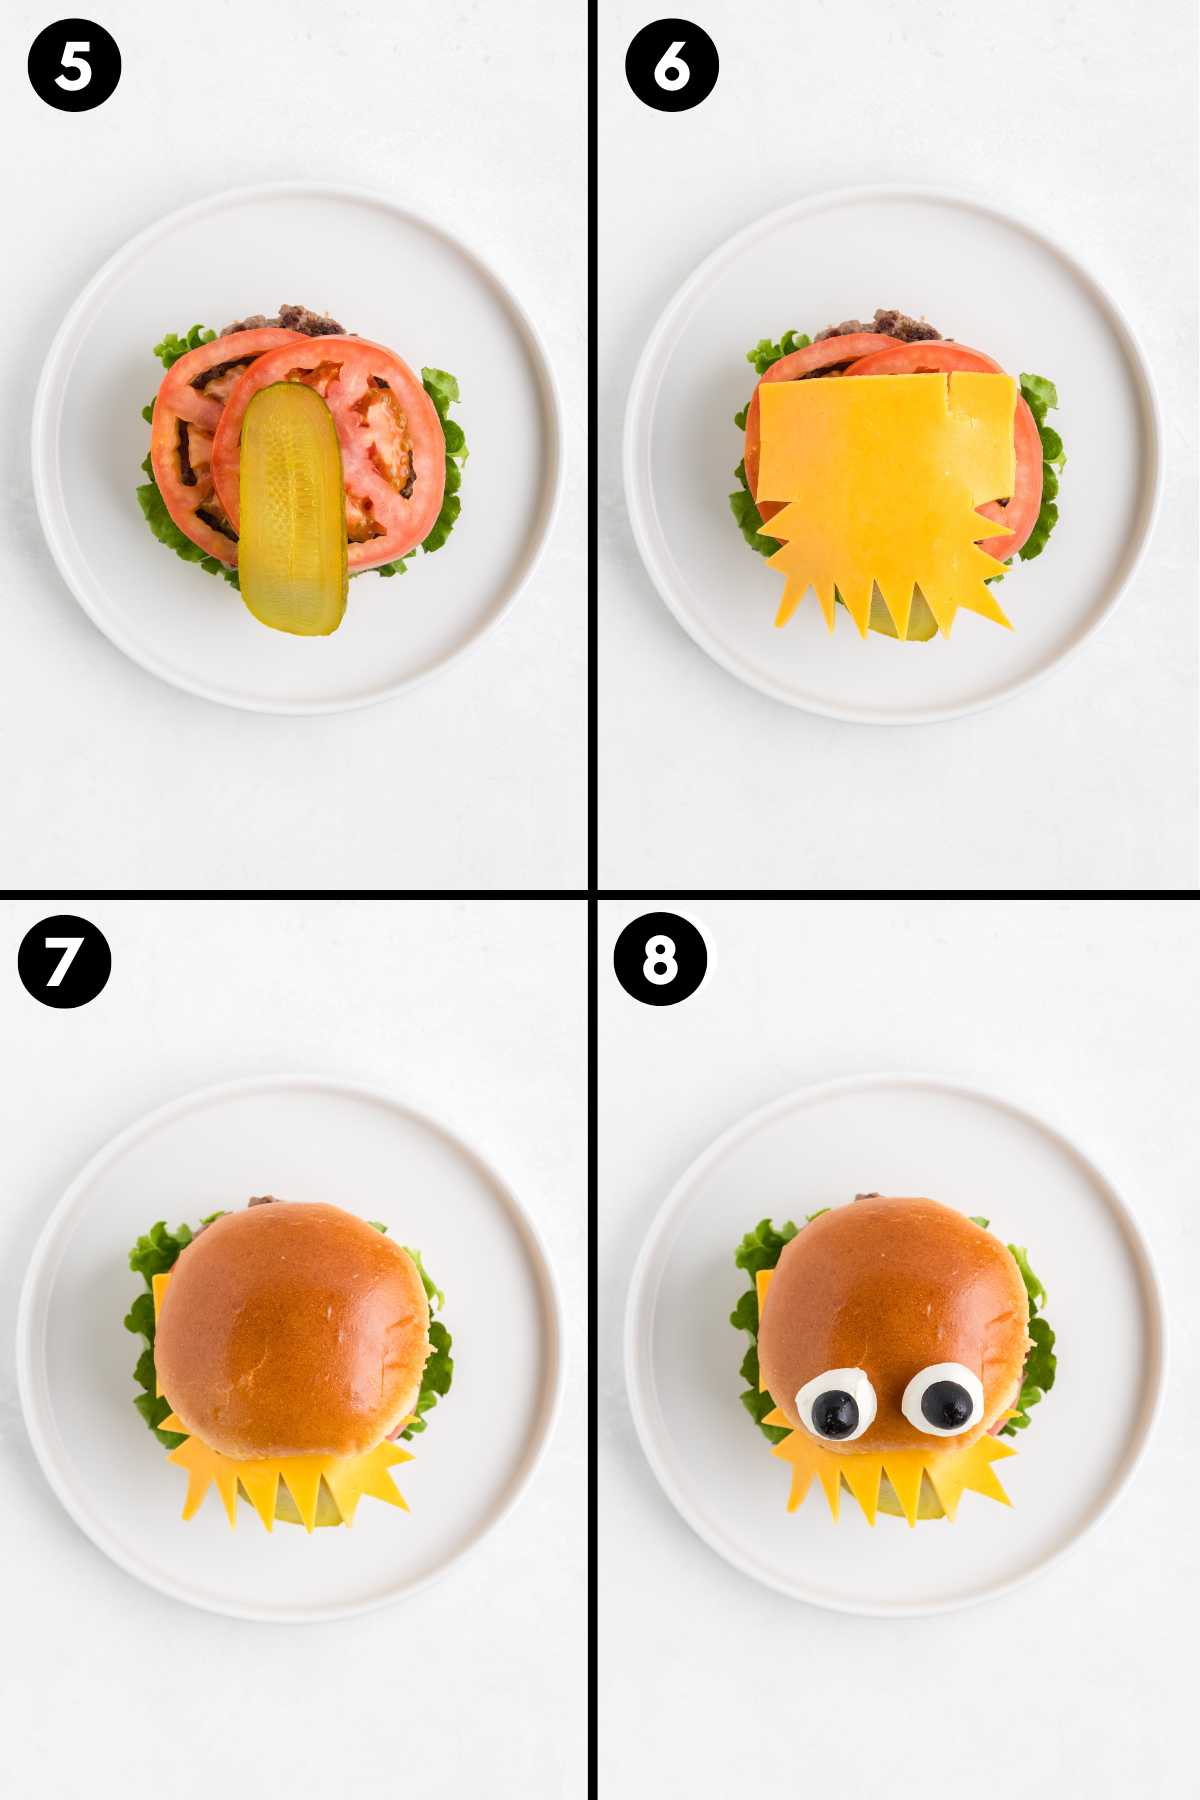
You can, of course, assemble the burgers in any order you like. Add onions, burger sauce or whatever other toppings your family enjoys. Just keep the pickle tongue and cheddar teeth visible so your monster still has a face. 🙂
Storage
Store leftover cooked burger patties in an airtight container in the refrigerator for up to 3 to 4 days. Keep the buns and fresh toppings separate for the best texture. Reheat cooked patties until they reach 165 °F (74 °C).
What to Serve with Monster Burgers
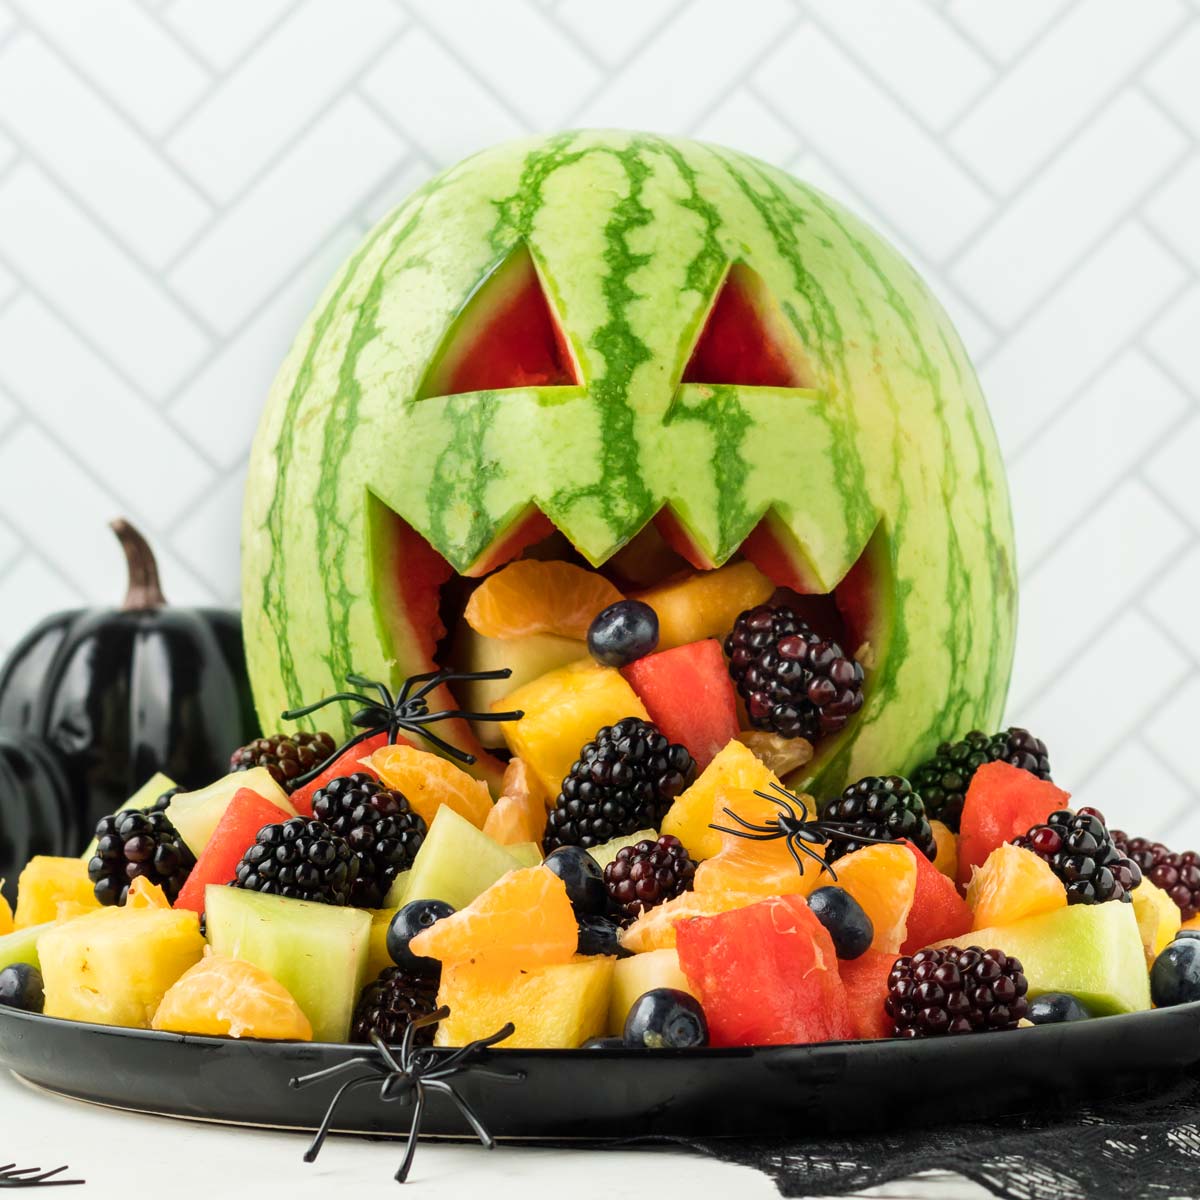
This Halloween Fruit Salad would be my top pick. It’s fun, healthy and perfect for little ones.
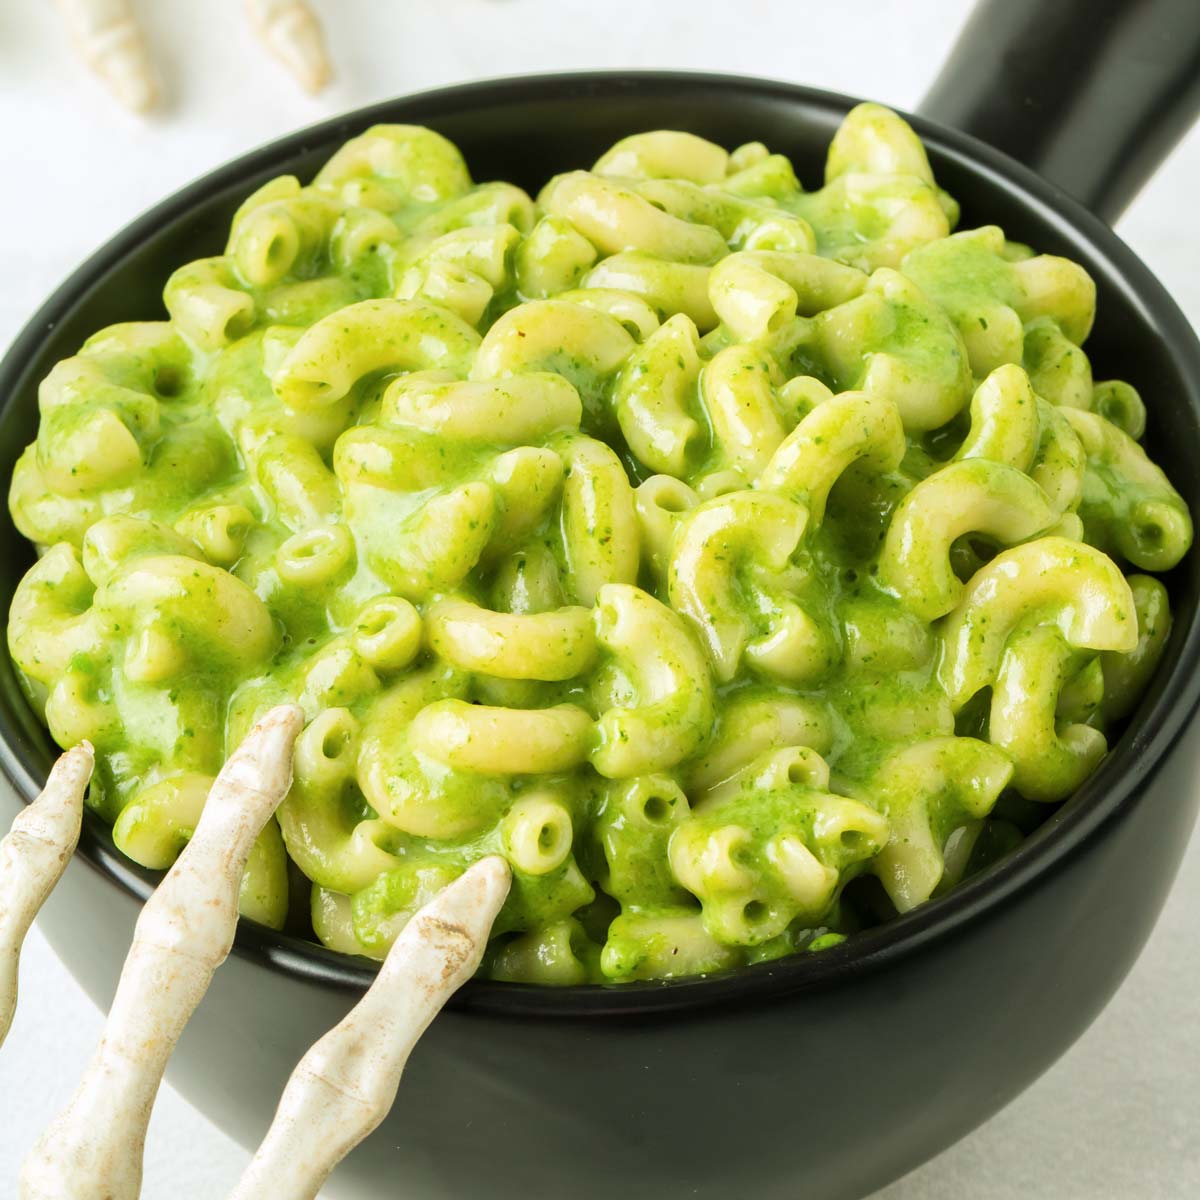
This Halloween Mac and Cheese is another really fun choice. Mac and cheese isn’t an everyday burger side, but it’s Halloween. 😉
More Halloween Recipes
- Frankenstein Cupcakes
- Eyeball Cupcakes for Halloween
- Ghost Meringues
- Non-Alcoholic Halloween Punch
- Halloween Punch with Eyeballs
I hope you’ll enjoy these monster burgers for Halloween! If you make them, I’d love to hear how they turned out. 🙂
🎃🍔👻 Have you tried these monster burgers? 👻🍔🎃
Please share your feedback by leaving a ✍️ review and 🌟 rating – it helps me and others! I so appreciate it. 💖
Monster Burgers Recipe
Ingredients
- 20 oz (566 grams) ground beef 80/20 is best - this will allow for 5 oz per burger
- salt to taste
- pepper to taste
- 1-2 teaspoons oil
- 8 medium black olives
- 8 mini mozzarella balls bocconcini, about 1 ounce (28 grams) each, patted dry with paper towels
- 8 tomato slices from about 2 tomatoes
- 4 slices orange cheddar
- 4 pieces of green lettuce rinsed and patted dry with paper towels
- 4 pickle slices
- 4 hamburger buns use gluten-free buns if you're GF
Instructions
- Form four 5-oz hamburger patties. They should be 1” wider than your buns.
- Press your thumb into the middle of each patty. This is done to prevent them from plumping up like meatballs during cooking.
- Salt and pepper the outsides.
- Preheat a skillet over medium heat. Add a small bit of oil and put in the patties.
- Cook until done, only flipping once. How long that takes depends on how thick your patties are and how well done you want. The USDA recommends that ground beef be cooked to an internal temperature of 160 °F (71 °C).
- While they’re frying, prepare the monster face.
- Cut the olives in half and stick the half with the “star” face up on top of a mini mozzarella ball. Secure them together using a toothpick.
- Cut 8 slices from the tomatoes. They shouldn’t be puny and floppy, but not super thick, either. Place them on a paper towel and pat dry before placing on the burger.
- Cut out triangles from the cheese slice to create the teeth. Don't cut away too much - you want the teeth to hang out from the bun.
Assemble the burgers
- Once the burgers have cooled quite a bit (you don’t want to melt the cheese), place a piece of lettuce on the bottom bun half. Then add the burger patty, 2 tomato slices next to each other, pickle in the middle to create the tongue, cut up cheese slice, top bun piece.
- Stick 2 assembled mozzarella/olive eyes on each bun with the help of the toothpick.
- Remove the toothpicks before eating, especially when serving children. Serve!
Notes
- If you don't want to use cheddar, you can use any orange cheese you’d like. It shouldn’t be the super firm kind that breaks apart when bent slightly - it should be able to flop over a bit, and it should be large enough to cover the size of your burger bun.
- La Boulangère Brioche burger buns from Safeway were used in the photos. They were the prettiest buns my photographer could find. When shopping, look for buns that aren't smushed for the prettiest burger monsters.
- The nutrition information provided is calculated as a courtesy and is only an estimate. I am not a licensed nutritionist or dietitian. For the most accurate nutritional data, consult a professional or use your preferred calculator.









Comments & Reviews
Tully says
These were so fun to make! I made them for a small birthday party. All these kids loved them! Thank you.
Erin @ Easy Wholesome says
You’re welcome! I’m so glad that people enjoyed them. 🙂 Thanks for your comment!
Patricia says
I made these for a toddler party and they just loved them. The adults did, too! haha. Can’t wait to make these again!
Erin @ Easy Wholesome says
That’s great to hear! I hope they’ll be enjoyed as much next time. Thanks for your comment!
Francesca says
Massimo
Erin @ Easy Wholesome says
Thanks! 😀
Jenna says
I made these last year for Halloween and will be making them again before trick or treating. It’s the only thing I could get my kid to eat. Such a fun idea!!
Erin @ Easy Wholesome says
Aww, yay! I love to hear that. I mean, that your kid actually ate. 😉 Thanks for your feedback!